Advanced Displacement Maps
I've recently seen a lot of questions about setting up and using displacement maps in After Effects. To help better understand how to use the effect I thought I'd bring back a sample project from 2002 using AE 5.

Here's a displacement project that uses the color channels of a pre-comp created with the technique I just discribed. The first thing to do when you start experimenting with the project is to turn the red pair of lights on and off. In these examples I’ve set vertical displacement to green and 40 pixels. Horizontal displacement is turned off. As you can see, there is no difference in vertical displacement when I turn on the red lights. Setting the Horizontal displacement to Red and animating the colored pairs of lights gives us this keen little movie.
I hope you’ll find the project enlightening. If I get time I may try and create a more in depth video tutorial on displacement.
Basic displacement

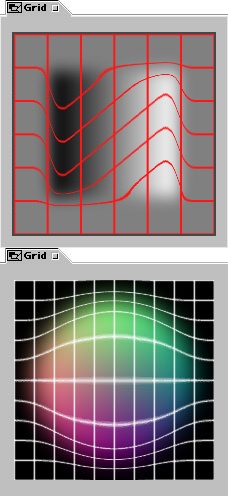
Displacement uses the color channels of a layer to move pixels. The amount of movement is directly proportional to the pixel value. If you're working in 8 bit and in Y only then a pixel value of 0 moves the pixel you're displacing the maximum distance down while 255 moves the pixels up. Gray doesn't move pixels. The example to the right has Y displacement set to 40 pixels.
Complex disteortion
Let's say you wanted to create a spherical distortion. You could create a fancy gradient in Photoshop, but you’d need to spend a long time experimenting with the proper color values or doing some fairly complex math. There are 2 easy ways to create this gradient. The first, and most accurate, would be to use a 3D app and light a sphere using red and negative red lights on the left and right with green and negative green on the top and bottom. The second option, and the one used in the sample project, is to light a solid in AE with red and green lights in the same way you'd light the sphere in a 3D app.
Here's a displacement project that uses the color channels of a pre-comp created with the technique I just discribed. The first thing to do when you start experimenting with the project is to turn the red pair of lights on and off. In these examples I’ve set vertical displacement to green and 40 pixels. Horizontal displacement is turned off. As you can see, there is no difference in vertical displacement when I turn on the red lights. Setting the Horizontal displacement to Red and animating the colored pairs of lights gives us this keen little movie.
I hope you’ll find the project enlightening. If I get time I may try and create a more in depth video tutorial on displacement.

0 Comments:
Post a Comment
<< Home