Introduction
Let's explore the power of Generative Shape Fill.
I'm VooDoo Val, freelance Illustrator and Creative Instructor on Adobe Live, and today I'll show you how to take a tattoo idea to full concept with the power of Generative Shape Fill.
Understanding generative shape fill
But what is Generative Shape Fill?
With it I can select or even draw any type of shape and use text to describe the kinds of elements I'd like to fill it with.
Filling a simple shape with text prompts
Here I'll select the circle and then select Gen Shape Fill from the Contextual Task Bar.
In the text box, I'll enter a prompt that fits the kind of design I'm going for, in this case, black and white tattoo line art of multiple flowers and petals.
Then I can select Generate.
In the Properties panel you can see I now have three great choices that reflect my prompt.
But how does this translate to a more intricate project?
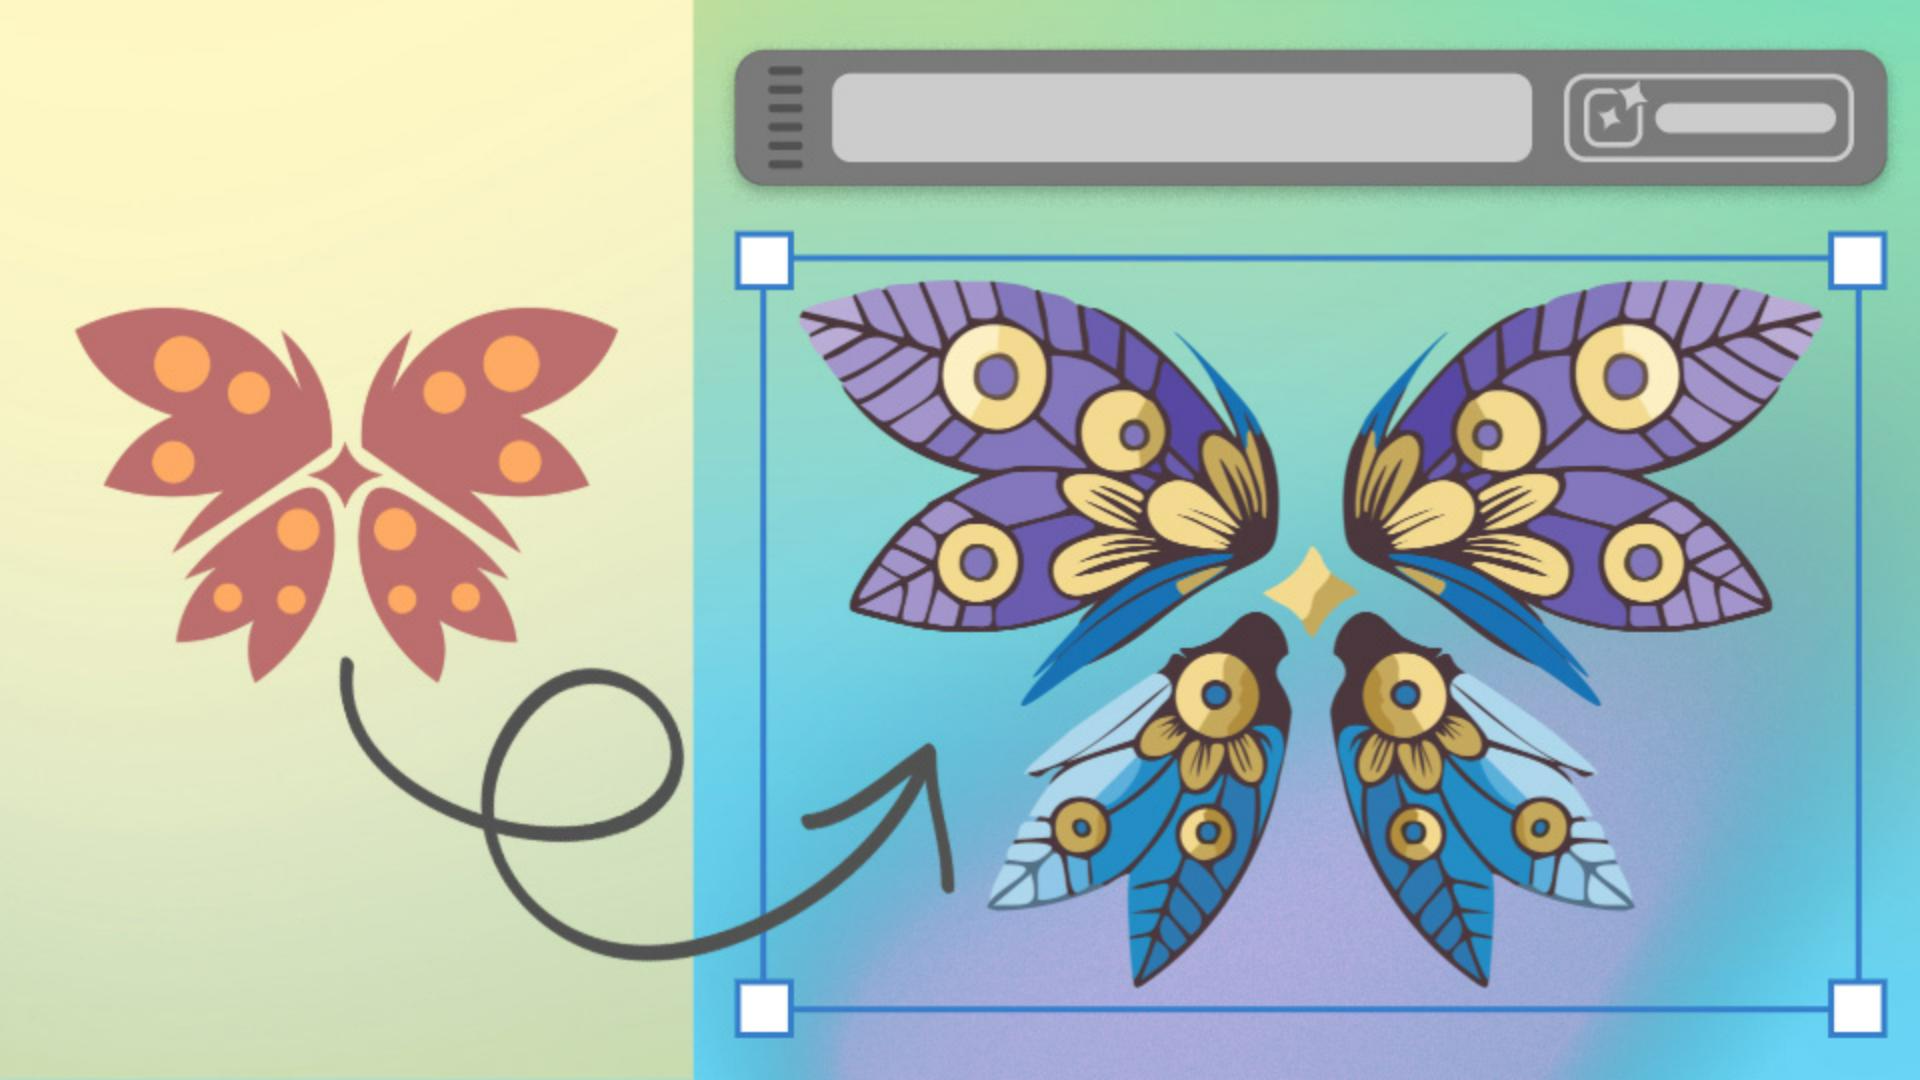
Say, I'd like to transform this sketch of a client's desired tattoo
Applying generative shape fill to a complex design
into a fleshed-out design concept.
Here I've created a more intricate design, built of multiple shapes based on the client ask.
Generative Shape Fill works even when multiple separate shapes are selected, so I'll select all of my new shapes, select Gen Shape Fill from the Contextual Task Bar again, and add a new prompt.
In this case, multiple intricate summer flowers and leaves in blue, purple, and gold.
Pro tip: Adding colors into your prompt gives better results.
Refining results with settings, effects, and color
You can click to experiment with Shape Strength and Detail or Style Reference, or you can click the Gear icon to open the Settings panel.
Here you can see I have my Prompt.
I can experiment with the tightness of the Shape Strength, I can change the Detail from Minimum to Maximum, I can open the Style Reference panel and even select an asset that's within my project as the style reference, for example, our previous example.
I can experiment with Effects too.
Selecting different style Effects such as the Doodle effect, and I can click on Color and Tone.
I can change Color Presets to Vibrant color if I want to, I can select the number of colors if that suits me, and I can even click to specify very specific colors if I already have a color palette selected.
Then I can select Generate.
If you'd like to change the design after the fact, you can always reopen the Settings panel and add to your prompt or change the settings.
Here I'm adding the phrase tattoo line art.
After I choose a design that best reflects my client's needs,
Editing and preparing the final design for presentation
I can edit any part of the design as every element is now grouped neatly.
I can clean up that design, reflect any elements to make it perfectly symmetrical, I can also edit the colors to create variations, design a mockup, and then present the final design to my client.
Now you try creating your own personalized tattoo design using your favorite elements, colors, and in your preferred style.