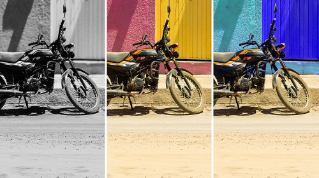
Lightroom Presets can help speed up the creative processing of your images.
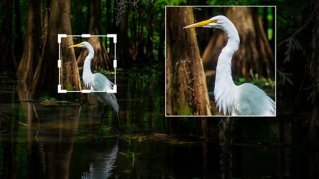
And with Lightroom's Adaptive Presets, you can automatically apply enhancements to specific parts in your photo.
Hi, my name is Bea Lubas, I'm a food and lifestyle photographer.
I'm also a Lightroom ambassador and the author of the book How to Photograph Food.
In this video, we are going to explore the creative possibilities offered by Lightroom's Adaptive Presets and how they can streamline your editing process.
The Presets tab is in the upper right.
Here you can access Recommended and Premium Presets, and also any Presets that you have created.
Adaptive Presets can be found inside of the Premium Presets right at the top.
So what's the difference between a Preset and an Adaptive Preset?
A Preset is a set of adjustments that you can apply to the entire image.
An Adaptive Preset, on the other hand, is a set of adjustments that you can apply to a specific part of your image.
In Lightroom, we have Adaptive Presets for Portrait, Sky, Subject and to Blur a Background.
For this, a still live image of the flowers, I want to apply a Premium Preset to the entire image first.
Let's go with a Style called Vintage.
I'm going to click on it to reveal this group of Presets, and then I'm going to select VN06, which actually is one of my favorite Presets.
These Preset's adjustments that I have just applied, show up in the Edit panel.
Now that the overall image looks quite nice, I want to add some extra pop to the flowers.
So I'm going to go to the Adaptive Preset for Subject, click on it to reveal this group of Presets, and as I move the cursor over each Preset, I can see the preview of the enhancement.
So here I really like how Pop makes the main subject more noticeable.
I'm going to click on it to select it, and now I can adjust the strength of the Preset with the Amount slider.
When I move it to the right, it makes the effect stronger.
When I move it to the left, it makes the effect more subtle.
Here I'm going to go with something stronger.
Since the Adaptive Presets are applied to a specific part of the image, the Adaptive Preset adjustments appear as a mask in the Masking panel.
If I go to the Masking panel now, I can see that one mask was added.
This mask is called Pop, and I can see a Select Subject masking tool was used.
The red overlay indicates the subject areas that are being affected by this Adaptive Preset.
I can also add and subtract from the mask to refine the masking selection, and in the lower part of the Masking panel, I can make additional adjustments.
To see the before and after view, click on the Eye icon at the top of the Masks panel.
This is before the Adaptive Preset, and this is the after.
There are also Adaptive Presets for Portrait, Adaptive Presets for Sky, and Adaptive Presets to Blur a Background.
You can fine tune the blurring effect in those in the Lens Blur section of the Edit panel.
The Adaptive Presets in Lightroom enable you to make quick enhancements to a portrait, a sky, a subject and background, and help to speed up your editing process.
Give them a try with your own photos and see how they can improve your workflow.


