Introduction
Creating eye-catching neon lettering is easier than ever in Photoshop.
In this video, you'll learn how to create a neon-style image using the Generate image feature with the style reference and the composition reference image.
My name is Rob de Winter.
I'm an Adobe Certified instructor, designer, and author based in the Netherlands.
And in this video, you'll see how easy it is to bring your own neon text to life.
I've already created a new Photoshop document
Preparing composition and style reference images
sized 1920 x 1080 px.
Let me first show you the composition reference image we'll use to guide our end result.
I made it in Photoshop, typed the word glow with an Adobe Font, and drew a star above it.
This image will help guide the layout of the final result.
Next, let's take a look at the style reference image.
I generated this image in Adobe Firefly, but you can also download a similar style image from Adobe Stock if needed.
Once we have both reference images, it's time to generate the artwork.
Generating neon lettering with Generate image
First, click the Generate image button.
In the Prompt field, type: 'pink neon light lettering on a black background'.
Then set Content type to Photo.
Under Effects, choose Hyper realistic and Neon.
This will guide your generated image a bit more.
Now let's apply our Reference images.
Click the Style button under Reference image, then click Choose image and select the style reference - our neon circle.
Next, click the Composition button, click Choose image and select the composition reference - the image with the word glow and the star.
Make sure to drag the Strength slider all the way to the right.
This will ensure that the generated results closely follow your layouts.
That's especially important for lettering where you want to avoid unexpected variations.
Now click Generate.
And pick the variation you like most.
Then let's copy the generated image into another file.
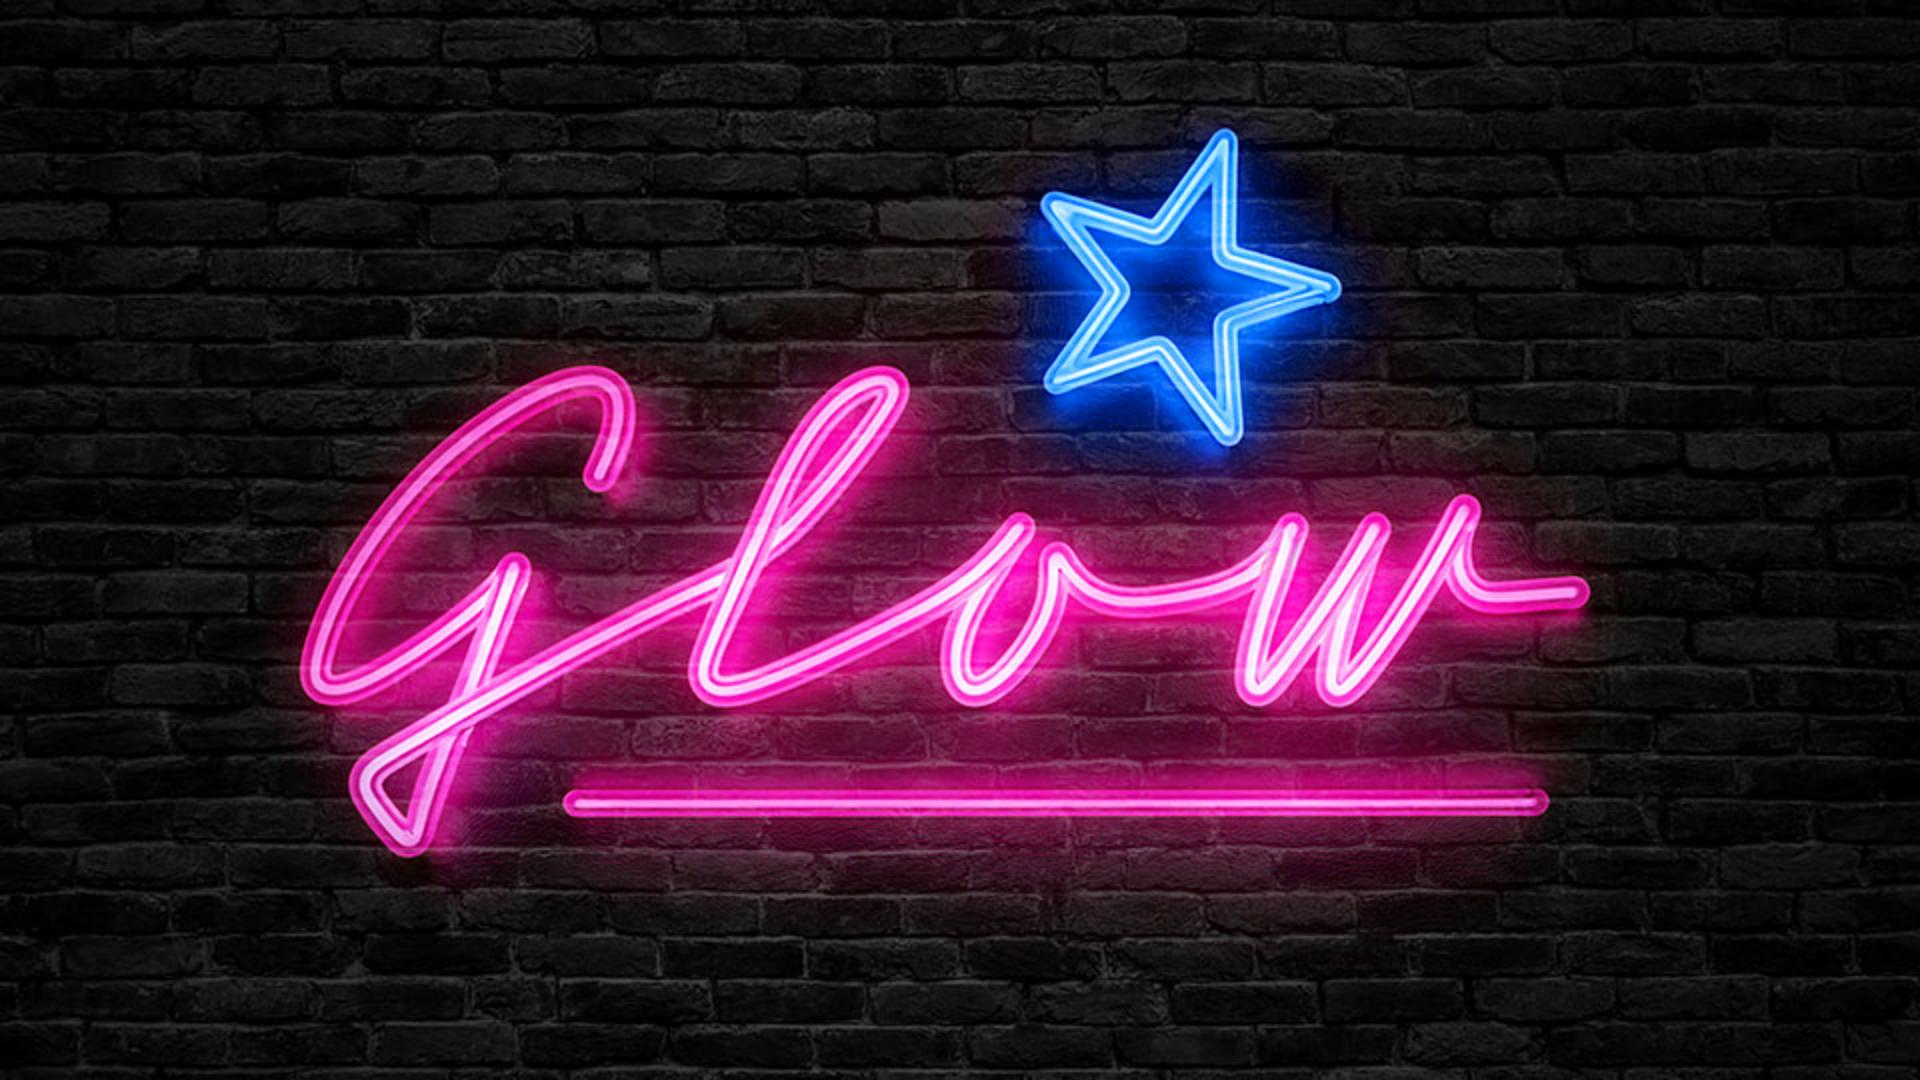
Blending neon text into a real background
In this case, I'm pasting it onto a photo of a dark brick wall.
With your neon layer selected, change the Blending Mode to Screen.
This makes the blacks transparent and blends the neon lettering beautifully into the background.
If you'd like to boost the brightness of the glow, simply duplicate the neon layer.
This intensifies the effect.
And if necessary, change the Opacity to make it less intense.
Finally, let's change the color of the star from pink to blue.
Refining colors and final neon adjustments
Select the Adjustment Brush from the Toolbar, set the Adjustment to Hue/Saturation and paint over the star.
In the Properties panel, adjust the Hue slider until the color shifts to a bright blue.
And that's it!
You've just created your own glowing neon text image using Photoshop's Generative image feature with composition and style reference tools.
Again, my name is Rob de Winter, and I hope this video helps you bring your designs to life.
Give it a try yourself and I look forward to seeing you in more Adobe videos.


