Retouch faster with Generative Fill without sacrificing professional quality
[Jesús Ramirez]: I'm Jesús Ramirez.
I work in entertainment, creating TV and movie posters.
Over the last few years, I've developed a Generative Fill retouching workflow that I use on every project.
It's fast, it works on large resolution images, and you don't need complex techniques like frequency separation to get professional results.
Let me show you my Hollywood Generative Fill retouching workflow.
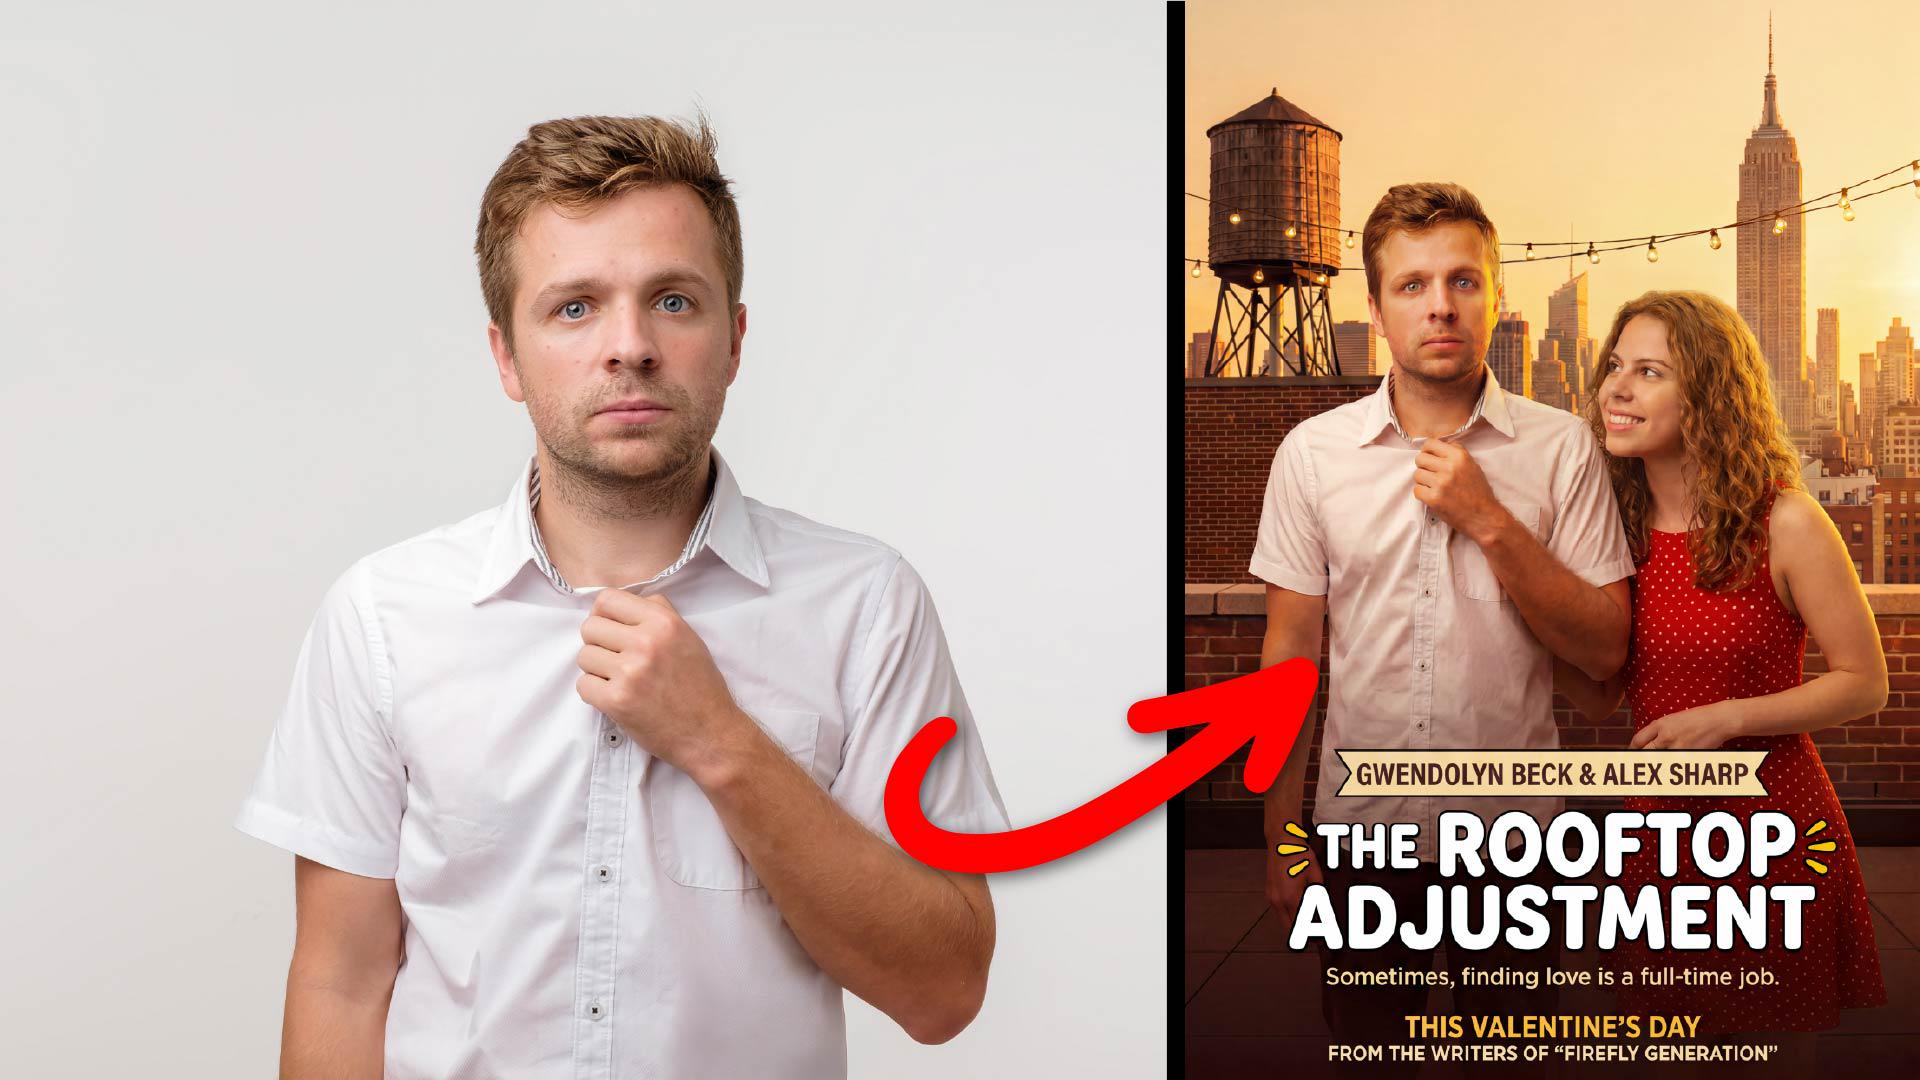
This is the type of image I typically receive from a studio or agency for a movie poster.
The talent is against a gray background, in this case, at 4736 x 3208 at 300 ppi.
A solid working resolution, but this will not be a problem for generative AI, because we're only working on fixing small imperfections rather than generating large segments.
The goal is to retouch this image that could later be used for a movie poster.
Think like an art director, not just an editor - hair, clothing
The first step is to analyze the image and decide what adjustments to make.
Remember, this is where you make your creative decisions.
You're the art director here.
What problems do you see?
In this case, I see three obvious problems: uncombed hair, skin blemishes, and a poorly fitted shirt.
We can quickly tackle all these issues using generative AI in a much faster way than we could just a few years ago.
First, let's work on his hair.
From the Toolbar, enable the Selection Brush tool, then loop around the entire area that needs work.
When you come back to where you started the selection, release the mouse button and Photoshop will fill in the selection.
Then click on Generative Fill from the Task Bar.
From the Model dropdown, choose Firefly's Fill & Expand model.
Adobe models work great in this Generative Fill workflow.
They look at the entire image for context to generate the fill without having to type a prompt.
Most importantly, all Adobe Firefly models are commercially safe and you retain all rights to the generated content, making it perfect for commercial work.
Partner models only see a square crop around your selection, and you must type in a prompt.
Again, choose Firefly Fill & Expand, and click on the Generate button.
And here are my results.
Your job is now to cycle through the three resulting Variations from the Properties panel, and choose the one that works best for your project.
And this is the one I like.
It has more natural-looking strands.
Next, let's work on the side of his head.
I think his hair is a bit too long, so let's give him a digital haircut using the same Generative Fill workflow.
Brush around the area you want to fix and use Generative Fill with a prompt to fill in those areas.
This time, I'll use the arrow icons in the Contextual Task Bar to cycle through the Variations.
If you don't like any of the results, you can always click on the Generate button again to generate three additional results, but in this case, I'll stick with this variation.
Next, let's work on his clothing.
Notice the shirt looks loose and it doesn't fit his body well.
We can quickly fix this by using the same Generative Fill workflow.
Start by making a selection around the sleeve, then click on Generative Fill - no prompt needed - and Generate.
Look through the Variations to find the one that gives you the best fit, and this one works well.
You can use the Eye icon to disable the layer and compare with the original.
Now do the same for the side of his body next to his arm.
Once you get the hang of this, you can go very quickly and make dramatic changes in just a few moments.
Here are my results.
Your job is to be an art director and choose the best result.
I like this generation the best.
The shirt looks fitted without any distracting folds.
Use AI selectively for clean, natural results - skin
Next, let's work on skin imperfections.
Click on the New layer icon in the Layers panel to create a new blank layer on top of the layer stack.
Then enable the Remove tool from the Toolbar.
From the Options Bar, set the Mode to Auto, which lets Photoshop determine when to use generative AI.
If it doesn't need it, the removal process happens in your device, and it will be much faster.
And if it does, you'll wait a little longer, but the advantage is that you will get much better results.
Also check Sample all Layers and Remove after each stroke.
And disable Create a new layer to avoid creating a new layer with each brushstroke.
Then zoom into the face by holding Alt on Windows or Option on the Mac and scrolling up on your mouse wheel.
Now simply paint over any blemish or distraction to instantly remove it.
The key here is to apply small brush strokes that directly target the imperfections.
Again, once you gain enough experience, you can go very quickly here.
And I cannot stress this enough: your job now is to art direct the resulting image.
You no longer need to spend a lot of time with tedious work; it doesn't add much to the creative process.
As you work, make sure to disable the layer to see the changes you applied.
It helps to find new areas to adjust or to see if you're heavy-handed on your retouching.
When working professionally, it is imperative that you stay organized and name your layers.
I'll select the topmost layer, hold Shift, and click on the very first generated layer.
That will select all the layers in between.
Then press Control G on Windows, that's Command G on the Mac to create a group.
Then I'll rename this group and call it Retouching.
When I disable the group, you can compare my edits to the original image.
For composites, fill in what’s missing then use Harmonize to bring it all together
Next, let's look at compositing this edited image into a movie poster.
This is a poster we're going to place our actor in.
First, unlock the Background layer by clicking on the Lock icon.
Now with the layer selected, hold Shift and click on the Retouching group.
Then enable the Move tool, and drag these images onto the Movie Poster tab.
Release in the center and press Enter to commit the changes.
Next, right-click on the two selected layers and choose Convert to Smart Object.
This will treat all the content as a single editable layer.
Now double-click on the Smart Object thumbnail to open it in a new tab.
From here, enable the Crop tool and crop the areas that you don't need.
Drag the handles closely to his body.
And for this composite to work, we will need to generate content below his body.
So drag the middle crop handle down.
Then click on the Checkmark to commit the changes.
To add the missing content, you can simply enable the Rectangular Marquee tool from the Toolbar and drag along the bottom of the image.
Make sure to include some of the actual photo to use as context for the generation.
Then go into Generative Fill, under the Model dropdown, choose Gemini 3 (with Nano Banana Pro), and in the Prompt bar type, 'add dark brown jeans and an untucked shirt.'
It's always a good idea to tell the model what you want to keep; in this case, type, 'Keep the same scale and pose.'
Then Generate.
And this is my result.
It looks fantastic.
Next, you can press Control S on Windows or Command S on the Mac to save the Smart Object.
You can close it, and notice how it also updates in our movie poster document.
I'll drag the Smart Object down so that we can see it all.
Then I'll click on the Remove background button from the Task Bar.
Now with the Move tool, place it into position and use the transformation handles to scale it and position it accordingly.
Next we need to incorporate him better into the scene.
There are a lot of ways to match color and color grade in Photoshop, but one of the most effective is to use the Harmonize feature from the Task Bar.
Photoshop will then look at the image and match the scene's lighting, color grading, shadows, and reflections with just one click.
You can then cycle through the three Variations to see which result is best.
In this case, the second Variation fits the scene.
Now you can utilize your traditional Photoshop techniques to continue fine-tuning this image until you get a result that you're happy with.
And this is my final movie poster after spending some time working on it.
Now that you know this professional Generative Fill retouching workflow in Photoshop, try it with your photos.
Again, my name is Jesús Ramirez.
Thank you for watching.


