Select objects instantly with object selection so you can edit faster
[Rob de Winter]: Selections are at the heart of almost everything you do in Photoshop.
You make selections to isolate specific areas and add adjustments, remove a background, and place a subject on a different photo, or blend objects together and generate new content right inside your image.
My name is Rob de Winter, Adobe instructor, designer, and author from the Netherlands.
And in this video, I'll show you three modern selection tools that save you a huge amount of time: the Object Selection tool, Remove background, and the Selection Brush.
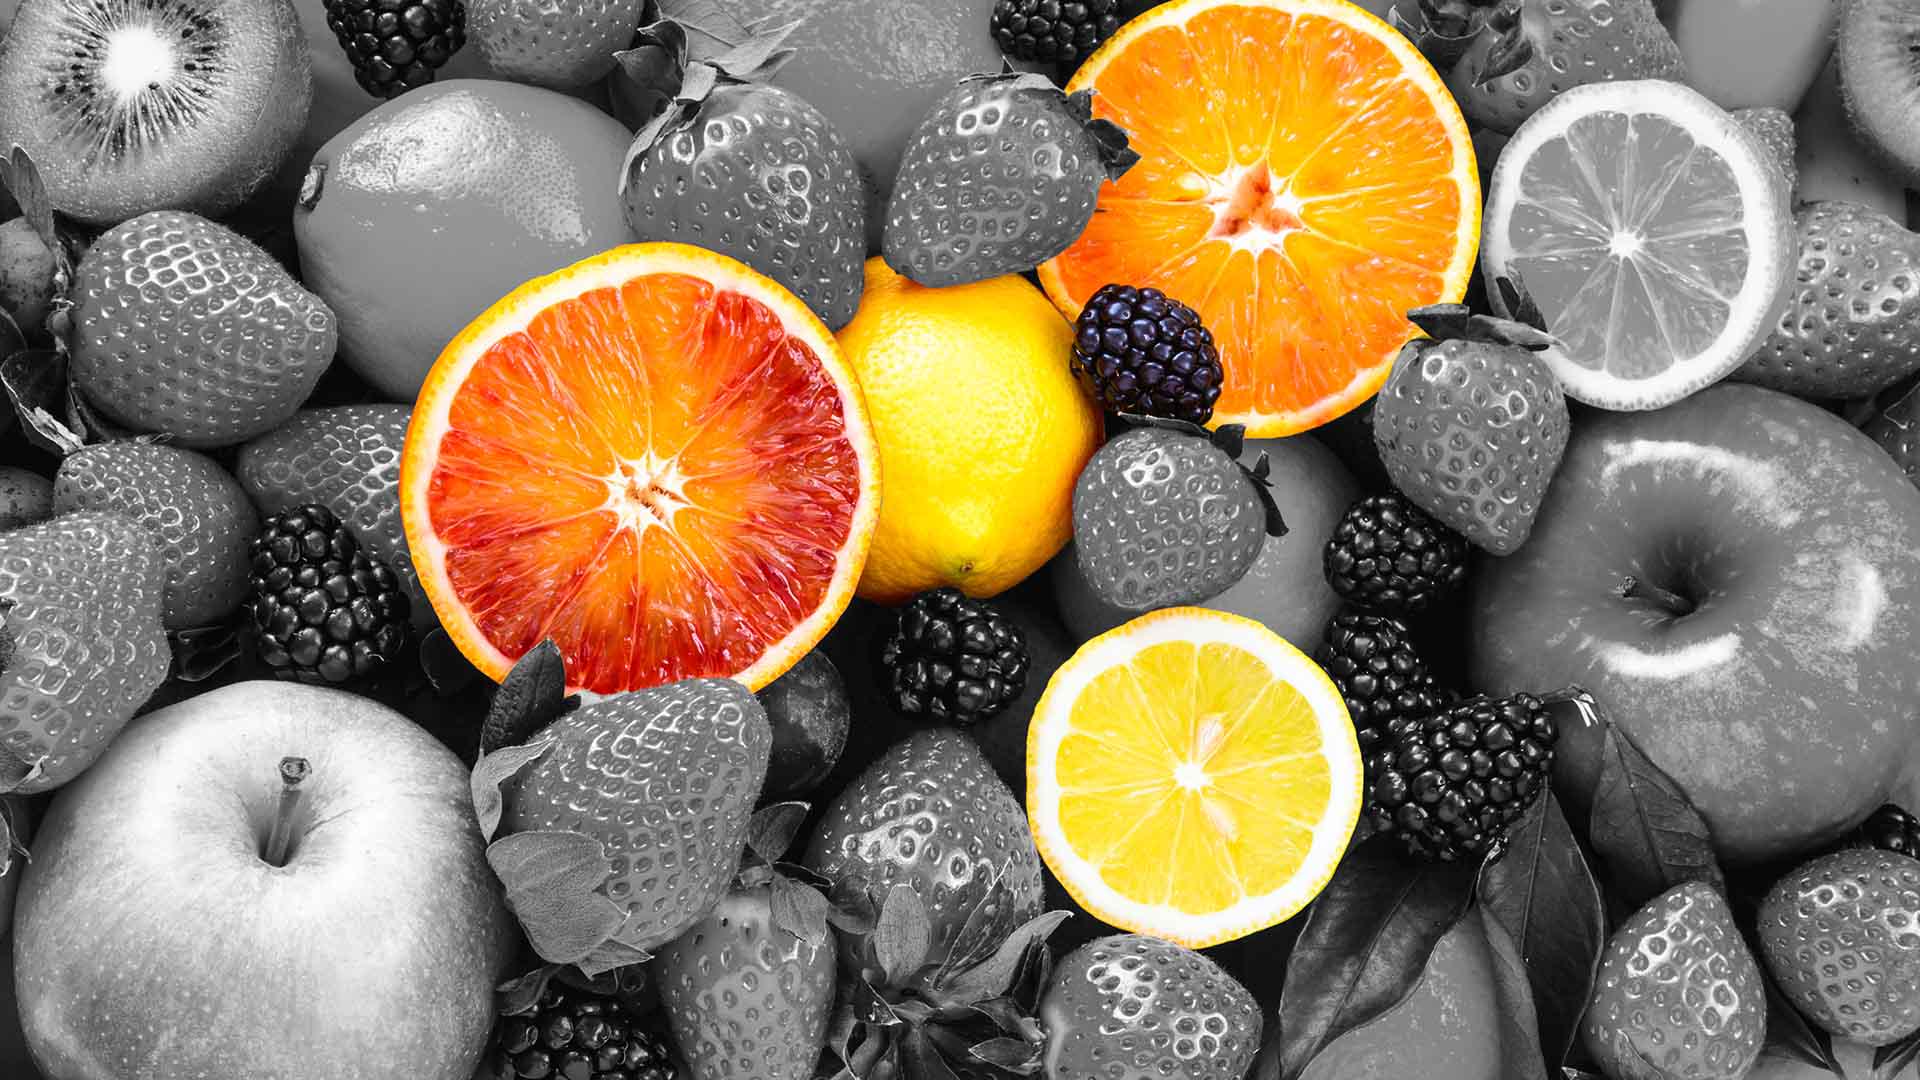
Here's a photo with a mix of fruits.
Let's say you want to isolate a few pieces and make the rest of the photo black and white.
The Object Selection tool makes this almost effortless.
Select the Object Selection tool from the Toolbar and Photoshop immediately starts analyzing the image.
You'll see a loading indicator in the Options Bar.
Once it's done, hover over the photo and you'll see objects light up with an overlay as you move your cursor.
Photoshop has detected all the individual objects automatically.
Click on a piece of fruit to select it.
To add more, hold Shift and click additional pieces.
If you accidentally selected something you don't want, hold Alt on Windows or Option on macOS and click it to deselect.
Keep going until you have exactly the fruit you want to select.
Now invert the selection by clicking Invert selection in the Contextual Task Bar.
The selection border now runs around the entire photo, meaning everything except your chosen fruits is selected.
Now go to the Adjustments panel.
If you don't see it, go to Window and click Adjustments.
Now choose Black & White.
Photoshop adds a Black & White adjustment layer that only affects the selected area; your fruits stay in color and the rest goes black and white.
And because it's an adjustment layer, you're working non-destructively, which means your original image hasn't been changed.
Drag it to the Bin icon in the Layers panel or hide it at any time, and your original photo is completely untouched.
Replace objects seamlessly using Generative Fill
You can also use the Object Selection tool to replace objects.
Click on a piece of fruit, then click Generative Fill in the Contextual Task Bar.
Type a prompt something like 'orange slice,' and click Generate.
Photoshop replaces it right in place.
You can now browse the Variations and pick your favorite.
One of my favorite features in Photoshop is Remove background.
Compositing used to take hours of careful masking, especially around hair or fur, and a lot of manual color matching to make your edit feel realistic.
Now, with this AI-powered workflow, you can extract a subject from a photo and place it in a new scene in just a few minutes.
You'll now see how Remove background and Harmonize work together to make compositions look realistic.
Here's a dark, neon street scene;
Remove backgrounds and match lighting for realistic composites
I want to place a lion in it.
Open Finder on macOS or the Explorer on Windows, grab your lion photo and drag it directly into Photoshop.
Click Done in the Contextual Task Bar, or press Enter to place it.
With the lion layer selected, click Remove background in the Contextual Task Bar.
Photoshop detects the main object in your image, in this case, the lion, and cuts it out cleanly, including all the fur detail.
Extraction was fast, but integration is what elevates your composite from a quick edit to a professional result.
The lion just looks pasted in, the lighting is completely different, the colors don't match, and it's floating without a shadow.
That's where Harmonize comes in.
Click Harmonize in the Contextual Task Bar.
Photoshop analyzes the lighting and colors of the background and adapts the lion layer to match.
It even generates a shadow.
This feature runs on Adobe Firefly, Adobe's own AI model.
Even in this extreme case - a warm-toned lion in a cold, neon-lit street - the result is really convincing.
Browse the Variations using the arrows in the Contextual Task Bar and pick the one that looks best.
One important thing: Harmonize creates a new layer so your original lion layer is still there underneath.
If you turn off the top layer, you'll see the unharmoniezed version is still intact.
For the last example, think about product photography or a social media image.
Here's a glass on a mossy rock.
It looks a bit fake because the glass isn't really integrated into its environment.
I want to blend it in and then add condensation drops and an orange slice
Paint precise selections to refine and build details
on the rim of the glass.
To do this, I will use the Selection Brush, which lets you paint a selection by hand combined with Generative Fill.
Select the Selection Brush from the Toolbar.
You can adjust the brush Size in the Options Bar at the top, or use the square bracket keys - left bracket to go smaller and the right bracket to go larger.
Paint the selection over the area where the glass meets the moss - the overlap between the bottom of the glass and the rock.
Then click Generative Fill in the Contextual Task Bar.
Leave the Prompt field empty and click Generate.
Photoshop generates moss growing slightly in front of the glass, making it look like the glass is actually sitting there.
Pick the variation you like most.
Now for the droplets, with the Selection Brush, paint the selection inside the glass.
You can also close the selection into a lasso shape, just to connect your brush stroke back to where you started and the Selection Brush fills it in automatically.
Click Generative Fill, type a prompt like 'condensation droplets on the edge of the glass' and click Generate.
Browse the Variations and pick your favorite.
You can even add an orange slice on the rim of the glass by making a selection first, click Generative Fill, add the prompt, 'half orange slice on glass rim' and click Generate.
The key thing here is that you build up the result in multiple steps.
One selection for the blend, another for the orange, and another for the drops on the glass.
Each generation adds a layer so you stay in full control of the end result.
You've now seen three modern selection tools: the Object Selection tool, Remove background with Harmonize, and the Selection Brush with Generative Fill.
And this is really just the beginning.
Selections are at the core of almost everything you can do in Photoshop.
Now give it a try yourself.
Again, I'm Rob de Winter, and I'm looking forward to seeing you in other Adobe videos.


