Introduction
[Dave Ko]: Are you tired of using the same templates as everyone else for your videos?
Are you ready to take control and customize things like moving text around your screen?
Hi, my name is Dave Ko, and I'm a motion Designer and I've been using Premiere for decades.
Premiere on mobile has introduced a new Pro feature called keyframes, and keyframes are going to up your creativity and free you from those cookie-cutter templates.
Today I'm going to show you how to use keyframes in Premiere for mobile and move things like text around exactly how you want.
A keyframe is a special marker on your Timeline.
It stores information like position, scale, opacity, rotation.
And what you can do is if you set two keyframes, Premiere fills in the in-between frames from one point to the next.
Let me show you what I mean.
Set keyframes to animate properties
Open a blank new project, then tap Videos and images at the bottom of the screen, tap Adobe Stock.
It's built right into Premiere on mobile, where a lot of the stock is actually free.
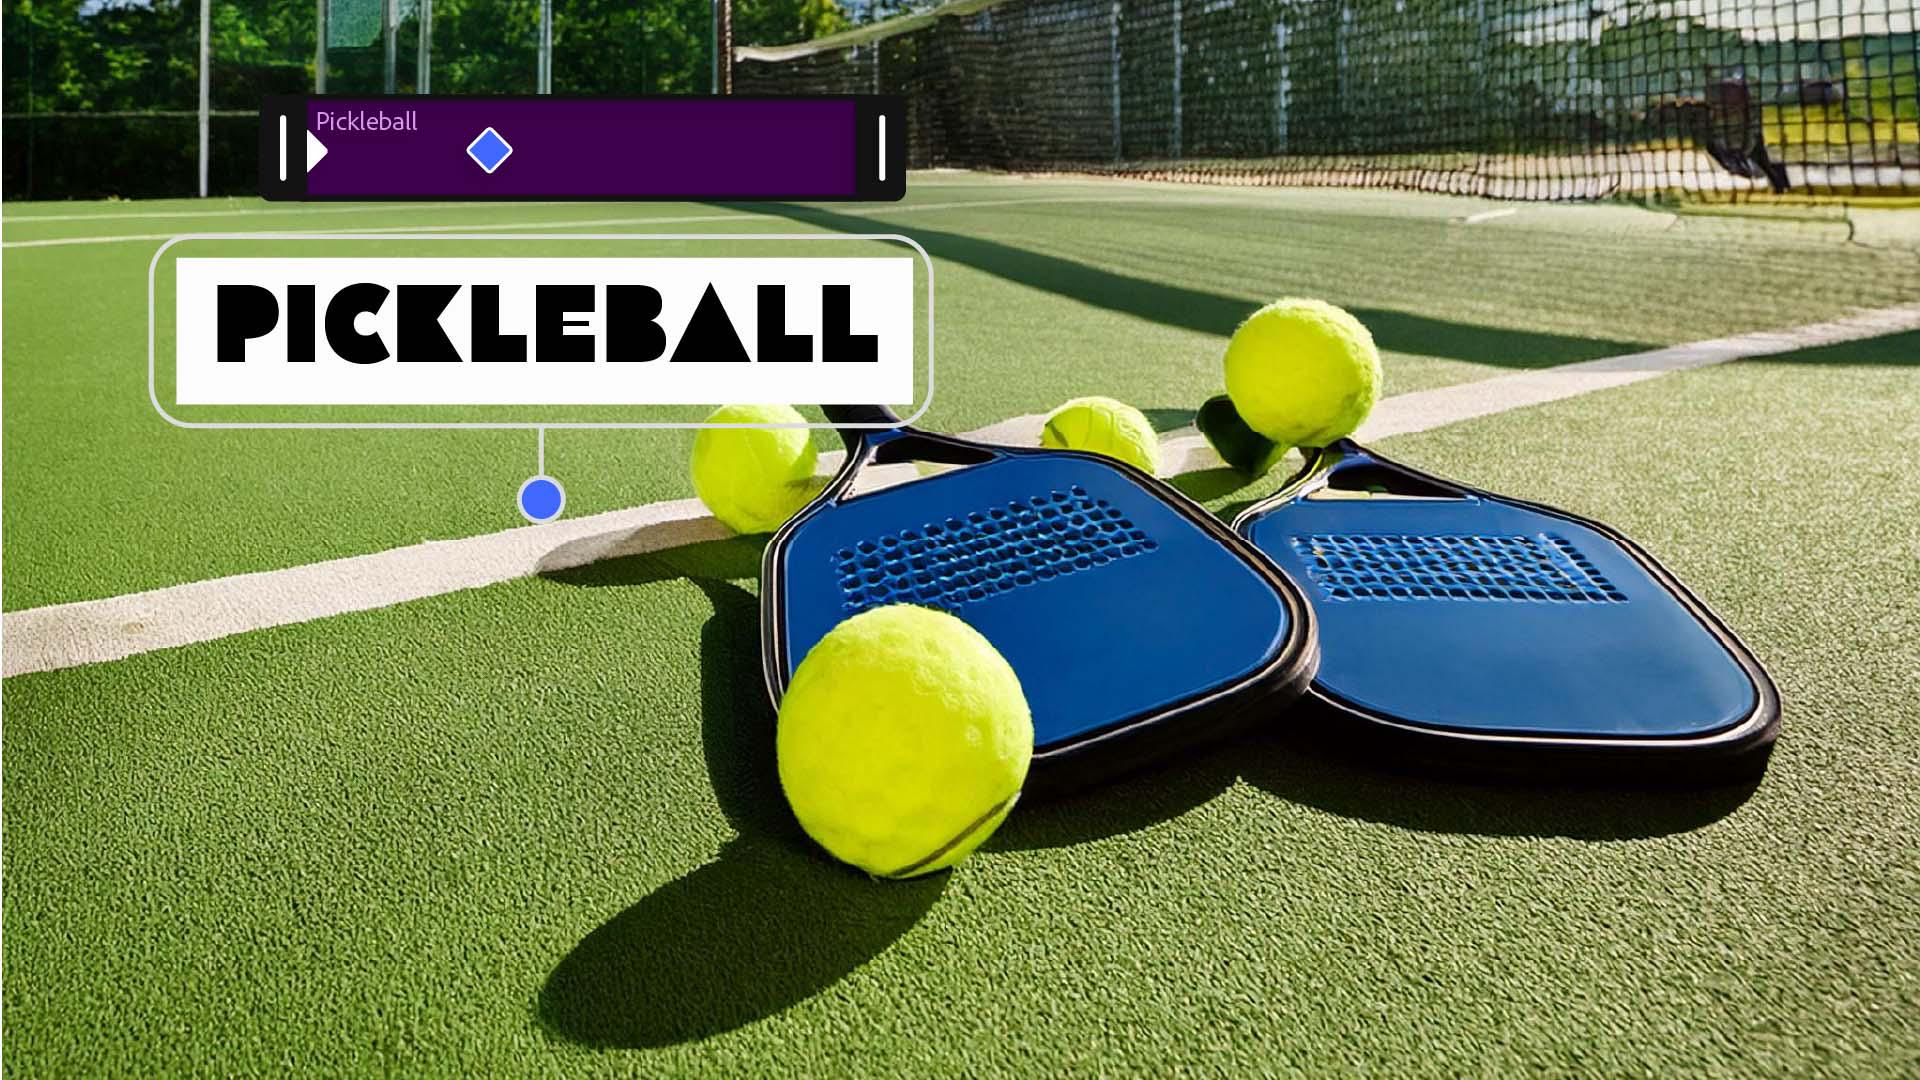
Then we're going to search for "Pickleball" as an image.
Once you've found one you like, just drop it in the Timeline and stretch the clip out to 6 seconds by dragging the end of the clip to the right.
Rotate it a few degrees to the left using the blue handle under the image.
Then we'll scale it up slightly by pinching the image with two fingers and expanding it.
Go to the very beginning of the clip and set a keyframe by tapping the diamond with a plus symbol.
Now drag the Timeline to the end of the clip and set another keyframe.
Here, we'll scale the image back down by pinching the image.
Then we'll rotate it a few degrees in the opposite direction using the same rotation handle on the bottom.
Hit Play.
The image slowly drifts and rotates across the whole clip.
That's a keyframe at work - filling in all the frames in between the two keyframes you set for rotation and scale.
Now let's animate some text.
Animate text on and off screen
Tap the button on the bottom left, or tap any empty part of the Timeline to deselect the clips.
Create a text layer by tapping Titles and captions, then Title.
And we'll type in "Pickleball", and tap the blue Checkmark.
Depending on where you were in your Timeline, the title clip will start there.
So tap and hold to drag the title to the beginning of the image clip.
Let's make the title the same length as well as our clip by dragging the end out further to the right.
With the text clip selected, tap Style and choose the Template, Font, the Color, Layout that you want, drag the Timeline to the 2-second mark, and we'll set a keyframe there and position the text where you want it to land.
Nudge it up a little to leave room for a second text line underneath, and this will be the final position.
Then go back to the beginning of the Timeline, and we'll set another keyframe and slide the text off to the left of the frame.
Then you can drag it manually, but to move it in a precise straight line, drag the Text Option panel to the left until Transform appears and tap it.
Use the slider to move the text precisely to the left, then tap Opacity.
We'll slide Opacity down to 0 and close the Opacity panel.
Play it back, and the text fades in while sliding from the left and settles in the middle.
Now do the same for the second text layer, which we'll use the word "Tournament".
This time we'll start this off on the right side and slide it to the middle.
We'll also make it a little bit smaller so that "Pickleball" is the main focus here.
Make some adjustments and then we'll slide it over to the side and lower the Opacity so it fades in.
Play it back - and there we go.
Add easing for gentle motion
Beautiful.
Select the Pickleball layer, and next to the keyframe diamond icon you'll see a small diagonal line with curves at each end.
That's the Eease button.
Easing controls how the animation accelerates and decelerates.
Hard keyframes snap in with stiff robotic impact.
These wiggle eases are oscillations where you can get these wild series of bounces, but for a polished result, choose Ease Out with the little curve at the end.
The text glides in and gently slows to a stop.
You are now in full control.
You can customize the animation of your text and other layers using keyframes in Premiere on mobile - no more cookie-cutter templates.
You build exactly what you imagine.
My name is Dave Ko, and I can't wait to see your customized keyframes out there in the wild.
