Moon Photography Guide To Get You Better Results

The moon has proven to be an ever-popular subject to photograph, providing a varied canvas for photographers to work with as it moves through its phases and entertains with sporadic lunar phenomena.
Many photography enthusiasts are in continual pursuit of getting the shot of the moon. The one that encapsulates it in all its spellbinding glory. While lunar photography can be challenging, mastering the art can be wonderfully rewarding.
In this article, we share some pro moon photography tips and offer a guide to camera settings and equipment to help propel you on your way to capturing the essence of its natural beauty.
KEY TAKEAWAYS
- Have a plan to allow for a prepared approach
- Shoot in RAW for photo editing freedom
- Consider faster shutter speeds for sharp photos
- Prioritise low ISO to reduce noise
- Use a long lens to magnify details and contrast
- Stabilise your camera to prevent blurry images
Tips for better taking pictures of the moon
When spending a night under the stars trying to get the moon image you've been waiting for, there are several things to think of other than the camera equipment you use and the settings you apply. Below, you can find some helpful tips to guide you:
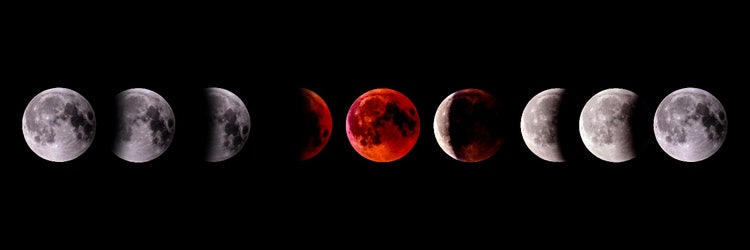
1. Consider the different moon phases. Lunar surface detail changes as the moon evolves from a new moon to a full moon, as does the brightness it gives off. Some of the best times to take photos of the moon can be during the waxing and waning phases, which closely precede and proceed the full moon phase.
2. Think about the time. The time of day you choose to photograph the moon can have a significant effect on the result you produce. A popular time for moon photography is just before the sun rises or sets, when the moon and horizon are in proximity and residual sunlight can enhance details and colours.
3. Check the weather forecasts. Some light clouds can amplify the photos you take of the moon with a wide-angle lens, but dense clouds and hazy conditions can hinder your close-up attempts. Similarly, city air pollution, especially during Australian heat waves in December through March, can create issues when using a telephoto lens.
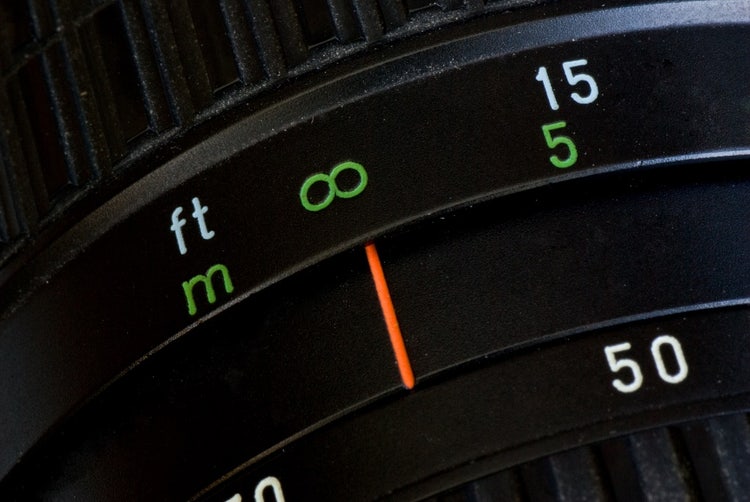
4. Focus far. Autofocus on your camera is unlikely to be up to the challenge of the range involved in celestial photography. It's a good idea to focus manually and at infinity, which requires ensuring you focus your lens as far as possible (look for the infinity icon on the barrel).

5. Get creative in the editing process. Many moon photos you see that have that real wow factor have the editing process largely to thank for it. Photo editing tools such as Adobe Photoshop and Lightroom can allow you the creative freedom to maximise your photos’ potential by heightening sharpness, decreasing noise, enhancing colour and even adding special effects.
Try the Photography Plan for free!
6. Practice makes perfect. A great way to enhance the images you capture of the moon is to get practice. You can experiment by shooting the moon in various phases, using a range of settings, exploring different compositions, and letting your creativity flow during the editing process.
Camera settings for moon photography
The exact camera setting to use for moon photography can depend on various factors. These factors may include the current moon phase, the weather, how much light pollution there is, and, of course, your signature style and desired result.
Specifics aside, there are some general things to know about setting up your camera for photographing the moon, which can give you a great head start:
Camera mode
If you’re unfamiliar with a DSLR’s manual functions or you’re using a point-and-shoot camera that has limited manual options, you can still take a great photo of the moon using your camera’s auto mode. By shooting in auto mode, you can let your camera automatically apply the settings it deems best for the conditions.
Typically, shooting in auto involves setting the camera mode and white balance settings on your camera to ‘auto’, and the metering setting to ‘spot metering’. You can do this through a dial on the camera or through an on-screen options menu.
If you wish to take your camera’s exposure, aperture, shutter speed, and ISO decisions into your own hands, you can explore your camera's manual mode, which you can find details for below. To photograph the moon, exposure is one of the most critical factors to get right, and by choosing your settings manually, you have the best chance of achieving this.
Image format
There can be many settings to consider for executing brilliant night sky photography. By shooting in RAW format instead of JPEG, you can give yourself some leeway during the editing process if you don't quite perfect each of these settings when you take the photo. All DSLRs support RAW capture and many sophisticated point-and-shoot cameras do too.
By shooting the moon in RAW format, you have the flexibility to use a photoediting program to compensate for the result of using less-than-optimal settings, whether you took your photos in auto mode or manual mode. This might include brightening your image or adjusting the colour, for example.
Shutter speed
Shutter speed refers to how long a camera's shutter is open, exposing the sensor to light. This setting usually determines your photo's brightness and whether it's sharp or blurry. Contrary to how it appears, the moon moves fast across the sky. So, in order to get that freeze-action moon shot, it’s important to consider your shutter speed.
If you’re taking photos of the moon in auto mode, your camera will take care of the shutter speed for you. If you’re shooting in manual mode, a good starting place for this setting is around 1/125s.
ISO
Having your ISO set low typically translates to cleaner images with better resolution and saturation than if you were to set your ISO higher. This can be especially true when doing lunar photography, where high ISO settings can cause grainy images, sometimes accentuated by the dark night sky.
ISO is a measure of how sensitive your camera film or sensor is to light, whereby a lower ISO setting represents lower light sensitivity and a higher ISO setting represents higher light sensitivity.
There’s no need to worry about your ISO settings if you’re doing your moon photography using your camera’s auto mode. However, if exploring manual mode, tending to your ISO setup is essential. How you configure your ISO can influence your shutter speed and aperture, so it's essential to find a happy medium. Consider setting your ISO at 100 or 200 to begin with.
Aperture
Aperture refers to the size of the opening in a lens through which light passes. When shooting in auto mode, the aperture settings don’t require your attention. But, in manual mode, once you've set your camera to a fast shutter speed and low ISO, you might like to experiment with various aperture settings. This can help you find the sweet spot that delivers crisp, detailed shots of the moon, craters and all.


Equipment for lunar photography
While some moon photography equipment may produce superior results, there’s no reason to let equipment limitations hold you back from enjoying taking photos of Earth’s celestial friend. Whether you’re using a high-end DSLR camera, a simple point-and-shoot camera, or even a mobile phone, awesome pictures of the moon can be within your reach.
Below, you can explore some photography equipment you may hire or purchase to enhance the quality of the moon photos you produce:
- A quality digital camera: A good mirrorless camera and DSLR camera both have the capabilities to get the job done, though a quality DSLR is often the preference of lunar photography enthusiasts. In general, DSLR cameras can accommodate bigger lenses, capture more light in a raw format and offer greater flexibility during post-processing.
- A telephoto lens: To photograph the moon, you ideally want to use a long zoom lens that allows you to get closeup shots while retaining clarity. A lens with a minimum focal length of 300mm can be beneficial.
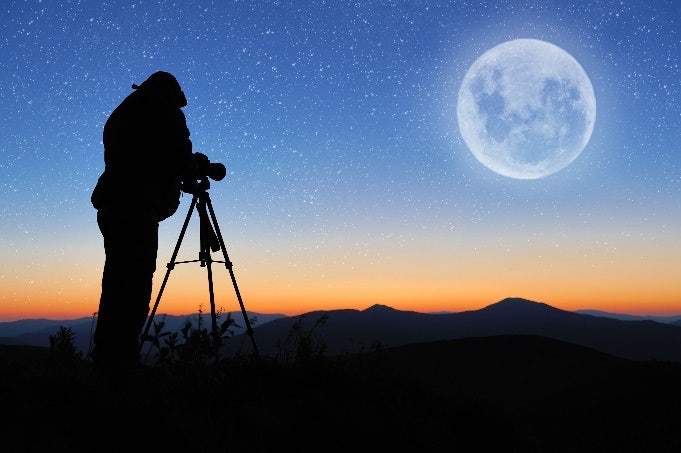
- A tripod: Image stabilisation is usually essential when capturing images of the moon, specifically when using a long focal length lens, which significantly increases camera shake. A sturdy tripod is essential for capturing a sharp image of the bright moon.
- A remote shutter release cable: To further enhance camera stability while in pursuit of the ultimate moon photo, a remote shutter release cable can be an excellent investment. It allows you to take photos without touching your camera, which can help you avoid ending up with blurry pictures of the moon.

Moon photography offers a great opportunity to hone your photography skills while taking in some special astrological sights and getting some fresh air. It can also enable you to truly unlock your creative potential during the post-production process as you experiment to create enchanting images that tell the perfect nighttime story.
Want more? Learn more photography techniques on Adobe.