Pre-deployment configuration (Advanced)
Administrators typically configure installers before deployment so that all users have identical settings. Many deployments simply involve using the Wizard and other basic configurations described in Pre-deployment configuration (Basic). More complex installations may require manually massaging plist files on a template machine.
Since manipulation of client settings through the user interface is not scalable, Adobe provides two key resources to help you configure Acrobat and Reader prior to deployment:
Customization Wizard: A free utility for configuring the installer prior to deployment.
Preference Reference: A dictionary of registry and plist preferences.
Preference fundamentals
Before continuing, you should know that:
Product preferences are located under the track ID “DC” (for Continuous) or “2015|2017|2020” (for Classic).
The Continuous track uses versionless preferences. That is, over time new preferences will always reside under “DC” regardless of how many updates are applied.
Naming conventions and paths are relatively similar on Macintosh, Windows, Unix, and Linux systems.
The Preference Reference describes 500+ settings.
There are two types of settings which reside in different locations: a per-user setting and a global setting which require administrative privileges to change.
Feature lockdown is available on Macintosh beginning with 11.0. Lockable features are controlled via machine level settings so the end users can’t change them without administrator privileges.
Preference names are case sensitive.
Just because you don’t see the preference doesn’t mean it doesn’t exist:
Some preferences exist internally and are not visually apparent in the registry until after a feature is used. Subdirectories may also appear as the code is exercised.
Many features are not enabled by default and their related preferences must be manually created.
Many preferences cannot be set thought the UI and must be manually created.
The easiest way to configure the product is to exercise the UI and then manually massage the preferences which don’t have a corresponding UI.
Plist file details
It’s always good to remember the following:
Plist files are binary files. Different editors display plist contents in different ways such as XML, structured text, etc.
Different editors may handle preference values in odd ways. For example, the 3rd party Preference Setter application will set
Integer 0, Boolean False, butNumber 0, Boolean Nomay not work. In XCode, the latter works fine.Plist files are cached during the current session. If you find your recently set preferences are disappearing, note that Acrobat reads the cached copy rather than the edited files and that it then writes out the plist file on exit, thereby overwriting your edits. To sync the cached plist copy with the newly edited plist, type the following in your terminal:
defaults read <path to your plist file>
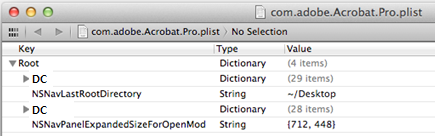
User plist locations
Preferences may be configured per user or per machine (by an administrator). Manage preferences by modifying Users/<user name>/Library/Preferences/com.adobe.<product name>.plist.
Plist syntax
Syntax varies by plist parser type. Your plist viewer may display an XML representation:
<dict>
  <key>FeatureLockdown</key>
    <dict>
     <key>bUpdater</key>
     <false/>
</dict>
Or something like this:
- ::
>> ] /Services [ /c << /EnableEchoSignDetection [ /b false] >> ] >>
When using this format, verify there are spaces between >> and ]. The ending should be `` ] >> ] >> ] >>`` not ]>> ]>> ] >>.
Windows vs. Mac
The structure, hierarchy, and naming conventions on Mac are similar to that used in the Windows registry. Thus, a Windows preference looks like:
[HKLM root\<version>\FeatureLockDown]bUpdater
On Mac, an XML representation looks like:
<!DOCTYPE plist PUBLIC "-//Apple//DTD PLIST 1.0//EN" "https://www.apple.com/DTDs/PropertyList-1.0.dtd">
<plist version="1.0">
<dict>
<key>DC (or 2015|2017|2020)</key>
  <dict>
    <key>FeatureLockdown</key>
      <dict>
       <key>bUpdater</key>
       <false/>
  </dict>
</dict>
</dict>
Data types
When adding new preferences the key name and data type must be correct. Every preference has a data type as indicated by the integer field under the key. These need to be added in the format that the application can recognize.
For example, to force a digest comparison with EnforceSecureChannel:
Open
~root/com.adobe.(product name)_(product version).plist.Navigate to
[Security\PubSec].Under
PubSec, add a new keyEnforceSecureChannel.Create an array element with an integer element specifying the data type and the boolean value.
<key>EnforceSecureChannel</key>
<array>
  <integer>0</integer>
  <false/>
</array>
Integer |
Data Type |
Description |
|---|---|---|
0 |
boolean |
true or false |
1 |
int |
An integer |
2 |
atom |
The string may be UTF-8 and can therefore include Unicode. The field typically contains text. For example, a value for |
3 |
number |
Double |
4 |
text |
The string may be UTF-8 and can include Unicode. The Value Data field is entered as text. For example, a value for |
5 |
string |
ASCII only |
6 |
data |
A binary blob |
7 |
Unused |
|
8 |
dict |
Containers that hold additional keys. |
Controlling updates
Disabling updates
Disable and lock the Updater settings by setting bUpdater to false. Doing so overrides UpdateMode.
Disabling the Updater
<dict>
  <key>(DC|2015|2017|2020)</key>
    <dict>
      <key>FeatureLockDown</key>
        <dict>
          <key>bUpdater</key>
          <false/>
        </dict>
    </dict>
</dict>
Note the following:
Continuous track web and desktop updates are released in tandem to ensure cloud and desktop features remain synchronized and compatible. Failure to update desktop components while leaving services enabled may lead to an unsupported configuration.
Updater preferences in the UI support “Auto” and “Off” options. The Continuous track of Reader does not provide any UI options and the default is “Auto”.
Removing the Updater.acroplugin
To disable the application’s ability to update altogether, use a post install script to move, rename, or delete the Updater.acroplugin file from <root>/Contents/Built-in/Plug-ins/Updater.acroplugin.
Locking preferences
Lockable plist locations
Note
Do not modify the feature lockdown file that ships with the product at Show Package Contents/content/MacOS/Preference/featurelockdown. The application merges the file Adobe provides with your file at runtime.
Locking support on Mac is identical to the support on Windows. Admin preferences can be set in <machine root>/Library/Preferences/com.adobe.(Acrobat.Pro | Reader).plist. Within this file the path to a specific lockable preference is identical to Windows.
Many preferences may be locked so that end users cannot change them via the product’s user interface. Some preferences only reside in the lockdown location and do not have a counterpart in the user preference area. For details about specific preferences, refer to the Preference Reference.
To lock preferences:
Go to
<machine root>/Library/PreferencesCreate a new plist file. Preferences for all versions are stored under a version hive. Thus, the
<11>and any future hives reside in the same file. products preferences reside under the track name:/Library/Preferences/com.adobe.Reader.plist (Inside hive 'DC')/Library/Preferences/com.adobe.Reader.plist (Inside hive '2015|2017|2020')/Library/Preferences/com.adobe.Acrobat.Pro.plist (Inside hive 'DC')/Library/Preferences/com.adobe.Acrobat.Pro.plist (Inside hive '2015|2017|2020')
The feature lockdown file is a system-level plist file in for a root account. The permissions of the plist file should be –755.
Set the version value in the key. For DC, this is either
DCfor the Continuous track or2015|2017|2020for the Classic track.Add entries as shown in the examples. Note the following:
Always prepend the data type to the preference name (use the same name as on Windows).
Verify the path contains the correct product version.
Save and close the plist.
Note
When using the Mac Wizard, keep in mind it creates an identical file in /Library/Preferences/. If a plist already exists on a client machine at that location, it is replaced at deployment time.
Future product updates won’t affect this file.
Locking attachment settings
Attachment settings are locked differently than other settings as follows:
Settings exist in a FeatureLockDown cabinet file by default. It is not a plist file.
The file is located at
/Library/Application Support/Adobe/Acrobat/DC|2015|2017|2020/Preferences/.This implementation originated with product versions.
Do not use Hungarian notation.
If you edit the file, future updates won’t overwrite your custom settings.
To modify the file, simply open and edit as needed.
<</FileAttachmentPerms [/i 1] /DefaultLaunchAttachmentPerms [ /c << /UnlistedAttachmentTypePerm [/i 2] … ] >> ]
Field |
Description |
|---|---|
<< |
Begin XML element |
>> |
Close XML element |
<< >> |
Container of the element components |
/ |
Entry name designator |
[ |
Open bracket |
] |
Closed bracket |
[] |
Container for an entry name value |
c |
Mac data type |
i |
Mac data type |
t |
Mac data type |
b |
Mac data type |
: |
Separates value names from value integers |
Delimits multiple value names in a list |
|
( |
Begins a list |
) |
Ends a list |
( ) |
A list container |
Example: Blacklisting JS API app.alert
The example below selectively blacklists the JavaScript API App.alert for all PDFs.
<?xml version="1.0" encoding="UTF-8"?>
<!DOCTYPE plist PUBLIC "-//Apple//DTD PLIST 1.0//EN" "https://www.apple.com/DTDs/PropertyList-1.0.dtd">
<plist version="1.0">
<dict>
  <key>2020</key>
    <dict>
      <key>FeatureLockDown</key>
        <dict>
        <key>cJavaScriptPerms</key>
          <dict>
            <key>tBlackList</key>
            <string>App.alert</string>
          </dict>
        </dict>
     </dict>
</dict>
</plist>
Example: Disabling startup messages
>> ] /IPM [ /c << /bShowMsgAtLaunch [ /b false] >> ] >>