Photography
Get started in infrared (IR) photography.
Peer into an unseen world. Give your images an ethereal, surreal look using infrared light techniques in digital photography, film, and post-processing.
Not sure which apps are best for you?
Not sure which apps are best for you?
Take a minute. We'll help you figure it out.
Take a minute. We'll help you figure it out.
Reflect a cool new world with infrared light.
Dive into IR light technology — its start, its history, and how it became popular with everyone from the US military to a musician and artist like Jimi Hendrix. Explore the IR “Wood Effect,” and discover how you can make film or DSLR cameras into infrared cameras simply by shooting images in specific ways. Get pro tips, like adjusting camera settings, to make your IR photos better. Plus, find details on Adobe Photoshop Lightroom tools that can help you create unique IR images in post-processing.
What is infrared photography?
The human eye cannot see infrared light. It lies beyond the visible light spectrum. But you can take photographs with an infrared filter or infrared film, which produces intriguing effects, to peer into this world. Colors and textures take on unique properties when reflected with infrared light, also known as IR light.
The history of infrared photography.
Robert Wood published the first infrared images in 1910. His photos were shot on experimental film that required very long exposures. For that reason, most of his subjects were landscapes. In World War I, infrared photos proved invaluable. The images could pierce the toxic gas that polluted the air. Troops were better able to determine differences between buildings, vegetation, and water to gather crucial intel.
In the thirties, Kodak and other camera manufacturers commercially released infrared film to the general public. Then, during World War II, the military continued its research into IR photography. It became a vital tool for modern warfare.
Two decades later, recording artists like Jimi Hendrix and the Grateful Dead further popularized the technique. They released album covers with infrared images that were popular due to their multicolored look. Now, the genre no longer requires special film to capture the images. Modern cameras and filters have made digital infrared photography more accessible than ever.
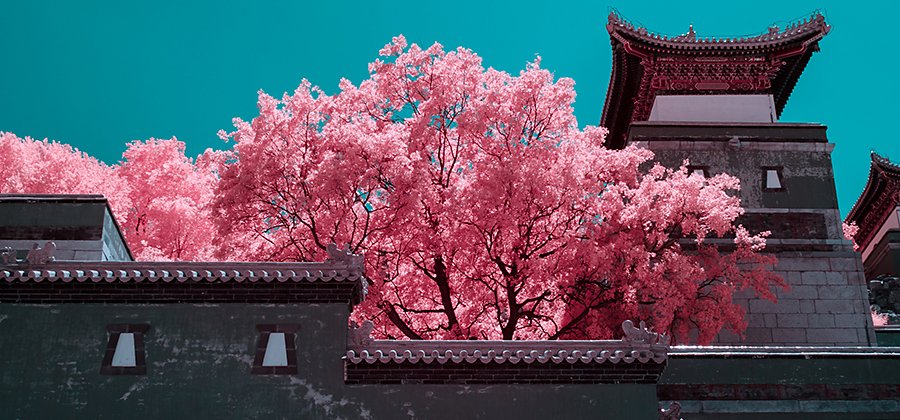
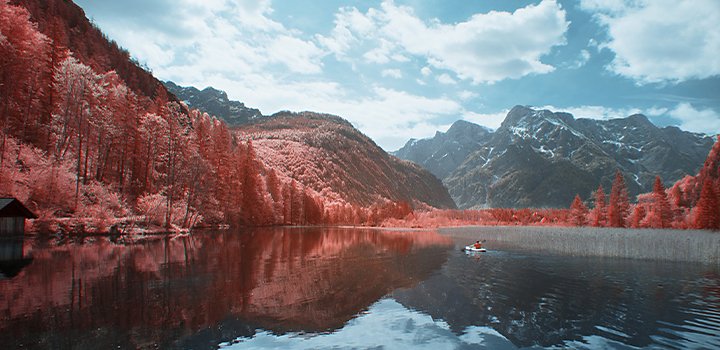
IR photography turns reality into dream-like scenes.
Named after infrared trailblazer Robert Wood, the most common result of infrared photography is called the “Wood Effect.” With the Wood Effect, infrared images of scenes reflect light so that foliage looks white and skies take on unusual colors, whether you shoot in black and white or false-color (color infrared) film. This effect is generally used in landscape photography to produce dreamy scenes. Skin takes on a smooth texture, perfect for haunting portraits. Certain stars and other constellations pop in infrared light. The ordinary will take on an otherworldly quality with this take on your standard photo.
Make film or DSLR cameras into an IR camera.
With recent advances in technology, infrared is a readily available feature for all photographers. Here are the ways you can shoot IR photos:
- Infrared film:The original method, this was the only way to shoot infrared for a long time, but it is used less now due to digital infrared photography’s ease of use. IR film is a great way to explore the world of IR light. You will record visible light as well as the infrared spectrum when using infrared film, so you will also need an IR filter to record pure IR images.
- Infrared filter: The most inexpensive way to experiment with IR photography, IR filters are similar to other camera filters. You attach them directly to your camera lens to capture the IR spectrum.
While convenient, there are two things to consider with IR filters. From a technical standpoint, they won’t work on cameras with built-in infrared filters, as they block all infrared light from reaching the camera sensors. Creatively, infrared photography uses slower shutter speeds and longer exposures to capture images, so you will need a tripod to shoot effectively with an infrared filter.
- Camera conversion: A more expensive method, camera conversion puts a filter into your camera that lets infrared light through. A converted camera will produce sharper IR images that aren’t bound to a lens filter’s equipment requirements. Infrared conversion also removes the need for long exposures and external filters, but at a cost; you will not be able to capture normal photos anymore with your camera. Kolari Vision and LifePixel are two notable infrared conversion services.
Tips and tricks for great infrared photos.
Once you select a subject, know what infrared method you’re going to shoot in, and have all the corresponding gear, consider the following factors before shooting.
Adjust your camera settings.
Similar to other long exposure photography methods like landscape photography, infrared photography requires attention to detail when it comes to your settings:
- Wide angles will help achieve a better depth of field. Keep your ISO low to avoid overly exposed photos.
- Manually correct your focus. Autofocus may not work correctly when dealing with infrared light.
- Shoot your images in RAW mode to account for motion blur when mounted on a tripod. This will allow for more flexibility on corrective edits.
- Customize your white balance. You will not be able to gauge color well through your viewfinder once you put the filter on, so adjust your white balance ahead of time.
The brighter, the better.
Normal photography steers clear of harsh shadows or sunny days. Infrared photography runs toward it. Not only does more light give the photographer more infrared for imaging, it also makes shutter speeds more manageable and raises the intensity of the refracted IR light within the scene. This can deliver stunning effects. “I only shoot during bright, sunny weather or minimally overcast days, so you get that bright infrared light. It doesn’t work as well if you have a cloudy day,” says infrared photographer Kaitlin Kelly.
Experiment, experiment, experiment.
Infrared photography is easy to begin but tough to master. It can take years of dedication and patience to fully apply the technique. Don’t be afraid to just start shooting. “It’s not straightforward photography. Experimentation, playing around, and figuring out the look you want is fun because you can determine that for yourself,” says Kelly. Take notes on what you like and what’s not working to craft your unique infrared recipe.
Edit so you can’t forget it.
“Infrared photography reveals an unseen light, but at the same time, it challenges people to think about what reality is in a photograph,” photographer Richard Binhammer explains. You can adjust the reality even more with Adobe Photoshop Lightroom. Swap the red and blue channels with the channel mixer to make your false-color landscapes more psychedelic. Go monochromatic and make that blue sky black or turn bright green foliage snow white. Tone down your white balance to give your subjects an eerie, ghostlike effect.
The combination of Lightroom and infrared photography can make the dreamscapes of your mind’s eye a reality.
Contributors
Share this article