How to edit MP4 videos.

Explore unique effects, professional presets, and intuitive tools in Adobe Premiere Pro and Premiere Rush. Edit MP4 videos of all kinds and share your vision with the world.

A person using Adobe Premiere Pro to edit a video on a laptop

What is an MP4?

MP4 is a digital video file format. It can store video and audio. This popular video format can be viewed and streamed across the internet, and it provides high video quality while keeping the file size relatively small. If you want to edit and share YouTube videos, consider saving your footage as an MP4 video file.


MP4s work like most video files. “When you talk about editing an MP4, you’re going to be choosing, arranging, and cutting clips, maybe adding music and text, and adding some simple effects and transitions,” says videographer Justin Odisho.


Simple steps for MP4 video editing.

From basic online videos to feature-length films, video editing encompasses everything from the simplest of edits to the most complex special effects. But when you break it down, here are the main steps, if you want to try your hand at becoming a video editor:


1. Import your unedited clips into your video editing program of choice.

2. Trim and arrange your clips in the Timeline.

3. Apply and adjust effects, transitions, graphics, and text.

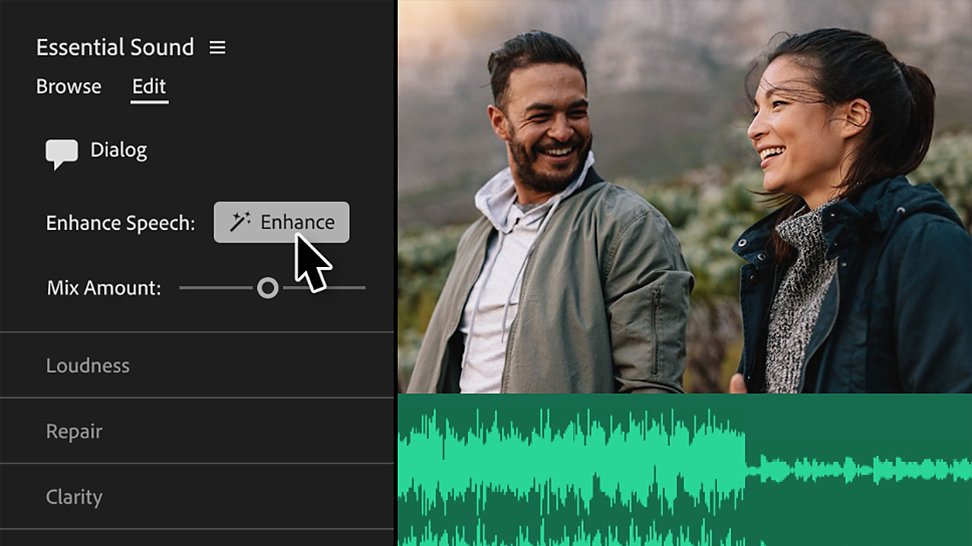
4. Add and edit music, sound effects, and audio.

5. Tweak your finishing touches and export your final video.

The Adobe Premiere Pro timeline panel superimposed over an image of a photographer posing in front of a mountain and forest
Adobe Premiere Pro

Make stunning videos of all kinds.

Explore user-friendly, intuitive tools.

There are several ways to import your footage into Premiere Pro. You can drag and drop your downloaded video files straight into your timeline, pull clips from your Asset Library, or browse free Adobe Stock content if you need some B-roll.


From there, use the Selection tool, the Hand tool, and the Razor tool to rearrange and trim your clips.


“If there’s a part where I didn’t stop recording, I can just grab my Razor tool and delete that section. I can start to edit together the best bits and pieces, and I can add transitions if I need to, once I’ve cut together the best parts,” says Odisho.


Add transitions between clips, like dissolves and wipes, to smooth the flow of your video and add interest.


Apply professional effects.

Make your videos stand out with professional transitions, special effects, text, and graphics. With the Effects panel in Premiere Pro, you can apply and adjust presets like lens distortions or mosaics. You can also blur, sharpen, distort, and transform your footage with the video effects.


With sliders and adjustments for each tool, you can make precise edits. Or perfect your MP4 footage with the Lumetri Color panel, and tweak the white balance, color correction, saturation, and exposure in innovative ways.


You can also edit clips in Adobe After Effects to create animations or add special effects. You can remove an object from a clip, make animated movie titles, or add fire or rain to your video. When your footage is ready, just pull it into Premiere Pro and edit it into your final video.

Adding titles to a video using Adobe Premiere Pro

Create and animate graphics.

By default, the Essential Graphics panel is a part of the Premiere Pro graphics workspace. This is where you can create text and graphic overlays for your videos. If you need an animated title for your short film, or rolling credits for your music video, start with the Essential Graphics panel.


“That’s where you can edit your text. You can adjust the size, font, color, type — whatever you want,” notes Odisho.


When your titles are in place, animate them with keyframes. Keyframes mark the points in your timeline where graphics, text, or videos change in value. If you want your title to fade out, you’ll add keyframes for when the fade begins and when it ends.


“You can also add keyframes so the clip slowly gets unblurred or comes into focus, and then fade the text out on top of that,” explains Odisho.

Adding titles to a video using Adobe Premiere Pro
Adobe Premiere Rush

Edit MP4 files on the go.

Create and share across platforms.

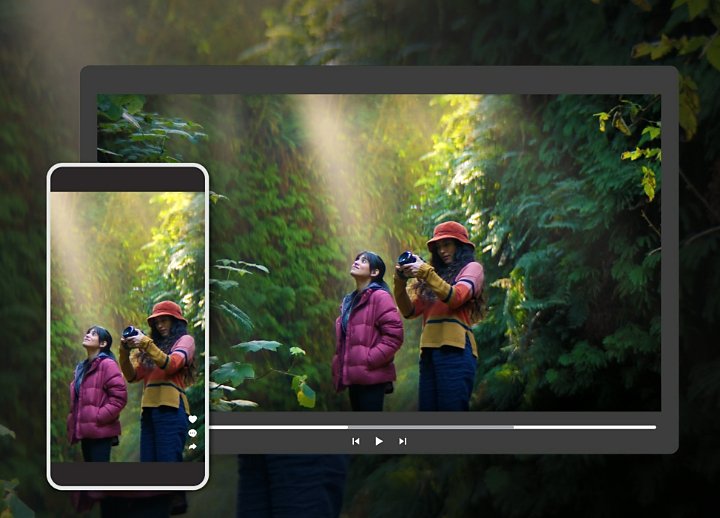
If you want to edit videos on your phone, start with Premiere Rush. This video editing software works on almost any device. From desktop to mobile, Mac to Windows, you can edit your video projects anywhere, anytime.


And if you want to share your clips on social media, you can easily adjust the aspect ratio to the best MP4 file for each channel. For Instagram Stories, you’ll need a vertical video with a 9:16 aspect ratio. But for YouTube, a standard 16:9 ratio will do. Plus, with the Auto Reframe and Pan and Zoom effects, you can ensure the important elements of your clip stay in the frame.


Experiment with streamlined creative effects.

If you edit videos on the go, you can still use high-quality video effects in Premiere Rush. Experiment with tints and shades by applying different color filter presets and adjusting the intensity. Or click the Edit button and use the slider bars to adjust the exposure, contrast, highlights, shadows, temperature, tint, vibrance, and saturation of your footage.


Plus, the Advanced tab lets you sharpen your footage or add a vignette effect. And you can create your own color filters for future use by saving your edits.


You can also slow down or speed up your video in just a few clicks. Select a spot in your clip you want to adjust, and then click the Speed button. From there, you can apply a ramp to smooth the transition between playback speeds.


And with the Graphics panel in Premiere Rush, you can add titles, transition graphics, and overlays to any video.


Make the most of your video editing tools.

Explore supported file types.

For the best results, you need to use high-quality video. Adobe supports industry-standard file types including MP4, MOV, AVI, WMV (Windows only), MPEG (MPG), and most audio files. If you have an uncommon video file type, like an MKV, make sure Premiere Pro supports it before you start your project.


Learn more


Import your videos in Premiere Rush on any device.

Whether you use macOS, Windows, Android, or an iPhone (iOS), follow these step-by-step tutorials to easily import your best video clips, photos, and audio for your MP4 videos.


Learn more


Take your MP4 videos even further.

There are countless ways to adjust and transform your videos, and with video editing apps like Premiere Pro and Premiere Rush you can explore all of the possibilities. Whether you just need to trim and tweak a single-take interview or cut together a complex video art project, the basics of video editing are always the same. And when you’re familiar with the tools, effects, and transitions available, you’ll be able to get the exact video you want.

Contributor

Do more with Adobe Premiere Pro.

Make visually stunning videos virtually anywhere — for film, TV, and web.

You might also be interested in…

Person adding audio into video using Adobe Premiere Pro

Choosing the right video format.

Find the best video format for streaming, downloading, or saving to disc.

A phone, tablet, and laptop next to each other with the same video editing software loaded

Easily crop video files for free.

Learn how to crop and resize your best video clips to your desired aspect ratio


Image of person diving into a tide pool by the beach with video editor bar hovering over the image

How to trim videos

Learn how to edit your video footage into compelling sequences.


Person sitting in an armchair using a smartphone

How to rotate video in Adobe Premiere Rush.
Tilt your video’s orientation a few degrees or rotate completely — and do it on your phone.

Get Adobe Premiere Pro

Create flawless productions with the industry-leading video editing software.

7 days free, then SAR 90.48/mo.