Manipulation de l’audio
Cette section explique comment importer du contenu audio, le lire en boucle pour le bruit de l’eau, et même créer un son d’évènement pour finaliser l’effet Éclair.
Publié le
Après avoir créé cet effet Éclair, il ne reste plus qu'à ajouter du son pour finaliser l'animation.
C'est parti !
Commençons par jeter un œil à la bibliothèque.
Elle est de plus en plus désordonnée avec tous ces contenus.
Pour la réorganiser, on pourrait ajouter un nouveau dossier.
Je clique, j'ajoute un dossier, que je vais nommer… « Lightning Assets » À l'intérieur de ce dossier, je vais placer ce dossier, c'est-à-dire celui du fichier PSD d'origine.
J'y place aussi le bitmap de l'éclair et sa copie.
On peut aussi ajouter un dossier pour le son, que je nomme « SOUND ».
Mais on peut encore améliorer l'organisation de la bibliothèque.
Pour l'instant, j'ai un dossier en haut de l'arborescence et un autre vers la fin.
Si j'ajoute un tiret de soulignement, le dossier « _SOUND » s'affiche en haut de l'arborescence.
Je fais la même chose pour le dossier Lightning Assets.
J'ajoute un tiret de soulignement, j'appuie sur Entrée, et le tour est joué.
Ma bibliothèque est à présent organisée, avec les dossiers tout en haut.
Animate permet d'importer tous types de sons : des fichiers audio Adobe, des fichiers WAV, des fichiers AIF, des fichiers MP3, etc.
Tous les types de fichiers courants sont pris en charge.
Voyons comment procéder.
Je choisis Fichier > Importer.
J'ai alors le choix d'importer dans la scène ou uniquement dans la bibliothèque.
Quand on ajoute du son, la première étape consiste à créer un calque.
Animate ne propose pas de calque ni d'emplacement dédié à l'ajout de son.
Je vous conseille donc d'ajouter un calque pour chaque son, comme s'il s'agissait d'un canal audio.
Je clique ici et je saisis « Waves » pour le premier son que j'importerai.
La première image clé étant sélectionnée, je choisis Fichier > Importer > Importer dans la scène.
Le son importé dans la scène sera également ajouté à la bibliothèque.
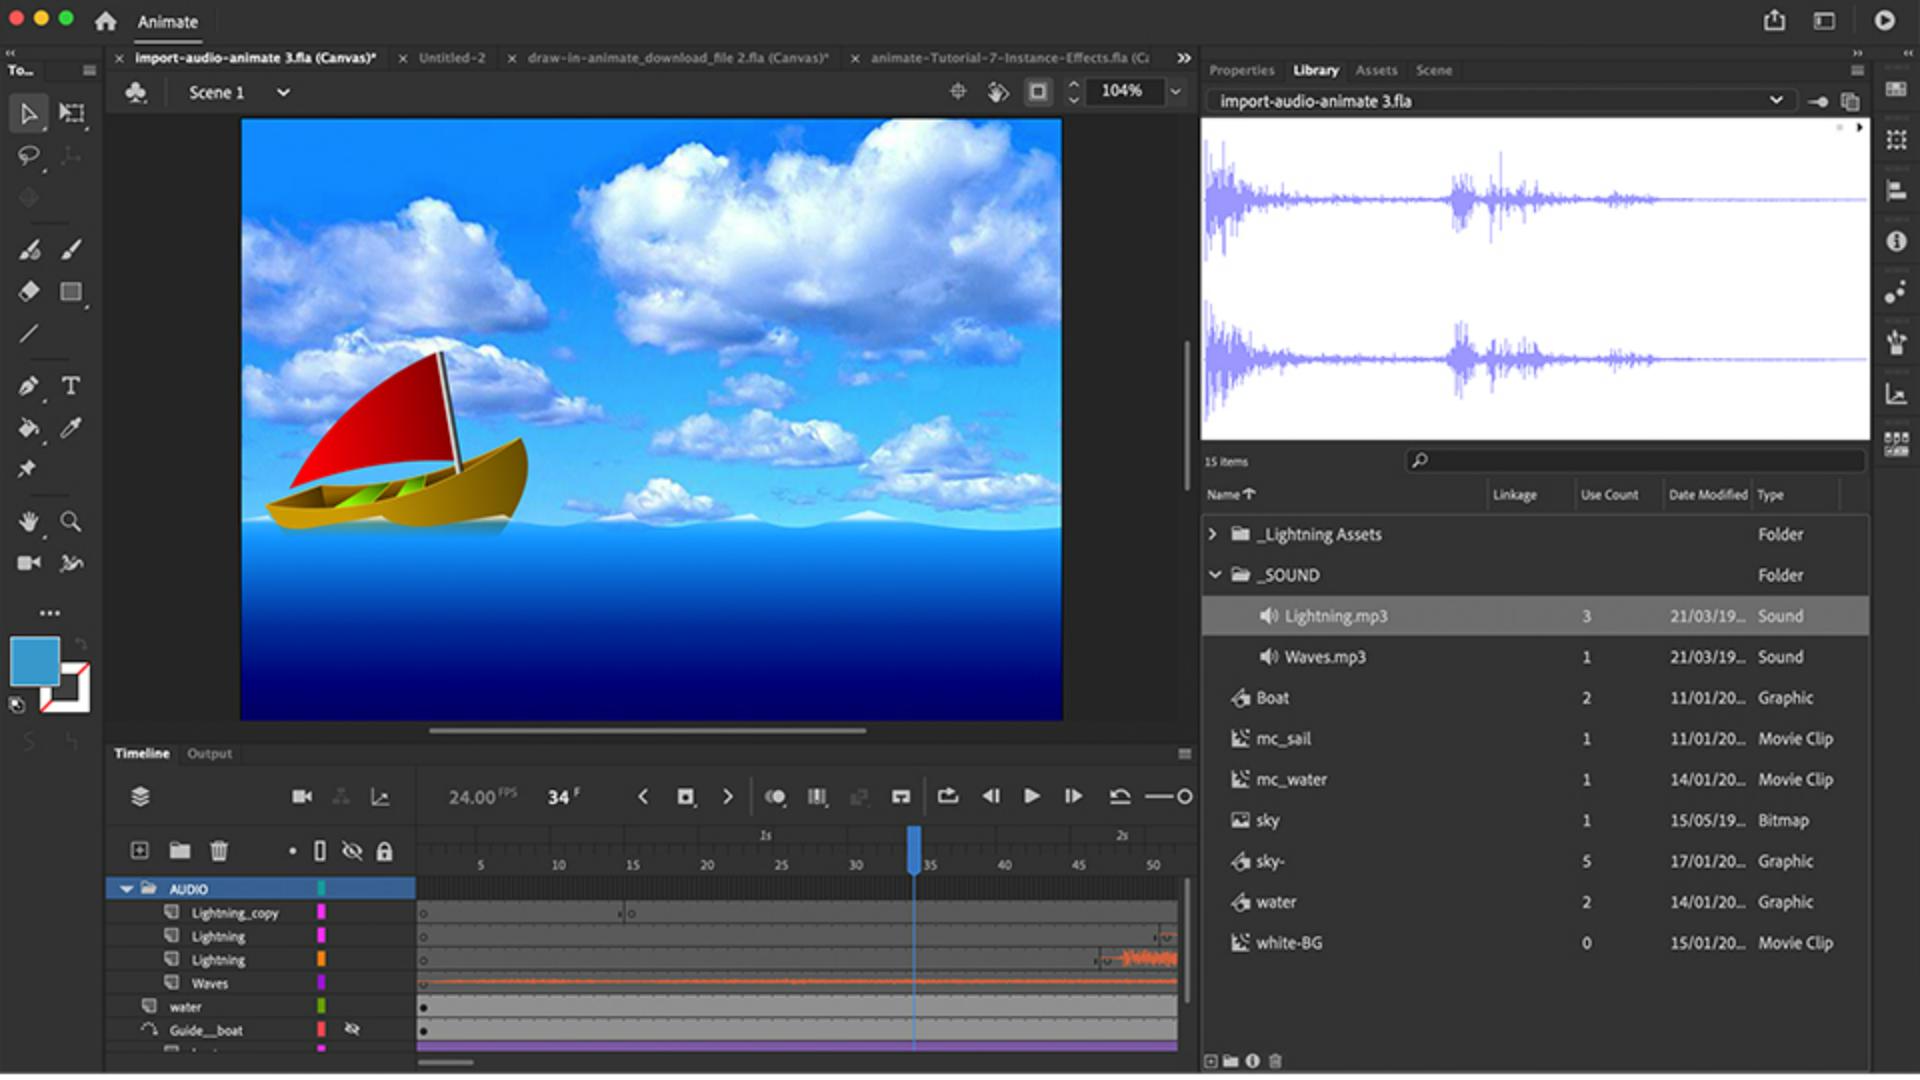
Là, je double-clique sur le fichier Waves.mp3, et la forme d'onde s'affiche dans la première image clé du scénario.
Le fichier audio apparaît également dans la bibliothèque.
Je peux faire glisser le fichier Waves.mp3 dans le dossier _SOUND.
Et voilà, on entend à présent le bruit des vagues.
Parfait.
Je vais cliquer sur le son des vagues ou la première image clé, puis ouvrir le panneau Propriétés, qui comprend une section « Son ».
J'aurais très bien pu sélectionner l'image clé et choisir le fichier Waves.mp3 dans ce menu.
Il existe deux types de sons dans Animate : les sons d'évènement et les sons en flux continu.
Les sons d'évènement doivent être téléchargés intégralement avant de pouvoir être lus.
Leur lecture se poursuit jusqu'à ce qu'elle soit interrompue par un évènement ActionScript, ou jusqu'à la fin du fichier.
Malheureusement, l'utilisation de sons en flux continu est impossible avec Canvas, Leur lecture débute dès que les données de la première image clé sont téléchargées.
Chaque image est ensuite synchronisée avec le scénario.
Le son associé à chaque nouvelle image est lu, puis l'animation passe à l'image suivante et au son correspondant.
Chaque élément audio est décomposé entre différentes images.
Je n'ai malheureusement pu utiliser que des sons d'évènement avec HTML5 Canvas pour pouvoir les exporter, sans avoir recours à un module externe.
On n'a donc ici que du son de type Évènement.
Il se charge sur la première image clé, puis est lu en intégralité.
On peut aussi spécifier un nombre de répétitions.
Ce champ indique que le son ne sera lu qu'une seule fois.
Ce sera suffisant pour le son des vagues, puisqu'il recouvre environ 130 images, soit la totalité de l'animation.
Si l'animation était plus longue, il serait tout à fait possible de le répéter un certain nombre de fois ou de le lire en boucle indéfiniment.
Mais ici, une seule répétition fera l'affaire.
Revenons à la bibliothèque.
Je vais maintenant ajouter et importer le son du tonnerre.
Je ne l'importerai pas dans le scénario puisqu'il doit être émis à trois reprises, en même temps que chaque éclair.
Je vais me contenter de l'importer dans la bibliothèque, puis je le placerai à l'endroit souhaité dans le scénario.
Cette fois-ci, je choisis Fichier > Importer > et, au lieu de la commande Importer dans la scène (Cmd + R), je choisis Importer dans la bibliothèque.
Je double-clique sur le son Lightning.mp3 pour l'importer dans la bibliothèque et je le fais glisser dans le dossier _SOUND pour conserver la même structure.
Ensuite, je recherche un endroit dans le scénario où la foudre s'abat.
Juste ici.
J'ajoute un calque, que je nomme « Lightning ».
J'ajoute une image clé au même endroit en cliquant sur la nouvelle icône Insérer une image clé.
Voici mon image clé.
Je la sélectionne et je reviens au panneau Propriétés.
Cette fois-ci, le panneau s'ouvre sur l'onglet Image.
Dans la section Son, ce menu déroulant affiche tous les sons disponibles dans la bibliothèque : Lightning.mp3 et Waves.mp3.
Je sélectionne Lightning.mp3.
Idem pour le son suivant : j'ajoute un calque.
Je recherche l'éclair suivant dans le scénario… Juste ici.
Ce calque étant sélectionné, j'ajoute une image clé.
Je double-clique et je nomme le calque « Lightning ».
Je clique sur cette image clé pour la sélectionner, je retourne dans le panneau Propriétés et je sélectionne le son Lightning.mp3.
Il reste encore un son de tonnerre à ajouter.
Il se trouve à peu près ici, à l'image n° 66.
Une autre méthode consiste à dupliquer un calque.
Je clique avec le bouton droit pour dupliquer le calque du son du tonnerre.
J'obtiens ainsi une copie que je vais pouvoir faire glisser sur l'image 66.
Je clique une première fois sur l'image clé, puis je clique à nouveau pour la faire glisser et placer le début du son au niveau de l'image 66.
Comme ceci.
Une partie dépasse à la fin, car le son s'étend au-delà du scénario.
Je peux cliquer et faire glisser pour sélectionner les images en trop, cliquer avec le bouton droit et choisir Supprimer les images ou appuyer sur Maj + F5.
Le scénario contient maintenant de nombreux éléments : un calque pour le son de chacun des trois éclairs et un autre pour les vagues.
Profitons-en pour les classer en ajoutant un dossier.
Je clique sur Nouveau dossier, et je le nomme « AUDIO » pour y stocker les sons.
Je le place en haut de la liste.
Je clique sur le calque Lightning, j'appuie sur la touche Maj, je clique sur le calque Waves et je fais glisser la sélection dans ce dossier.
Une fois que je réduis l'arborescence, tout est mieux structuré.
J'appuie sur Cmd + Entrée pour tester l'animation.
C'est parfait !
Et voilà !
J'espère que ce tutoriel sur le son vous a plu.
À bientôt !
Ce que vous avez appris :
Comment importer du contenu audio dans la bibliothèque ou sur la scène.
Les sons d’évènement se déclenchent lors de la lecture de l’image sur laquelle ils sont placés et sont lus dans leur intégralité.
Les sons en flux continu ne sont pas compatibles avec le HTML5.
Vous pouvez importer des fichiers audio aux formats .asnd, .wav, .aif et .mp3.
Le contenu audio peut être placé sur un calque dédié.
Les calques audio peuvent être organisés à l’aide de dossiers.
Les éléments peuvent aussi être organisés dans des dossiers de la bibliothèque.