Introduction
In this video, you will learn how to apply presets to your photos in Lightroom.
You can follow along with any photo or you can download the sample file from the Adobe page for this tutorial.
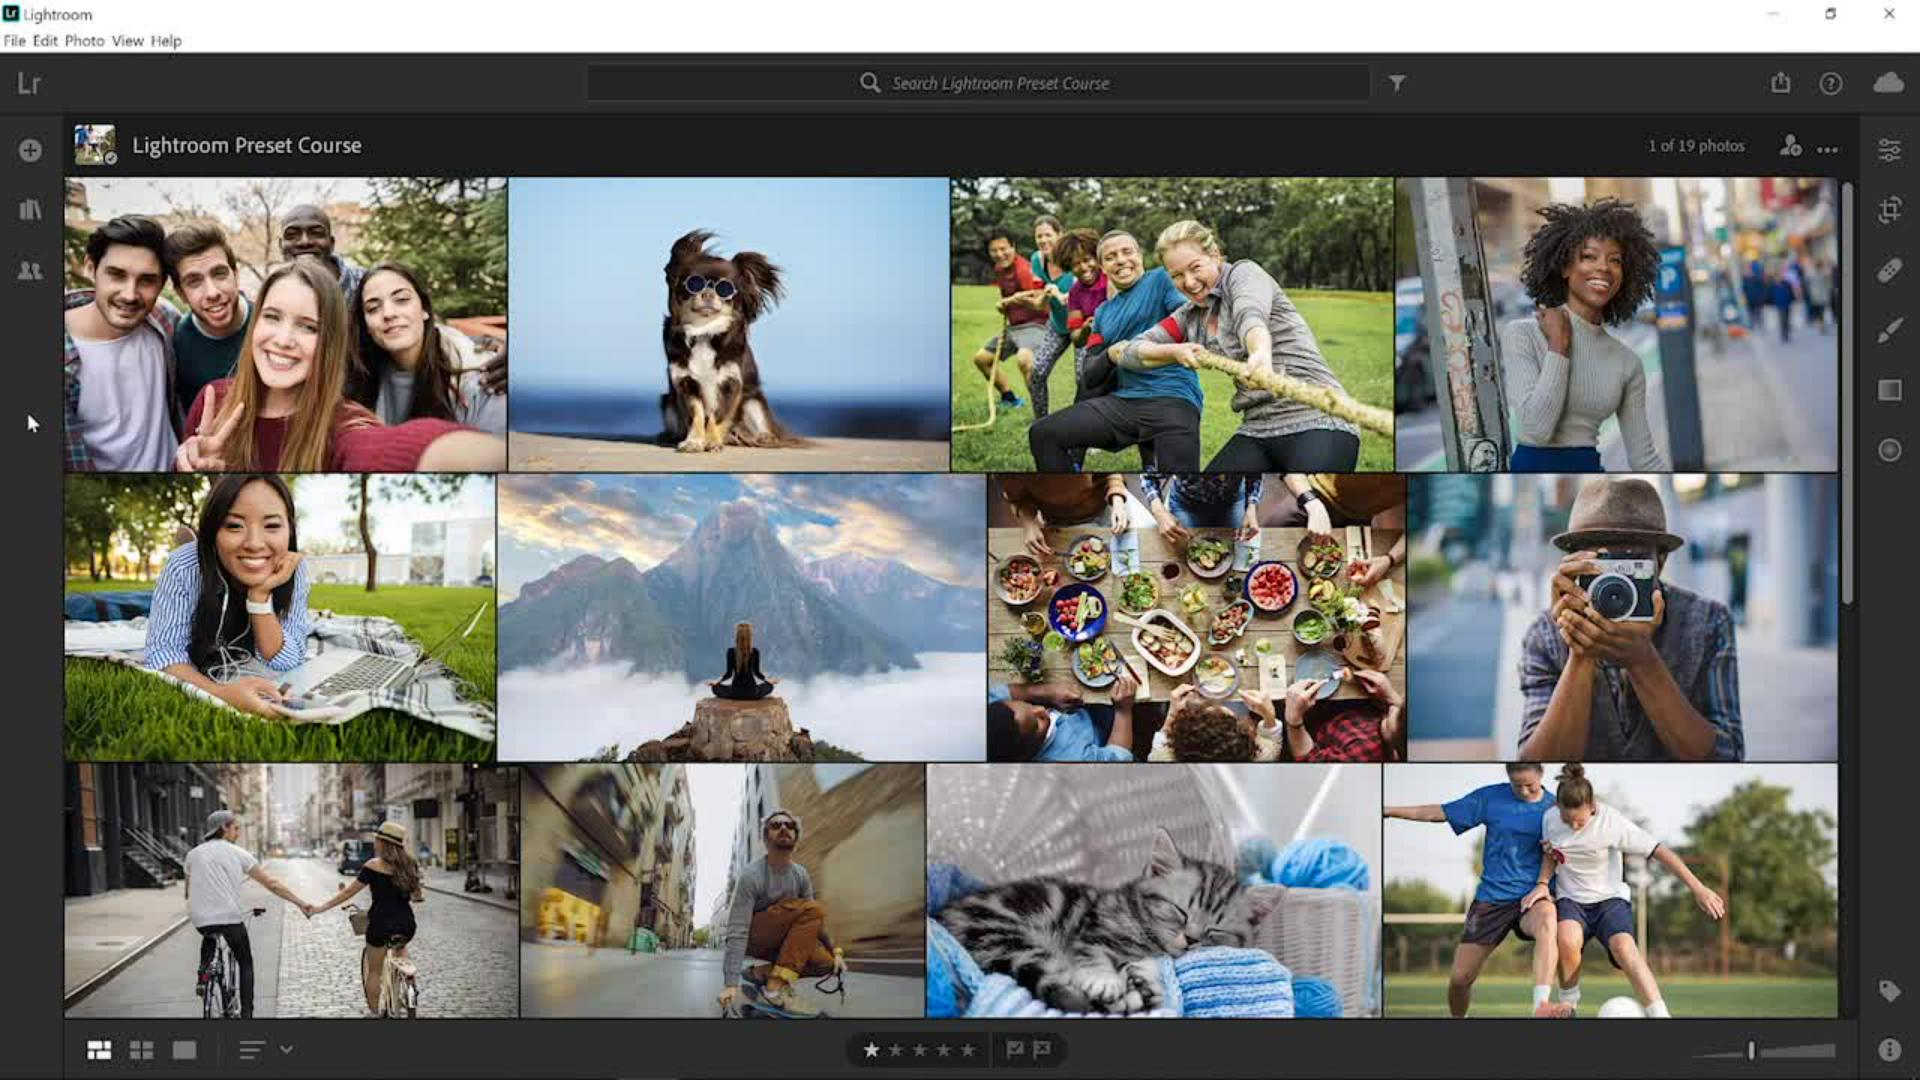
Once you import the sample photo into Lightroom, you will see it in the photo grid, double click on it to open it.
Understanding what presets are and how they work
Presets are a lot like applying a filter to a photo on a mobile app.
With one click, you can dramatically change the look and feel of your photo.
Unlike many mobile photo editing apps, presets are all editable.
A preset is nothing more than a predetermined position of one or more of the control sliders, so you can always adjust them to fit your needs.
Let me show you how they work.
Click on the Edit icon or press E on the keyboard to go into the Editing workspace.
Browsing and previewing preset categories
Then, click on the ... and disable Single-Panel Mode.
This will allow you to open more than one panel at a time and it will help illustrate how presets work.
Next, Open the Light, Color, and Effects panels, then click on the Presets button at the bottom of the Edit panel, that opens up a third column with the list of presets grouped into categories.
You can click on the name to expand the category.
Then, you can hover over each preset to see a live preview of how it will affect your photo.
And, of course, if you find one that you like, you can click on it to apply it.
Notice it as I hover over the presets, the sliders in the panels change.
The predetermined location of each slider or preset location of each slider is what gives each preset its look.
You can also use presets to help you learn what some of the editing controls do.
For example, when you hover over the Aged Photo preset in the Creative category, you will notice that the Whites slider is set to positive 40, which brightens the highlights.
In the Blacks slider, it’s set to negative 40 to darken the shadows.
This creates contrast in the image.
Customizing presets with manual adjustments
Also, in the Color panel, you will see that the Vibrance and Saturation sliders have both been reduced to de-saturate the image and make it seem older.
Next, I'll open the B&W presets and hover over them.
For this photo, I will go back to the Color category and select High Contrast & Detail.
Sometimes a preset will not be perfect for your photo, but you can always edit it to better match your image.
In this case, I think that the Contrast is too strong, so I can reduce it by dragging the Contrast slider to the left.
Another great feature is that you can apply multiple presets
Stacking multiple presets for creative effects
to an image to create more interesting effects, which means that you can stack presets on top of one another to further enhance your image and create more interesting effects.
For example, you could add Grain to this photo.
Expand the Grain preset category and hover over the Grain presets.
Notice that the original preset is left intact, we're only adding Grain.
The Grain slider is in the Effects panel.
Notice how the Grain slider changes as I hover over the presets.
I'll select Light because I don't want too much Grain on this photo.
You could also add a vignette on top of that.
Open the Vignette category and hover over the different presets.
Notice the Vignette slider in the Effects panel.
I'll select Heavy to add a strong vignette.
If you would like multiple versions of your photo with different presets,
Creating variations and resetting presets
you could go to the Edit menu and select Duplicate..., then click on the Film Strip icon and select the copy on the far left of the film strip.
To remove the presets that we've applied and start from scratch, you can reset your image to go back to the original by clicking on the ... icon and selecting Reset to Original, or you can press Shift R on the keyboard, then you can hover over the presets and find one that you like.
Click on it to apply it and now you have the same photo with two different presets.
As you can see, presets are very powerful and can save you a lot of time in editing.
You can even use them on Lightroom on your mobile devices.
Now that you know how to apply presets in Lightroom, go ahead and try them out on your photos.