Adobe Illustrator just got a seriously cool upgrade and it's called Generative Expand.
It uses AI to intelligently increase the dimensions of your vector artwork.
I'm Dave Clayton, and in this video, I'll show you exactly how it works and why it's a game-changer for your workflow.
We've got our vector artwork open and we want to explore how it might look at a larger scale.
Maybe something like a poster layout.
So, we're going to use Illustrator's new Generative Expand tool to quickly expand the design.
Our first step is to select all of the artwork, then look for the Contextual Task Bar.
That's the floating toolbar that pops up when something is selected.
You can also access Generative Expand via the Object, Generative Expand..., Make..., or from the Properties panel.
But honestly, the Contextual Task Bar is quicker and more intuitive.
Once you've got your artwork selected, you'll see the Generative Expand button appear and then you can click it.
You'll then get a bounding box around your design with handles.
This is where the fun starts.
You can drag out from the sides or corners to expand the space.
Hold Shift to keep proportions or Alt Shift to expand symmetrically on opposite sides.
You'll even see a little callout showing the dimensions as you drag, which is really handy for precision.
When you're happy with the size, just hit Generate.
Illustrator uses AI to fill in the expanded area, and you'll get three versions to choose from.
You can pick the one you like best and click Done to apply it.
You can still switch between the options if you want, just click Done again when you're sure.
And that's it.
Your design is expanded, clean, and still fully editable.
You can hit Generate again if you want different results or keep going.
Select the artwork again and add even more to your scene.
Let your creativity run with it.
It's also a good idea to resize the artboard when you're done expanding.
One cool feature to note for this is to use Object, Artboards, Fit to Artwork Bounds.
If you have multiple artboards on the canvas for different designs, then we can use Object, Artboards, Fit to Selected Art.
We can also use Generative Expand to fit artwork to specific sizes, for example social media posts.
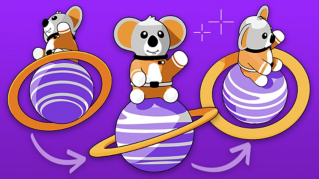
We've got this wide vector Space Party style graphic.
We're going to use the Generative Expand tool to intelligently add new detail above and below the artwork.
I've already set up two artboards, one at 1080 x 1080 pixels and the other at 1080 x 1920 pixels to make sure that we're expanding to the exact sizes, we need.
First, select the entire graphic using the Selection Tool.
You can either drag over everything or just press Command or Control A.
Now look up at the Contextual Task Bar and click on the Generative Expand button.
Use the guide handles to drag the boundaries to the top and bottom edges of the square artboard.
When you're ready, click Generate.
You'll get three AI-generated variations.
Just pick the one you like and hit Done to apply it.
Next, copy and paste that result into the center of the second artboard, the tall one, and repeat the process.
Drag the top and bottom of the 1080 x 1920 frame and click Generate again and choose your favorite version.
And just like that, we've created two new compositions from one original graphic.
And the best part?
Everything's still editable vector artwork.
Here's another common scenario.
We have our artwork for a print banner.
It needs to go to print, and we want to add the required bleed, but want to keep the current artwork exactly as it is.
Here we have our artwork for our print banner.
For this tutorial, we will set an exaggerated bleed of 20 mil so it's easier to see the results.
By comparison, the typical bleed setting of 3 mil or 1/8 of an inch is minimal, but this way we can see what's happening.
Let's quickly do this by using the new Generative Expand feature built right into the file when we add bleed in the document settings by going to File, Document Setup..., we'll set our exaggerated Bleed amount of 20 mil here and click OK.
You'll now see the bleed area around the artboard with a red-colored boundary.
Then select the new red print bleed icon in the upper-right corner of the bleed boundary to expand the art.
Three variations will appear in the Properties panel.
The first variation automatically appears on the canvas as a generative object on top of your original copy, indicated by the small blue icon on its bounding box.
Print bleed also creates a copy of your original artwork and generates the required bleed.
This new generative object group appears in the Layers panel with two subgroups Expanded Art with the parts created for the bleed area and Original Art.
You can always generate more if you need to, but for now we'll stick with that selection.
You can also select the Artboard Tool and then access Print Bleed from the Contextual Task Bar.
Now you have your bleed and your printer will be happy.
And that's it.
Generative Expand can help you ideate, expand artwork for specific sizes and make sizing bleed super quick without touching your original artwork.
These are smart ways to be creative and keep everything looking clean.
So, give it a go next time you're working with your vector files.
I've been Dave Clayton and thanks for watching.


