Introduction
With Photoshop's Generative Fill, you can quickly ideate for your designs, transforming your ideas into a reality with just a few clicks.
My name is Jesús Ramirez.
In this video, I'll show you how to use the powerful Generative Fill and Smart Object Layer Comps to create multiple design ideas and display them all in the same document.
The goal is to create several design ideas for my client's main image to use in their website, social media campaigns, and print advertisements.
This is a photo of an empty table in the restaurant.
We will use Photoshop's Generative Fill to add their signature dishes.
These generations will not be the final product, it's just a quick way to ideate and come up with options for our client.
The first step is to create a selection around the area
Creating selections with Generative Fill
where you want to place the new object.
You can use any Selection Tool for that.
However, the Selection Brush is one of the best tools to use alongside Generative Fill.
It allows you to create a selection just by brushing over the image.
Best of all, when you circle an area, Photoshop automatically fills in the inside.
The overlay shows the selected area where Photoshop will generate new content.
To do so, click on the Generative Fill button in the Taskbar and type the Prompt, empty white plate.
Then click Generate to create three images based on this prompt.
Now click on the arrow icons in the Taskbar to cycle through the results.
They all look great, but I like this one the best.
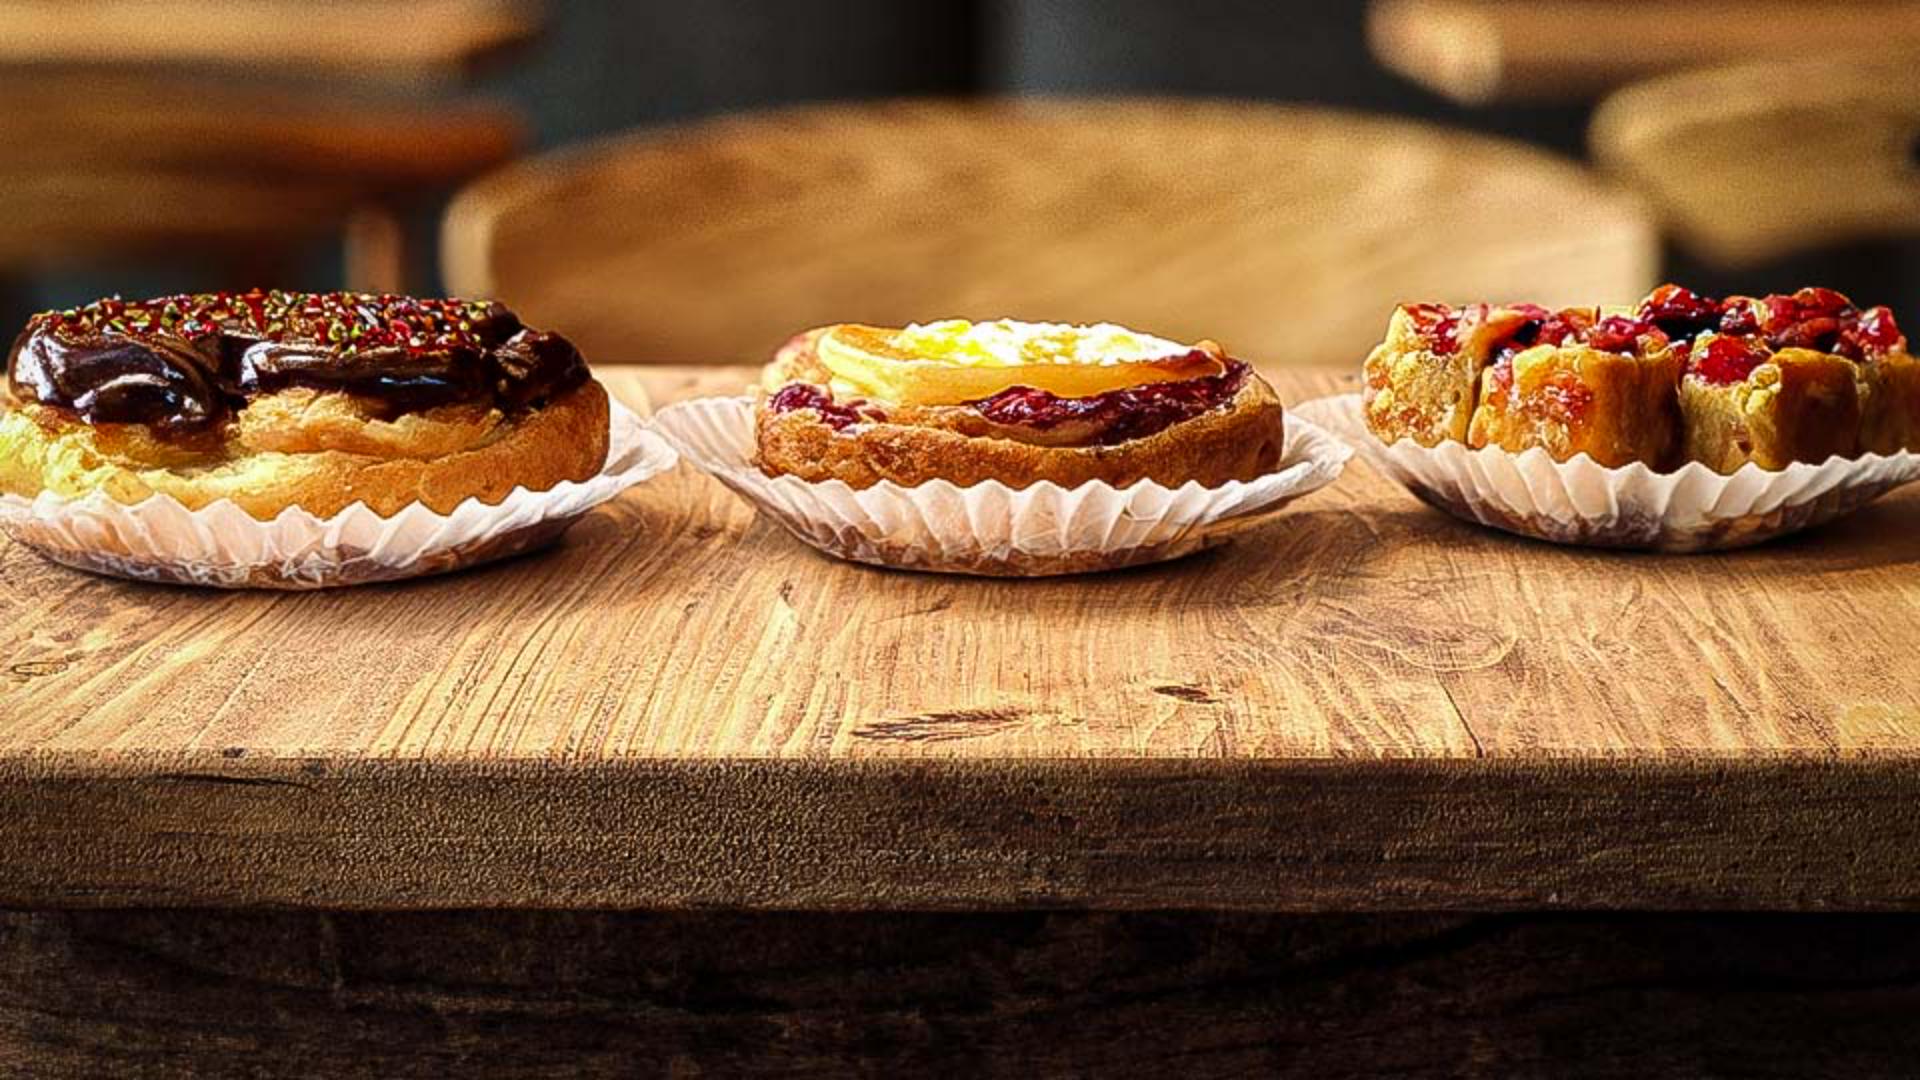
Now let's generate some of the signature dishes
Generating multiple food design ideas
this restaurant offers.
I'll circle this area on the plate, Photoshop will fill it in, and I'll click on Generate Fill from the Taskbar.
This time I'll enter the Prompt, lasagna with marinara sauce.
Then I'll tap the Enter key on Windows, which is the Return key on the Mac to generate.
You can also cycle through the variations by clicking on them from the Properties panel to choose the one you like best.
I'll go with this one.
Now disable this layer by clicking on the corresponding Eye icon.
Let's generate another of their signature dishes.
Create a selection over the plate.
This time I'll generate, spaghetti and meatballs. and Generate.
Again, cycle through the variations and choose the one you like best.
My client is also known for her pastries, so it might be a good idea to offer it as a possible design idea.
Disable all generative layers by clicking on their corresponding Eye icons, Increase your brush size by tapping on the right bracket key on the keyboard, then paint across the canvas and use the Prompt, assorted pastries, Generate, cycle through the results and choose the one you like best.
Planning design variations with Layer Comps
Now that I have all my design ideas, I need an easy way to display the different combinations of objects to my client.
One fantastic feature you can use to do this is nested Layer Comps.
This is one of the benefits of having generative AI integrated into Photoshop.
You can combine generative AI with non-traditional workflows to get things done fast and efficiently.
Let me now show you how Layer Comps work.
First, click on the topmost layer from the Layers panel,
Converting layers to a Smart Object and building Layer Comps
hold Shift and click on your bottommost layer to select them all.
Then right-click on the selected layers and choose Convert to Smart Object.
A Smart Object is a container that allows you to apply editable adjustments, distortions, and filters.
You can always make changes.
Now edit the contents of the Smart Object by double-clicking on it.
The contents will appear in a new tab, these are the same layers we were working with before.
Now go into Window and choose Layer Comps.
Layer Comps allow you to save and switch between different versions of layers in your document.
From this window, you can click on this icon to create a New Layer Comp.
All you need to do is give it a name.
I'll call it Pastries because this is the version of the document we're looking at.
Make sure Visibility is checked and press OK.
Now disable the assorted pastries layer by clicking on the Eye icon and enable the plate layer and spaghetti layer.
Click on the New Layer Comp icon and call it Spaghetti.
Press the Enter or Return key to commit the changes.
Now disable the spaghetti layer and enable the lasagna layer, then create a new Layer Comp and call it Lasagna.
When you're done, save these changes by pressing Control S on Windows, that's Command S on the Mac and close the Smart Object tab.
Presenting and switching design ideas for clients
Now in the main file, the one that contains the Smart Object, you can showcase these design ideas to your client in a clutter free environment.
To do so, go into the Properties panel and from this dropdown you will see the Layer Comps you created, select any of them and Photoshop will display that version of the image.
You can quickly cycle between them to show your client all the ideas you came up with.
Now that you know how to generate custom elements for your composites, try generating your own for your projects.
Again, my name is Jesús Ramirez.
Thank you for watching.


