For this tutorial, I'm using the Adjust Contrast - Highlights - Shadows.prproj file.
You can find that project file with the media associated with this tutorial.
Just double click on it to open it in Premiere Pro CC.
In Premiere Pro CC, I am using the Editing workspace right now.
You can reset that by clicking on the Panel menu in the workspace's panel.
Flat looking footage often has a good range of contrast available.
It just needs a little adjustment using the Lumetri Color panel to fill out the available dynamic range.
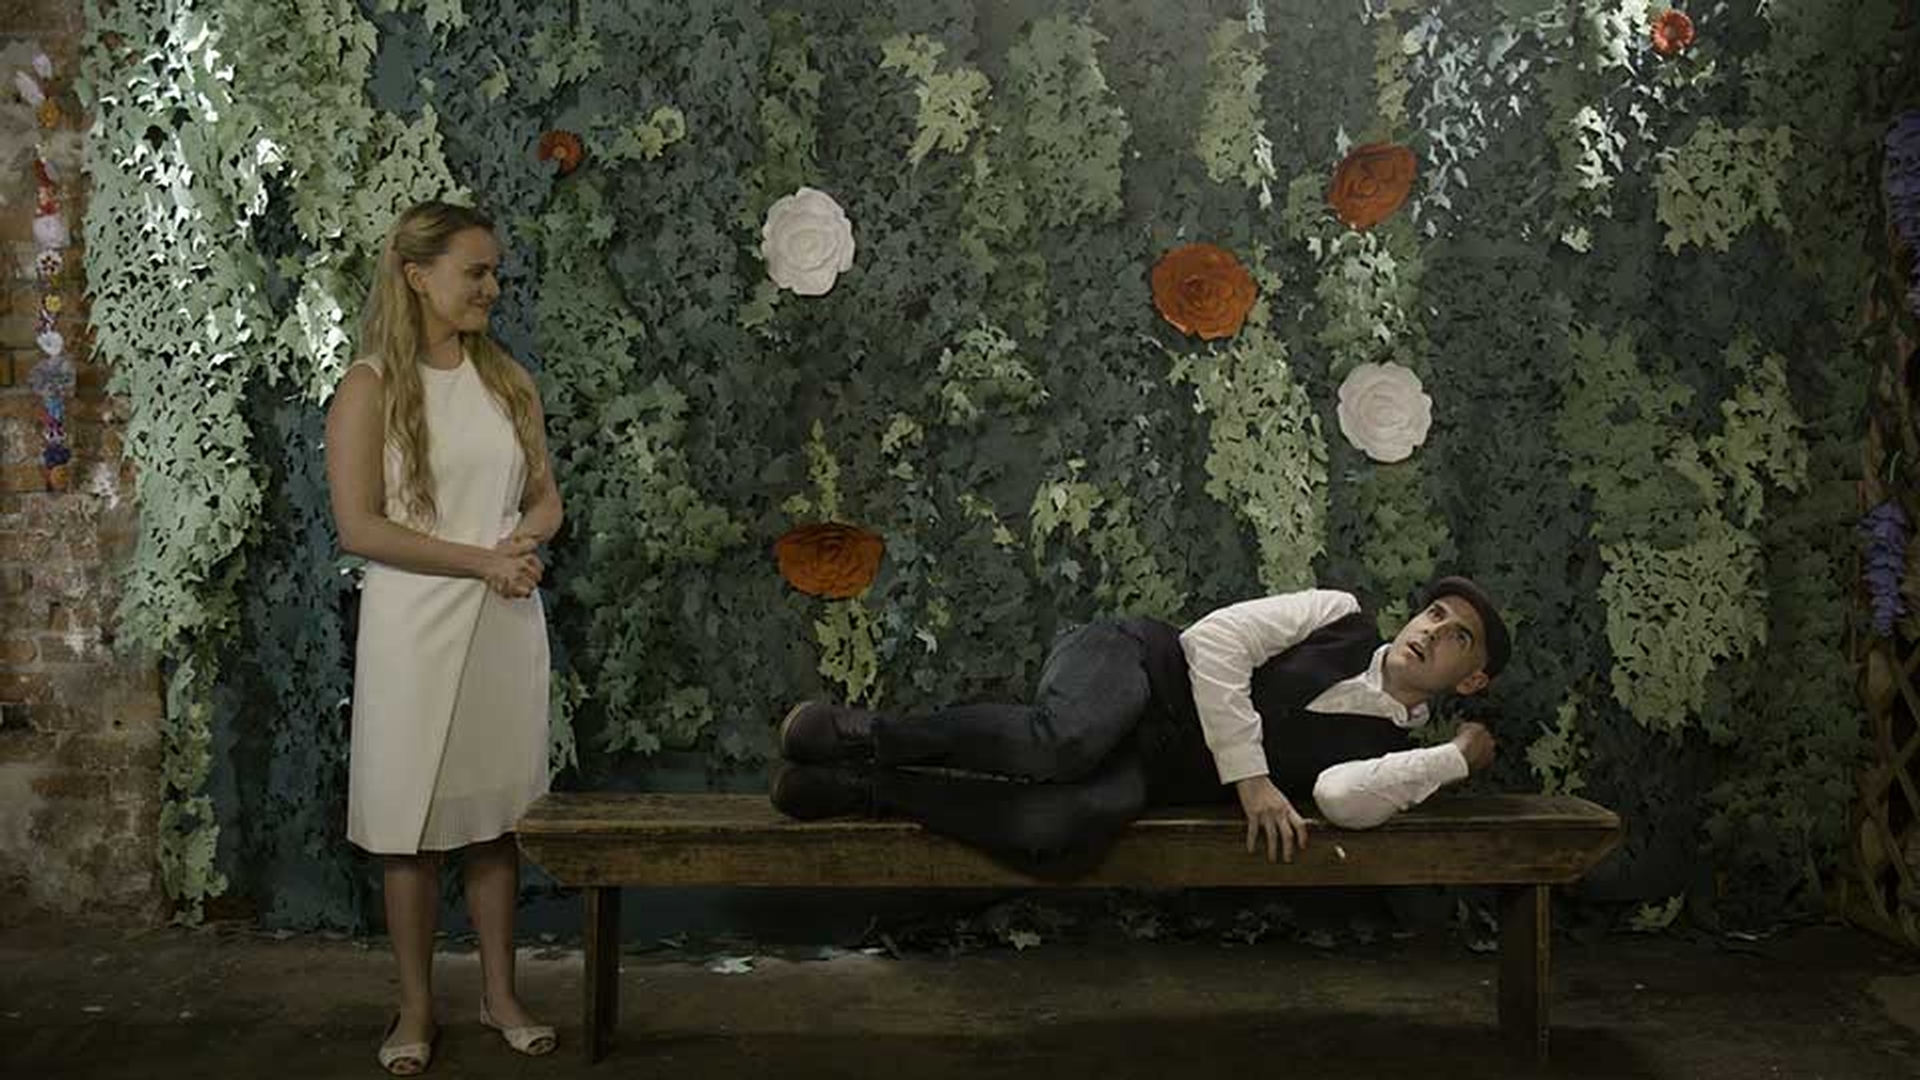
I have a shot here, for example, which is very interesting we got a lot of texture in the background, but it's definitely a little flat.
And that's because it was shot in a S-log 2.
I'm going to switch to the Color workspace.
And this workspace includes both the Lumetri Color panel and the Lumetri Scopes panel.
Both panels are available under the Window menu.
But by default, the Lumetri Scopes panel shares a frame with the Source monitor.
I'm going to make sure the first clip here in the sequence is selected.
And I'm interested in particular in the Tone controls here in the Lumetri Color panel.
Like the Effect Controls panel, the Lumetri Color panel makes adjustments to one selected clip at a time.
Now you can use an adjustment layer, or, of course, you can copy and paste effects, but you're always going to be modifying the controls one clip at a time.
In the Lumetri Scopes panel, right now I've got the Waveform (YC no Chroma) displayed.
You can access that by right clicking in the middle of the panel and choosing the Waveform.
And you want to make sure that under the Waveform Type sub menu, you've got YC no Chroma selected rather than one of the other options.
What's useful about the Waveform (YC no Chroma) is that it just shows you Luma.
There's no indication of color information here.
So, it's a little bit easier to see what's going on with the brightness in the image.
Even if you're not familiar with this Waveform display, it can be helpful to see the results of adjustments you make with these Tone controls.
Just drag a control from one extreme to another, and you'll see the Waveform display update.
Each green dot in the Waveform represents a pixel in the image.
And when a pixel is at the bottom, it's dark.
And when it's at the top, it's bright.
And though there are a couple of number scales here for you to refer to, we've got here IRE and the RGB 8-bit video scale.
Really, you can kind of see 0 is as dark as it gets, and 100 is as bright as it gets.
So, here I'm going to take the Exposure control and drag it right the way down.
And now I'm going to take it to the right and take it all the way up.
And you can see the result in the image and also in the Waveform.
You can reset any of these controls by double clicking on them - here, I´m double clicking on this Exposure control.
And we´re back to our default.
You'll notice that with the Exposure control, you'll generally get a more natural looking adjustment to the brightness of the image without going beyond these 0 to 100 IRE limits.
I'm going to just brighten this up a little bit.
Just to get those highlights up.
You can see where the leaves have caught the light in the corner of the screen here.
We don't want it to really burn out, but we want it to be nicely lit.
And as the horizontal axis of the Waveform display matches the horizontal axis of the image, you can see we've got these bright pixels appearing in the highlights of the image.
And now let's try each of the other controls.
I'm going to increase the Contrast, and you can see that expands the Waveform; it spreads it, so I get even stronger highlights.
But you'll notice these darker pixels are reaching further down as well.
And already the image is looking more natural.
Next up, I've got my Highlights.
And if I stretch this from one extreme to the other, you can see this is taking that middle high band and lifting it and dropping it.
Again, I'm going to pull this up a little bit.
The Shadows is the reciprocal range of pixels in the darker areas of the picture.
You can see it's pulling down that main band across the lower range of the Waveform.
Again, now the image is starting to come alive.
The Whites is the absolute highlights.
You can see it's stretching the whole image up there.
And the Blacks is the black level.
We can see as I pull this down, the darkest pixels in the image are hitting that zero line.
Now we've got a good range of contrast in our image.
Making adjustments to these controls really is a science and an art.
And there is no absolute right and wrong other than the delivery requirements for your finished medium.
That could be a broadcaster who specifies specific limits for the highlights and the shadows in the image.
It's worth noting that these controls adjust the brightness of the image.
They don't change the colors.
However, we do have a Saturation control here.
And as I increase this or decrease this, you can see it does have a minor effect on the overall brightness.
Let's pull this up a little bit.
Also, right at the top here in the Basic Correction section of the Lumetri Color panel, we have a Temperature and Tint option.
I can drag the whole image over towards the warmer end of the scale or the cooler end of the scale.
And you'll find very often when you're perhaps mixing interior and exterior lights in those more complex lighting situations, you might want to compensate for a tint.
And pull this towards the green or the magenta.
You want to be a little bit careful about putting too much magenta in.
It tends to make people look rather unhealthy.
I'll just double click to reset this control.
We're not working here with high dynamic range media.
But if we were, we could go to the Panel menu in the Lumetri Color panel and enable the High Dynamic Range options.
This allows us to bring the HDR Specular highlights - that's the very, very bright sections of the image much, much higher.
It won't show up here because, of course, we're not working with this type of media.
But if you've got the right media and the right output display, you'll really see the impact.
If you have downloaded the media associated with this tutorial, there are several other clips from the same location that you can experiment with using these controls.


