with Alex Trochut

Alex’s tip on an easy way to make a sophisticated shading effect in Adobe Illustrator.
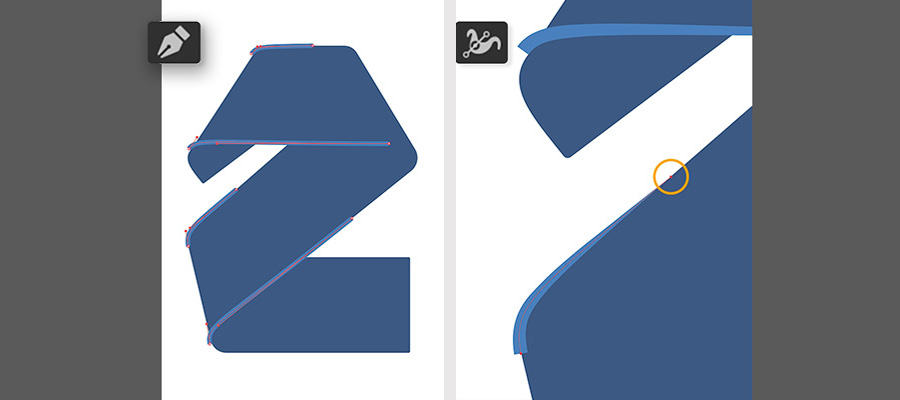
Draw two sets of lines along the top and left sides of the shape as shown here. To start, choose the Pen tool, set the fill color to none, choose a stroke color, and set the stroke weight in the options bar at the top. Then click to start the line, click and drag to create a curve, and click where the line should end. Press the Escape key to finish the line.
To taper the end of each line, choose the Width tool, select the point at the end of a line, and drag down to decrease the width of the stroke.

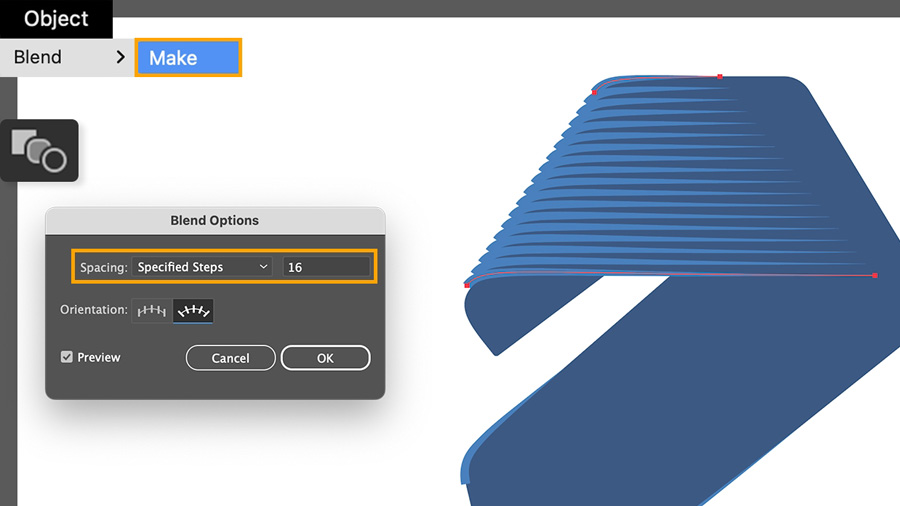
Create a repeating line-art design as an accent on the graphic. To do this, hold Shift to select the first and second line with the Selection tool.
Choose Object > Blend > Make to create the pattern. Then double-click the Blend tool to set the Blend Options to match the settings shown in the image.

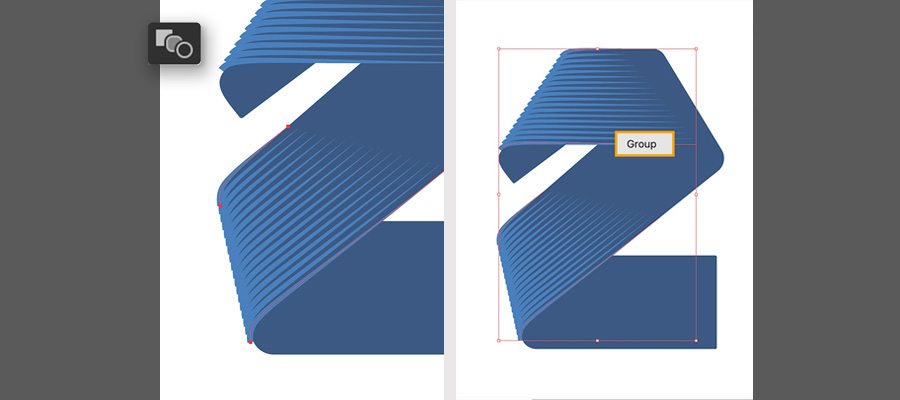
Blend the second set of lines using the previous steps. Then use the Selection tool to select both patterns and group them together (Object > Group).

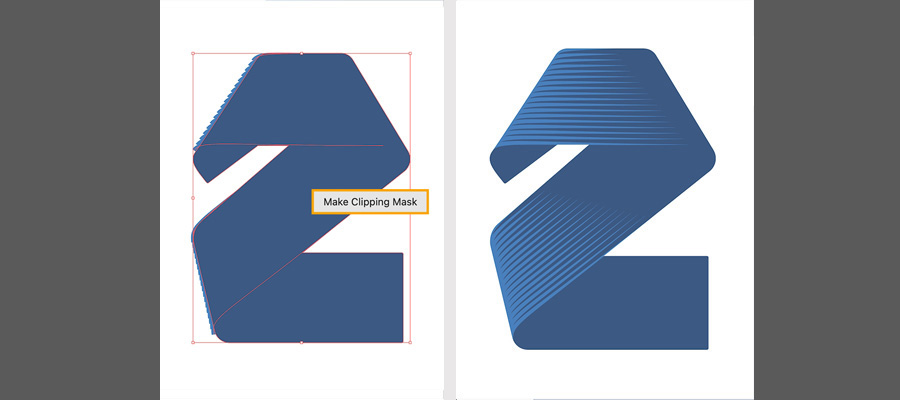
Contain the patterns within the shape. To do this, click to select the blue shape with the Selection tool, press Control+C (Windows) or Command+C (macOS) to copy it, and Paste in Place (Shift+Control/Command+V). Then drag with the Selection tool to select the shape and line patterns, right-click, and choose Make Clipping Mask.