Introduction
[Kristina Sherk]: Are you looking for easy ways to level up your portrait retouching in Lightroom?
Taking advantage of these AI-generated masks might be just what you're looking for.
Hi, I'm Kristina Sherk from Shark Pixel.
And in today's video, we are going to explore how using AI people masking can help you speed up your portrait retouching by selecting common facial features.
Detecting people and facial features with AI masking
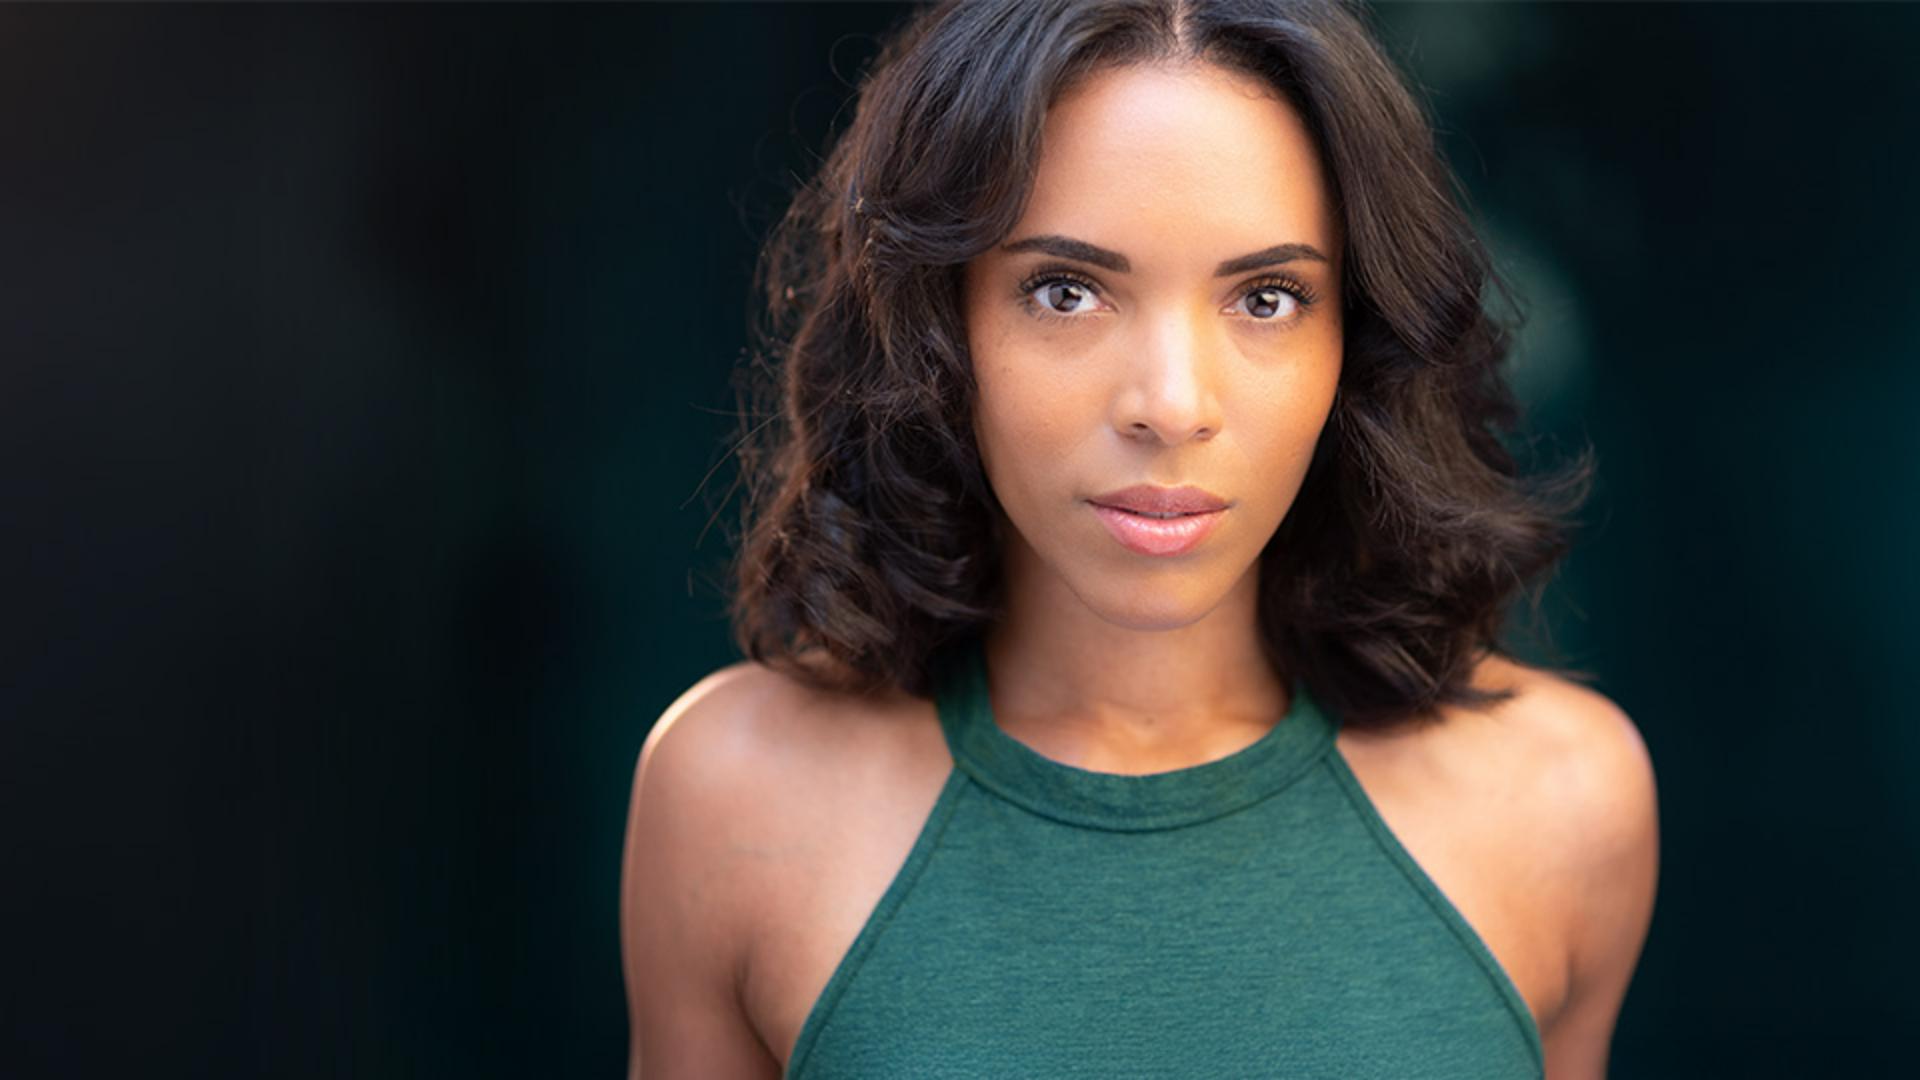
Let's go ahead and double-click this image to bring it into our Editing mode, and then I'm going to click on this icon for our Masking panel.
If I go ahead and open up this People section, you'll see that it's detecting the photo and it finds all of the faces in my image.
Let's go ahead and click on Person 1, and you'll see that we get a few choices here that the AI has detected.
We've got our Entire Person, Facial Skin, Facial Skin, Eyebrows, Eye Sclera, Iris and Pupil, Lips, Teeth, Hair and Clothes.
I want to go through and pick a couple of these.
Let's start with Facial Skin, let's also check Eyebrows, Eye Sclera which are the whites of the eyes, Lips and Clothes.
I don't want to make the same adjustments to all of these aspects or features of my portrait, so I'm going to need to click one last button to make sure that all of those are created separately.
Create 5 separate masks.
Let's go ahead and hit Create.
And now back in our editing section, you can see our little Masks area here has been created with all of the different masks.
How amazing!
I haven't done any freehand masking, it's all done right there for me.
I can click and drag this out.
It can float around or I can go ahead and nest it on the side there.
Let's start with Facial Skin.
Smoothing and refining facial skin
What I want to do is come down to my Effects panel, and I'd like to click on Texture here and add -20 Texture, -25 Clarity but then for the Grain, just to bring back a little bit of texture on that skin, we're going to add +15 for the Grain.
If I click on this Eye icon right here, you'll be able to see the skin smoothing be visible and then hidden.
That helps me always make sure that my retouching stays realistic.
Let's go on to our Eyebrows mask.
Enhancing eyebrows and eye whites
Let's come up to our Light section.
We'll click on our Exposure here and we're going to put a -0.52 and press Enter.
And that's going to just slightly darken those brows I think that looks good.
Let's move on to the eye whites or Eye Sclera.
I want to just slightly increase the Exposure within the Light section again, and we'll do that by just adding 0.20% increased Exposure.
And then another tip that I have is when you're dealing with temperature of your eye whites as you age, our eye whites go from blue to yellow in undertones, so a subliminal way to add youth to your image is just to make those eye whites slightly bluer - not by much, just by -4.
For our Lips, I'm going to just add a little bit of pink,
Adjusting lips and recoloring clothing with masks
maybe 13 for our Tint slider.
Then I'm going to come to my Saturation slider and bump that up as well, just to really make that lip gloss pop.
Let's move on to our Clothes mask.
Let's go ahead and decrease the Exposure just about one stop.
And then what I want to do is come into my Color area, and I'd actually like to add a color to this shirt to make it just blend in a little bit more with the background.
Let's go ahead and activate our color overlay by clicking on the word Color.
Now I'm going to click and drag this little circle all the way up to a warm green color.
The color of the shirt is going to look different than the color that we are adding.
And that is because the shirt is going to be a blended color of the natural bright blue that we originally had in the shirt, with the yellowish green that we are adding.
The final result is a nice muted teal color, which really blends and works well in this image.
Let's go ahead and just preview the before and the after of the shirt.
We'll go ahead and click and drag using that bar at the top
Reviewing and fine-tuning the portrait retouching
and drag and drop our Masking panel.
And then we're going to use the master Eye icon at the top to click on and off.
And you'll be able to see the changes that we made with those specific masks.
There is one thing that I'd like to change about the lips.
I think I want to add just a little bit more contrast to them.
So I'm going to click on my Lips mask, I'm going to come down to my Light section, and I'm just going to increase that Contrast, just create a little bit more pop in that lips area.
Let's just check our work one last time using the master Eye icon at the top-right of my Masking panel.
And there you have it.
These AI-generated masks in Lightroom are a powerful tool to help your portrait retouching become a breeze to complete.
Next time you have a portrait, try out one or more of these amazing feature masks to help you start working smarter, not harder.