| 1 |
Select the lizard stripe object on the left with the Pointer tool. |
| 2 |
If the Fill inspector is not already open, choose Window > Inspectors > Fill to open it.
 |
| 3 |
In the Fill inspector, choose Gradient from the list at the top of the inspector. |
|
The selected object fills with a black and white graduated gradient fill. |
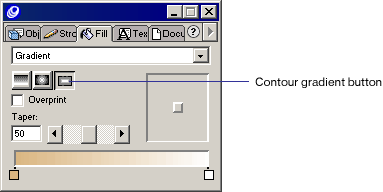
| 4 |
Select the Contour gradient button.
 |
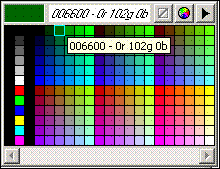
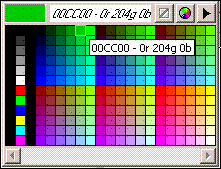
| 5 |
Click the color swatch at the left end of the color ramp, and choose the dark green swatch shown below from the pop-up color palette. The left swatch sets the color for the outside of the contour gradient.
 |
| 6 |
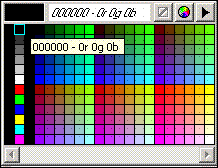
Click the color swatch at the right end of the color ramp, and choose the black swatch shown below from the pop-up color palette. The right swatch sets the color for the inside of the contour gradient.
 |
| 7 |
Click the color swatch at the left end of the color ramp and drag it to the center of the color ramp. A new swatch appears in its place. |
| 8 |
Click the color swatch in the center of the color ramp and choose the light green swatch shown below from the pop-up color palette.
 |
| 9 |
Drag the Taper scroll bar to the right to set the taper at 75. The higher the Taper setting, the more the contour colors blend together.
 |
| 10 |
Repeat steps 1 through 4 for the lizard contour object on the right. |
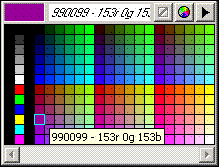
| 11 |
Set the left swatch to the brick red swatch shown below.
 |
| 12 |
Set the right swatch to black. |
| 13 |
Drag a new swatch from the left to the center of the color ramp and set the center swatch to the magenta swatch shown below.
 |
| 14 |
Set the Taper to 99.
 |
 |
|


