For this tutorial I'm using the Assembly workspace.
You can reset the workspace by double clicking on the Assembly name in the workspaces panel.
I'm just clicking Yes to confirm.
The Project panel has three views.
List view gives access to information about your clips.
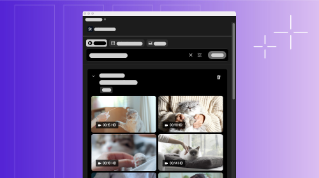
Icon view displays clips as thumbnails.
You can hover the mouse pointer over a thumbnail to preview the clips contents and you can drag clips around into new positions and they'll always snap to a grid.
Freeform View also displays clips as thumbnails, but they're unrestricted by the grid.
You can position them anywhere you want including overlapping.
You can create stacks of clips that you think might be interesting to place together in a sequence.
I'm going to double click on the Project panel name to set it to full screen, so we can see this process more clearly.
I have two types of content, so I'm going to group them based on their visuals.
But right now I can only see one set.
If I scroll down, you'll see the other media.
I'm going to start by using the Zoom control to zoom out and make these thumbnails smaller.
Now I'm going to grab these nature shots and I'll create a little stack from them.
I'm particularly interested in these nature clips.
So I'll select them, right click and choose Clip Size Extra Large.
In Freeform View, you can assign different clips sizes to help organize your content.
Now I'll increase the zoom.
And notice the relative clip sizes and positions are maintained. when you zoom.
You can zoom using Option in Mac OS or Alt in Windows while scrolling the mouse wheel.
You can also pinch on a trackpad, use the plus and minus keys at the top of your keyboard, and of course you can use the Zoom slider.
If you double click the Zoom slider, it'll reset.
You can pan around the Project panel using two finger dragging on a trackpad. and in fact I'll just double click on the Project panel name here, so I can access the Hand Tool.
And using this tool, you can pan around as well.
I'll just go back to my Selection Tool, and double click on that Panel name again to set it to full screen.
I can tidy up the view by selecting clips, right clicking, and choosing Align to Grid.
If no clips are selected, and you right click on the background of the Project panel all the clips will be aligned.
And notice there is a Reset to Grid option that allows you to specify some sorting options.
You can preview the contents of multiple clips by hovering the pointer over them.
To bring clips to the front, hold Command in Mac OS or Control in Windows while scrolling.
Hold Option in Mac OS or Alt in Windows to snap clip edges together.
This is useful if you want to create a storyboard of your various clip thumbnails.
If you find a particular arrangement is helpful, you can store it and reuse it.
Right click on the background of the Project panel and choose Save as New Layout.
I'll call this Freeform 1.
Now I'll make some changes.
And I can always restore the layout by right clicking and choosing Restore Layout followed by the name I gave it.
You can store multiple layouts of course and manage them by right clicking on the background of the Project panel and choosing Manage Saved Layouts.
There's that layout I created, I'll select it for deletion and click OK.
Use the panel menu in the Project panel to choose the Freeform View options.
And here you can specify the types of metadata that will be displayed.
By default you'll have the clip name, but you can also add a second line of metadata.
In this case I'll scroll down and I'll choose Video Duration.
You can also specify whether label colors and badges will be displayed on your clips.
I'll click OK.
And now I have that Vdeo Duration added.
That's the Project panel Freeform View in Adobe Premiere Pro.


