Introduction
In this video, your will learn how to create your own photo vignettes with the radial gradient in Lightroom CC.
You can follow along with any photo or you can download the sample file from the Adobe page for this tutorial.
Once you import the sample photo into Lightroom CC, you will see it in the Photo Grid.
Double click on it to open it.
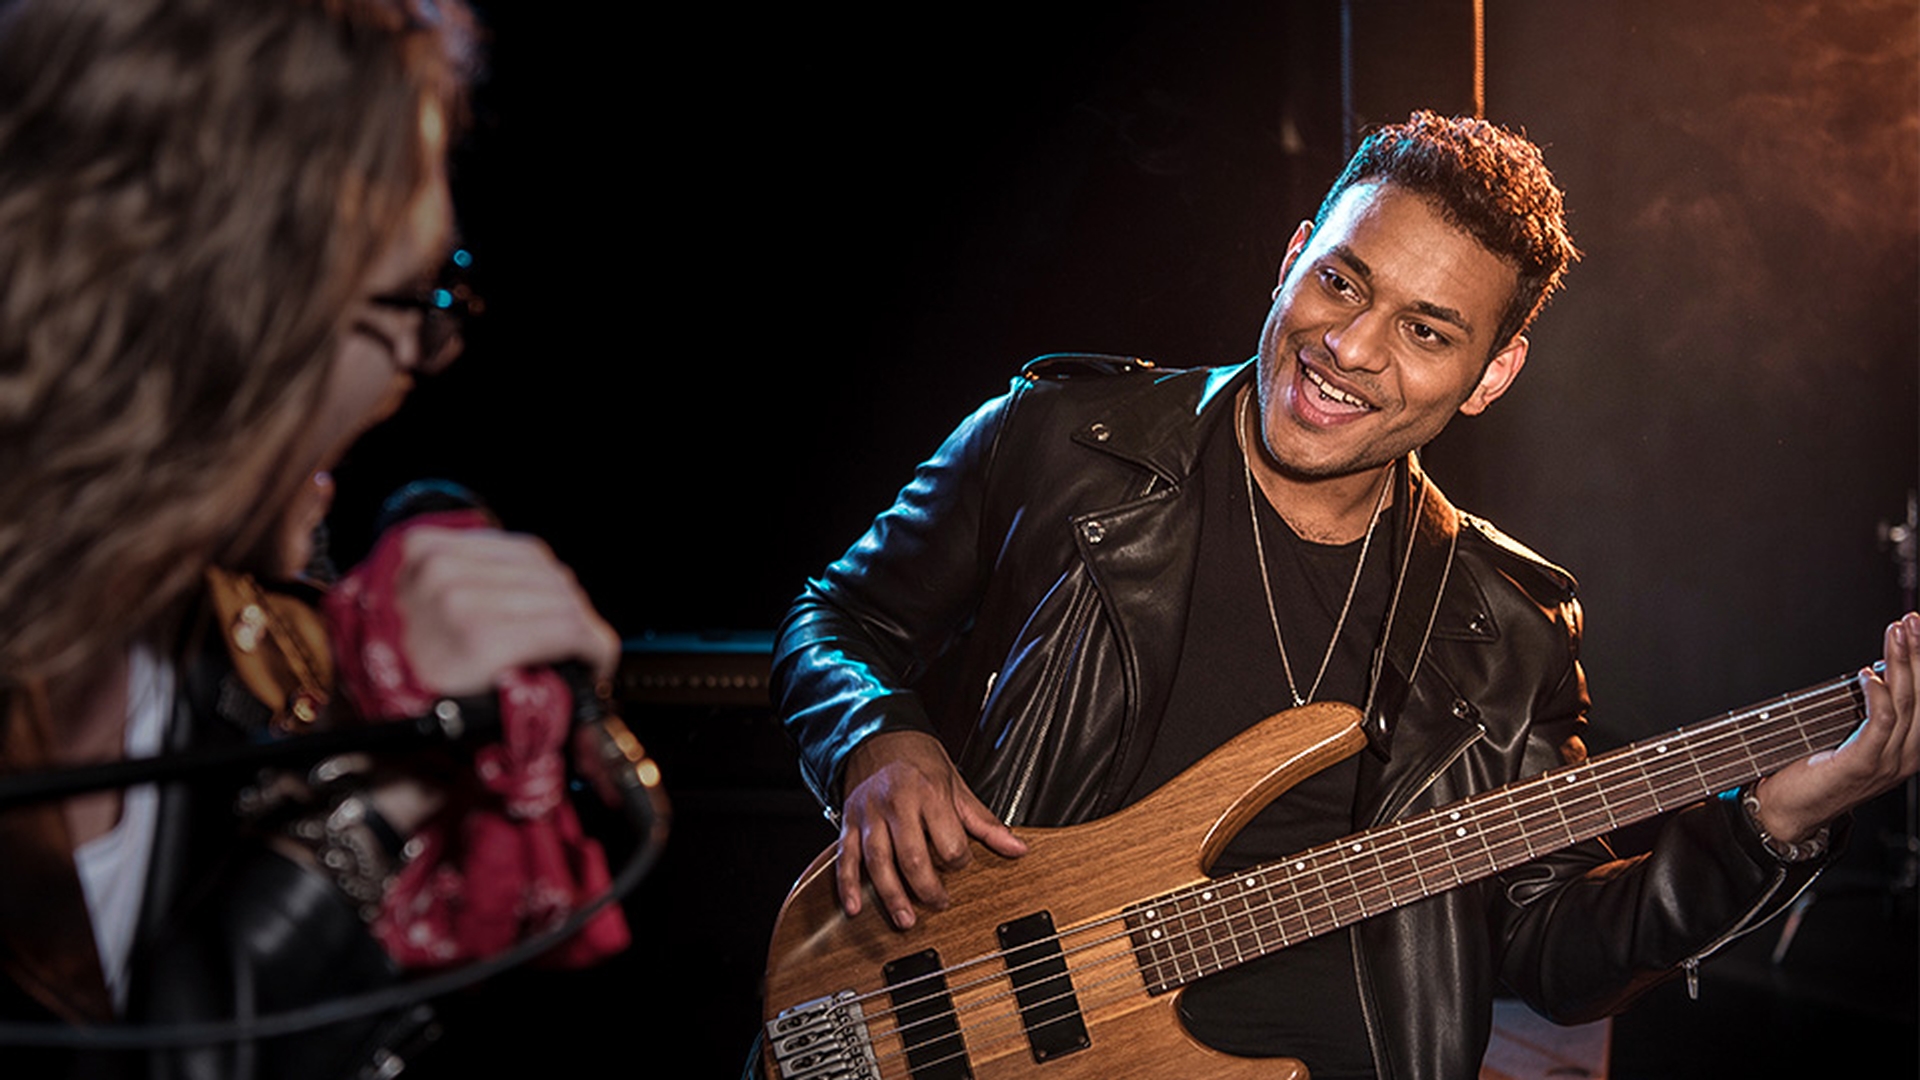
In some photos, you may want to guide your viewers' attention to a focal point that is not in the center of the image.
In this photo, the focal point is the guitarist off to the right.
There is also another person on the left side that is distracting from the focal point.
In this video, we will use a radial gradient to create a custom vignette that will draw the viewer's attention to the guitarist.
Creating and positioning a radial gradient
Click on the Radial Gradient icon which will open the radial settings.
These are not global adjustments, they will only affect the radial gradient that we create.
Also, these are sticky settings which means that Lightroom CC will remember the previously used settings.
To reset the settings to default, right click on any slider and select Reset All Sliders.
Two ways to create a radial gradient
There are two ways of creating a radial gradient.
First, you can hold the Control key on Windows - that's the Command key on the Mac - and double click anywhere on the photo.
This will create a radial gradient that fills the entire image.
I'll reduce the Exposure, so that you can see the effect.
If the darkening effect is in the center, then click on the Invert checkbox to move it to the edges of the image.
In this example, we want to bring attention to the guitarist who is not in the center of the image.
If you don't see the overlay, press the O key to cycle between the different overlays, then right click on the pin and select Delete.
The second way of creating a radial gradient is by clicking and dragging directly over the image.
The point where you click on will become the center of the gradient, so click in the center of the guitar's body and drag out to make the gradient larger.
You can reposition a gradient by clicking and dragging on it and you can adjust the shape of the gradient by dragging any of the four transformation handles.
You can also rotate by hovering outside of the transformation handles and clicking and dragging when you see the double-sided curved arrow.
Now, fine tune the gradient so that it covers the guitarist, then use the Feather slider to control the sharpness of the edge of the gradient.
Make sure that the edge is not noticeable.
One of the advantages of creating vignettes with the radial gradient
Enhancing a custom vignette with effects
is that you can include multiple effects in your vignette to help add more attention to the focal point.
For example, you could add negative Clarity to remove mid tone contrast which reduces detail.
You could also blur the vignette by moving the Sharpness slider to the left, and you can even reduce Saturation to help the guitarist stand out more.
In this case, cooling the image will also help because the guitarist has warm colors.
Keep in mind that in your image, you may only need one of these adjustments or a combination of many others.
To further draw the viewer's attention,
Creating a spotlight effect with duplicated gradients
we can create a second radial gradient that only affects the guitarist.
Right click on the radial gradients pin and select Duplicate.
Now we have an identical copy of the original radial gradient, then uncheck the Invert checkbox so that the adjustments affect the inside of the radial gradient instead of the outside.
Use the transformation handles to resize the gradient.
Make sure that the gradient only affects the guitarist and keep it tall so that it creates the illusion of a spotlight.
Now apply the opposite effects that you applied in the first radial gradient to create contrast and attract more attention to the guitarist.
Start by increasing the Exposure then warm up the image by dragging the Temp slider to the right, increase Clarity to add contrast in the mid tones and make the guitarist pop.
Then add Saturation and increase Sharpness.
If you want to make the edges of your image even darker,
Finishing with a traditional vignette and review
then you can add a traditional vignette.
Click on the Edit icon then open the Effects tab and drag the Vignette slider to the left.
Click on the Show Original button to see the original image and click again to see the edited version.
Notice that with these simple adjustments, we were able to bring a lot more attention to the guitarist.
These adjustments are not permanent.
You can go back into the Radial Gradient, click on the gradient pin and edit the gradient.
There is no need to save when you're done, Lightroom CC automatically syncs your adjustments to all your devices and you can edit them at any time.
Now you know how to create your own photo vignettes with the radial gradient in Lightroom CC.
Go ahead and try these techniques on your photos.