Introduction
One of the most enjoyable things about photography is sharing your photos.
And Lightroom offers several ways to do this.
Whether you want to save a copy of an image to your computer, to post to social media, or you want to share an entire album that can be viewed online.
Hi, I'm Seán Duggan from the Adobe Learn team.
In this tutorial, we'll cover how you can get photos out of Lightroom and start sharing them.
As I mentioned earlier in this tutorial series, you don't have to do anything special to save the work that you do in Lightroom.
This happens automatically as you're working and includes any changes you make to your photos in the Edit panel, any flags and ratings you may have added or albums you've created.
It's all saved and backed up to the Adobe Cloud.
But there might be times when you need to save a copy of a photo
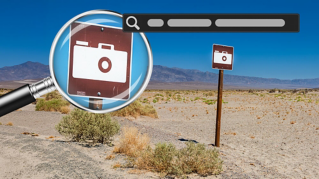
Exporting photos from Lightroom
to your computer for another purpose.
To do that, you need to export the photo.
When a photo is selected, you can access the Export options in the File menu, or you can also just click the Share icon in the upper right.
In the top section of the Share menu, are options for exporting a copy to your hard drive, there are presets for saving small and large JPGs, as well as exporting a copy of the original, plus, any settings you've applied in Lightroom.
If you want to export with different image dimensions
Customizing export settings and watermarks
or use another file format, click Custom Settings...
The options in this window will vary depending on which image type you choose.
I'll leave this set to JPG.
The Presets menu provides access to the same export presets that we saw in the main Share menu.
In addition to the image dimensions and quality, you can also choose to add a watermark on your photos if you wish.
Click the Gear icon to customize the appearance and placement of the watermark.
You can even choose to use a Graphic as a watermark.
For this example, I'll turn that option off.
There are several other settings that you can customize, including the metadata that is saved with the photo, the file name, sharpening, and the color space.
For photos that you'll be posting on the web, sRGB is the best choice.
Since I've already set up my Content Credentials, I'll choose to include those.
Click this icon to learn more about Content Credentials.
When you have the settings configured the way that you want, click Export in the top right.
I only have a single photo here, but you can select and export multiple photos with this feature.
You can also share a photo or several photos with other people,
Sharing photos online with share and invite
so that they can view it online in a web browser.
Let's see how that works.
This time I'll select multiple images by clicking one and then Command- or Control-clicking on a few others.
I'll go back to the Share menu in the upper right and I'll choose Get a Link.
In the Share & Invite window, you can set the Link Access to Anyone can view, or only those people that you specifically invite.
And here you can see the link that Lightroom has created.
Click the icon of the Clipboard to copy this, and then you can paste it into an email, a text message, or include it in a social media post.
If you want to share with specific people, you can add their email addresses in the Invite section.
If you're sharing with people who also use Lightroom, the photos will appear in the Shared Album section of their Lightroom program, and these three icons set their access to Can View, Can Contribute, or Can Edit & Contribute.
There are also other options for customizing the display of the images on the web, as well as additional settings including allowing comments and likes.
I'll click Done and now that link can be accessed online.
Viewing likes, comments, and shared activity
Let's see what this looks like in a web browser.
If I click on an image to view it larger, I can click the Heart icon to add a like and I can also add a comment.
Back in Lightroom, the Activity icon in the lower right will display any likes or comments that have been added to the photo.
In the Shared tab of the Albums panel, you'll see any photos that you've shared with the Share & Invite window.
You'll also see Lightroom albums that have been shared with you by other people, and albums that you have shared.
Managing shared albums and access settings
To share one of your albums, right-click its name and choose Share & Invite... to access the same sharing options.
Albums with a Globe icon indicate photos that have been shared, so that anyone with a link can view them.
An icon of two people indicates albums or photos that are shared only to invited people.
Right-click the album name to modify the Share & Invite settings, or to Stop Sharing the photos.
Now that you know how to export copies of photos to your computer, as well as how to share directly from Lightroom using Share & Invite, give these features a try and start sharing your own photos.
I'm Seán Duggan with the Adobe Learn team.
Thanks for watching.