Introduction
Layers are elements used to make compositions.
And they give you flexibility to control the appearance of a composition because each layer has its own set of parameters allowing you to position each one independently.
In this composition, we're going to make adjustments to our layers to fine-tune the appearance of this title animation.
Let's start by going down to the Timeline and clicking in the empty area here at the bottom to make sure none of the layers are selected, and that the Timeline panel is active.
Go ahead and press the Spacebar to preview the animation.
And you'll see as the Current Time Indicator moves down the Timeline here, you'll see more and more layers built into the scene.
I'll press the Spacebar to stop playback.
I pointed this out because I want you to know that the right side of the Timeline is dedicated to controlling when layers appear over time.
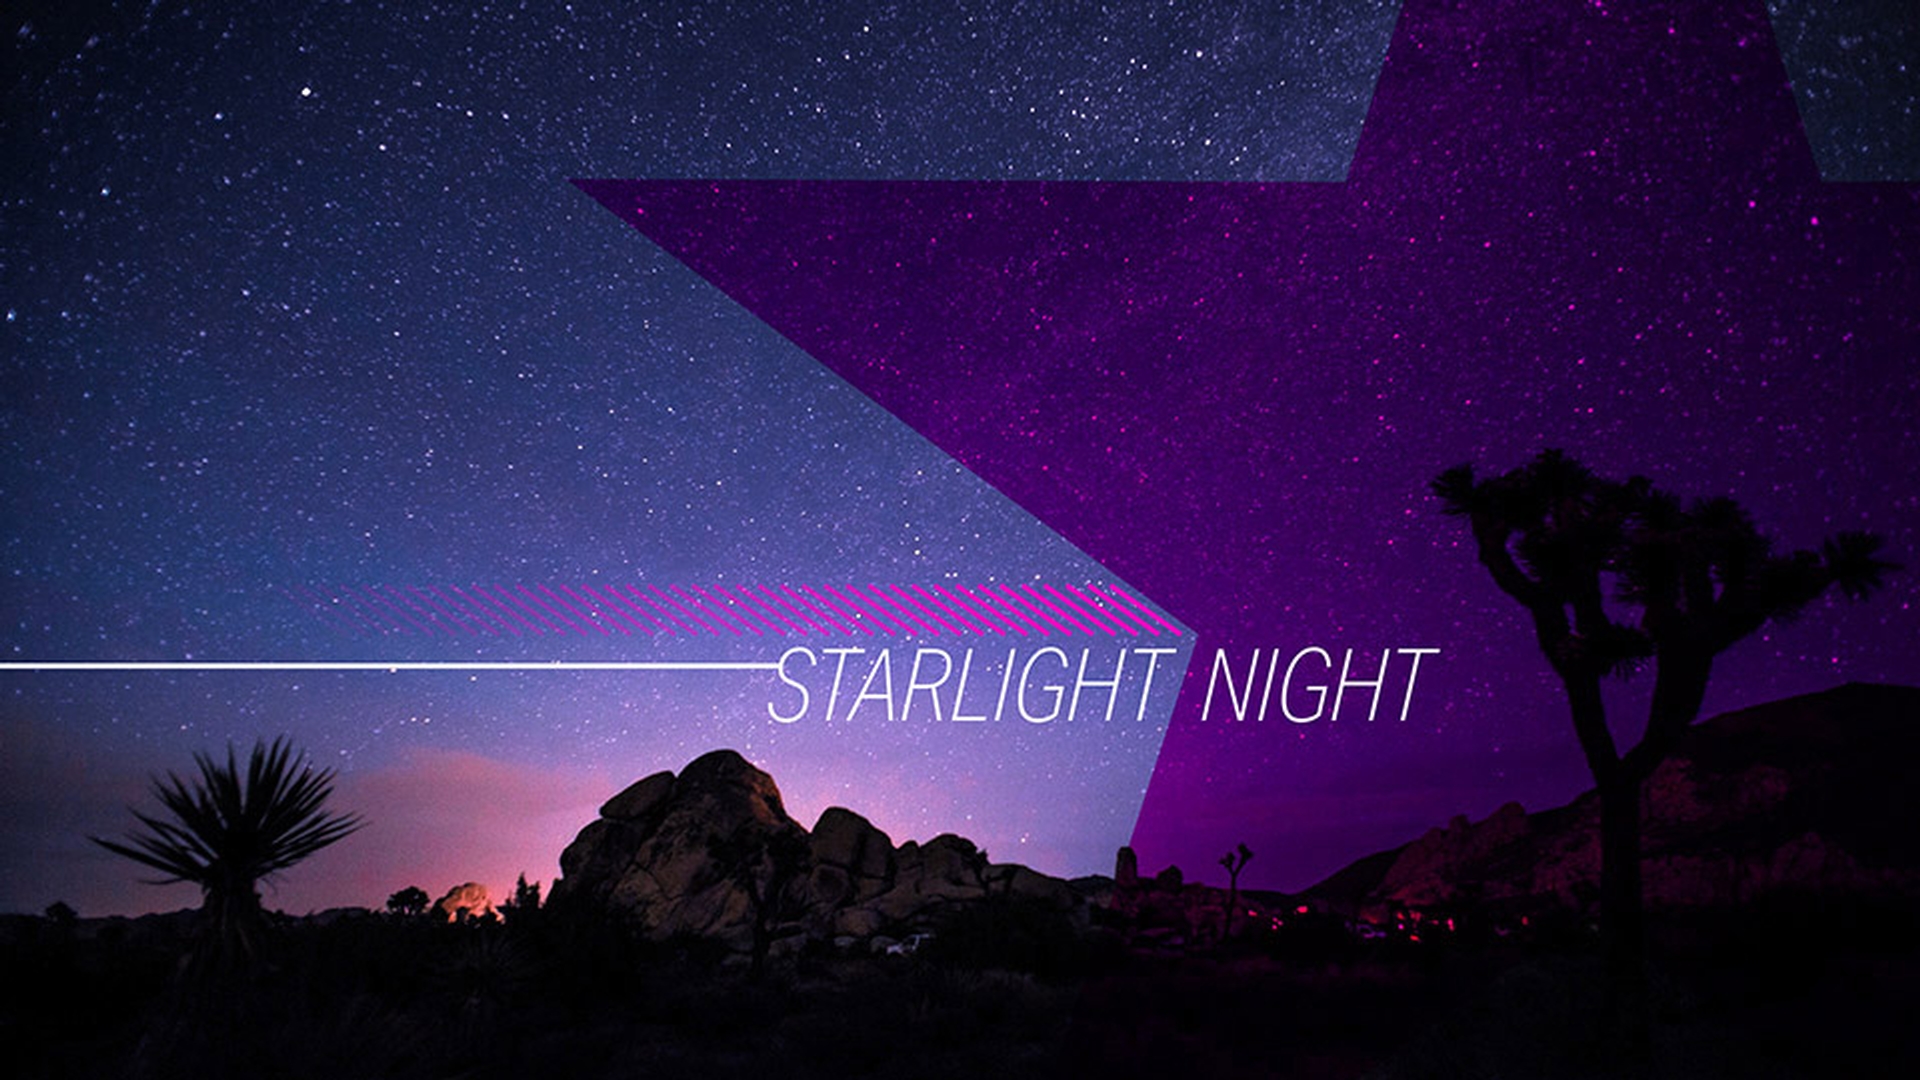
Now, in looking at this title animation, this pink star is really dominant.
Adjusting layer appearance with blend modes
And I'd like to blend it back into the background.
So, when you want to make adjustments to layers, you have to look at their options.
I'm going to go to Layer 3 and select it.
And to see the options for that layer, I'll open up those options with the triangle on the left side.
And since this is a shape layer it has Contents.
But it also has Transform options.
Every visible layer in an After Effects CC composition will have Transform options.
Now notice down here at the Opacity I have a blue stopwatch.
And I have these little diamonds here.
These are Key frames which create animation which means this layer is fading in over time.
And If I click and drag on this layer, notice the Key frames are tied to the individual layer.
Now I'll press Control Z or Command Z to undo that last slide there because I want to blend this layer back into the background without using the Opacity setting.
In the middle area of the Timeline, these are called Switches.
And at the bottom, there is a button where I can Toggle Switches / Modes.
Modes are blend modes.
If you use Photoshop CC, you're probably familiar with them.
Let's click on the Normal dropdown for Layer 3.
And to blend this back, I'd like it to be darker with everything else, so I'm going to go to the Darken section, and I'll choose Multiply.
And now this is blending into the background and making the star purple which I think is great.
Now I'll collapse the options for Layer 3 and see what else we can do to kind of fine-tune this animation.
Enhancing title contrast using solid layers and blend modes
As I'm looking here, at the word Starlight, it pops off the background but not quite as much as I would like.
So, I'll go down to Layer 6.
This layer here is a solid; it's called a solid layer.
Now if I open up its options, it only has Transform options.
Now if you look on the left side of the Timeline, notice the Eyeball is off here.
So, if I turn it on, now I can actually see that layer.
So, if I hover over any of these parameters, I can scrub on them by clicking and dragging.
So, here I could scrub the Opacity down.
And honestly that's not very exciting.
So, what I'll do is I'll make sure the Opacity setup at 100 pt., and I'll use a blend mode for this as well.
I'll change it from Normal to Soft Light.
And now if I toggle that layer off and on, you can see the scene is much more interesting.
Now on the right side of the Timeline,
Controlling layer timing and trimming in the timeline
you'll notice that this layer is over top of every single frame.
And I don't want it to actually start into the scene until graphics start to appear.
So, what I'll do is I'll select Layer 4 where the white line starts to appear.
And I'll press I to move the Current Time Indicator to that In point.
Now, if I click on Layer 6 and drag, I can slide that layer.
But that doesn't change the duration of the layer, What I want to do is trim the start point of the layer.
So, I'll undo that last little slide there.
And I could either drag right over the left-hand side of the layer or I could use a keyboard command.
So, on Windows, it's Alt {.
On the Mac, it's Option {.
And that will move the In point of that layer to your Current Time Indicator.
So, now when I scrub, you can see that layer actually darkens right as the star comes into the scene.
I like this much better.
Now let's collapse Layer 6 and take a look at our layers.
Organizing and renaming layers for clarity
And notice Layer 1 isn't labeled, so I don't know exactly what that layer is.
So, what I'll do is I'll scrub my Current Time Indicator until I can see those elements appear.
And I think it's these repeating lines.
To make sure, I'll toggle the Visibility off and on, and it is.
So, with Layer 1 selected, to rename it, all you have to do is press Enter or Return.
And I'll call this 'Repeating Lines'.
And press Enter or Return to set it.
So, now you can fine-tune the appearance of your compositions using layers.


