Hello everyone, I'm Hallease, filmmaker, storyteller.
Welcome back.
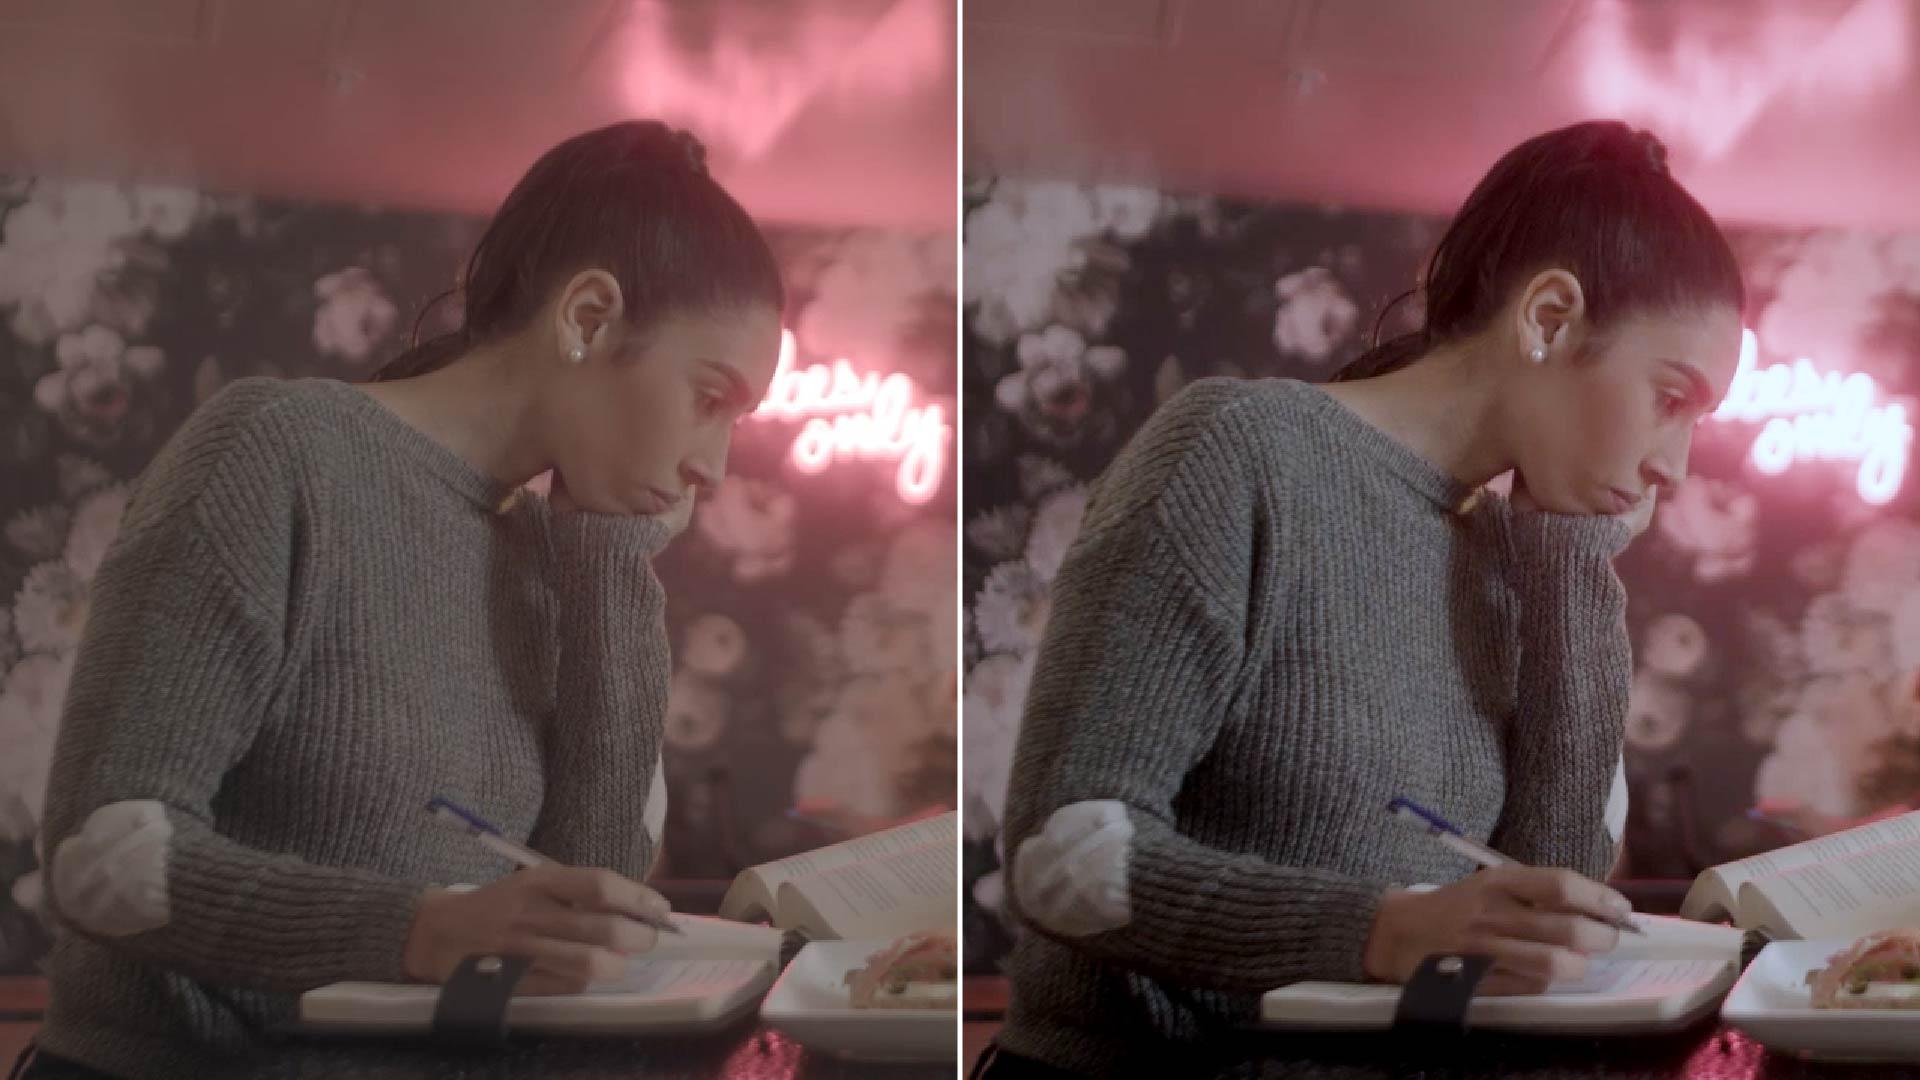
The goal of color correction is to make the colors in your footage look consistent across all of your clips.
If you're using footage from a modern cell phone or DSLR, the colors might already look pretty good, but you may still need to make minor adjustments to correct for lighting or unwanted color casts.
Premiere's automatic color correction tools are a great option to get you started if you want to make your clips look better, but you're not exactly sure where to start.
Let's open the Lumetri Color panel by choosing Window, Lumetri Color.
The Auto button is often a great starting point for making further adjustments.
Once pressed, you should see that many, if not all, of the sliders in the Color and Light sections have changed.
If you're happy with these settings, then that's all you need to do.
But often I find I'll want to make a few minor changes.
For example, I might adjust the Exposure slightly, bring up the Shadows, or increase the Contrast a bit more.
If you're not sure what a particular slider does, just drag it back and forth and you'll quickly be able to see the effect it makes.
You can always use Command Z or Control Z on a PC as well to undo your last change.
Another automatic color adjustment you can make to your clips is to apply what Premiere calls a Creative Look.
You're probably familiar with Photo Filters, and Creative Looks in Premiere Pro are very similar.
In the Creative section, you will see a dropdown menu that includes dozens of available looks you can use depending on the vision of your project.
Use the arrows on either side of the Preview window to review the different looks.
When you find a look you like, just click the thumbnail preview image to apply it to your clip.
Once you have applied a look, you can also adjust the Intensity slider if you want a more subtle or extreme version of that look.
So let's review.
Color correction is used to ensure the consistent colors across your footage adjust for lighting and address unwanted color casts.
The Auto button is a great place to start with your color corrections, but you can always adjust the sliders further to perfect it.
You can also add specific looks in the Creative section to give your project an artistic feel.
In the next video, we're covering graphics.
I'll see you over there.


