
Never search for a logo file again! Shared, consistent branding is here!
In content, like in life, consistency matters. According to Forbes, presenting a brand consistently across all platforms can increase revenue by up to 23%, but 60% of organizations report that materials created don’t always conform to brand guidelines. If creating consistent content is so impactful for business’ success, why is it so uncommon? We’ve learned from our user research that these inconsistencies stem from the pressure to create content quickly, the sheer volume of creation tools, and the lack of brand guideline education.

Adobe Express’s powerful branding capabilities are here to ease some of that pain. Once you set up your brand with its unique logos, colors, and fonts, Adobe Express’s AI hooks you up with customizable templates and the ability to “brandify” any piece of content in a single tap. No more hefty, hard-to-follow brand guideline documents that are separate from the content creation tool. Just set up your brand once to save time later. That works great for busy solo-entrepreneurs who need quick content solutions, but for dispersed teams, there hasn’t been a great way to collaborate from one set of guidelines. That is, until now!
Now you can share your brand with your team so everyone can easily create from the same brand assets. Equip your marketing team with your easy-to-use, one-tap brand guidelines and never worry about an outdated logo, off color, or wrong font making its way into your marketing content again!
Once you share your Brand with a collaborator, they’ll be able to create new content using your logos, fonts, and colors as well as apply the brand to any template in one tap. Don’t worry, they won’t be able to edit your Brand. Only the original creator can modify a shared brand. Think of shared Brands as a shared starting point, meaning your brand assets are at your fingertips at the point of content creation.
Here’s how to set up your team for success with shared brands:
1. Set up your brands.
To set up your brand, click on “Brands” on the left hand navigation on Adobe Express’s home screen. Adobe Express will guide you through adding your logo, color and custom font so that you always have your brand elements at your fingertips while creating. Pro tip: If you have more than one brand across your side hustles, clubs, or products, repeat brand set-up for each of your brands!
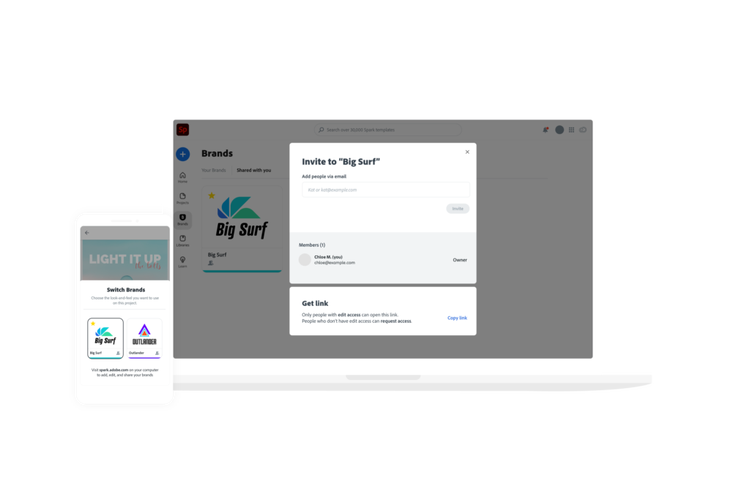
2. Share & accept brands.
Now that your Brands are ready, you simply have to invite your coworkers. Click on the invite button from your brand card or at the top right of the brand detail view. As a recipient of a brand, you can accept from an email invitation or an in-app notification. Once invited, you’ll have read-only access to the brand. This means that you can use the brand, but cannot make destructive edits to the brand. Pro tip: If you don’t know the recipient’s email, you can simply copy a link to the brand.
3. Start creating branded content!
To use a brand that was shared with you, simply open up the Adobe Express editor and click on the brand name under the “Design” tab. You can switch to a shared brand by clicking on it. Now that your shared brand is associated with a project, you can use the brand elements to create on-brand by applying the logo, color, and fonts from that brand.Pro tip: If you want to apply all three in one click, press the Brandify button under the “Design” tab.
Start creating with your team by sharing your brand with a collaborator. And let us know on social @adobespark how you like it!
New to branding? Check out these guides to get started.
Why You Need Brand Guidelines (And How to Make Them in 3 Easy Steps!)
9 Steps to a Memorable Brand Strategy
Chloe McConnell is a Senior Product Manager for Adobe Express, focused on collaboration and team workflows. Find her on social @chloerm.