How to add video transitions to your film.
Use creative transitions to take your audience from one scene to the next without missing a beat. Learn how to add transitions to your video in Adobe Premiere Pro.
The art of the transition.
A video transition is a creative way to move from scene to scene. Filmmakers use transitions in a variety of ways; they can signify a shift in storyline, show the passage of time, or simply move the audience to the next scene in a smoother fashion. Transitions are added to video clips during the post-production process using video editing software.
Whether you’re making a feature film, a music video, or a video collage or slideshow, adding smooth transitions to your content is one of the easiest yet most effective video editing skills you can learn.
Which transition is right for you?
Fade in, fade out, and cross dissolve transitions are all common transitions for videos, likely because they are light on motion graphics and don’t draw too much attention to themselves. But flashier, more complex transitions can be a defining creative choice that adds to your video if you let them. For example, the Star Wars saga is well known in the film community for its many unique wipe transitions.

How to use transitions in Adobe Premiere Pro.
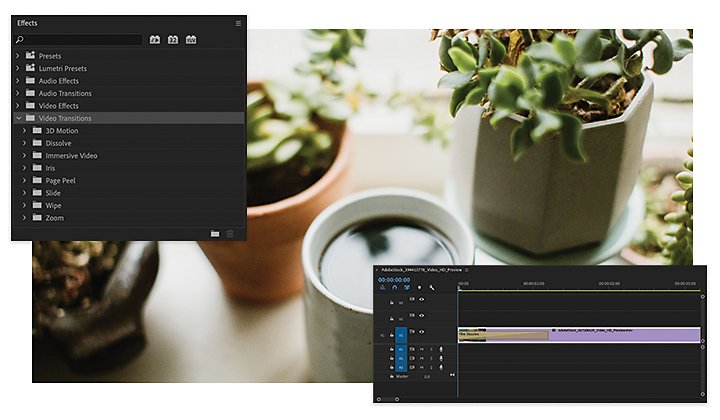
1. Open the Effects panel under the Window tab.
2. Open the Video Transitions folder and select which transition you want to apply.
3. Drag and drop the transition in between the two clips where you want it to appear.
4. Customize the duration and alignment of your transition using the Effect Controls panel.
For a visual step-by-step of this process, check out this guided video tutorial.
Apply a default transition.
The quickest way to add a transition is to right-click in between the two clips where you want to add a transition and select Apply Default Transition. This will add a cross dissolve effect, and it works for both video clips and audio tracks.
Get a handle on it.
One thing to keep in mind as you edit your video is that your two frames need to overlap to create a transition. The extra footage on each end of the clip is called a handle. Handles will appear only if you have more footage than you are using in the timeline. To create handles, drag the ends of your clip to extend them and create a buffer for your transition.
If there is no extra footage, Premiere Pro will repeat the last and first frames of the selected clips to make the transition. To avoid cutting your clips short, keep your camera rolling for a few extra seconds before and after every shot. This will also give you more flexibility when you cut your footage.
Working with transitions in Creative Cloud.
If you want a type of transition you don’t see in an Adobe video editor, don’t worry — there’s a plug-in for that. The Adobe Video Partner Finder can help you find plug-ins that have been vetted for use with Adobe apps. Video effects like glitch transitions, liquid transitions, and seamless transitions will all come from plug-ins.
You can also make transitions in Adobe After Effects and Photoshop and bring them into your Premiere Pro workflow. If you don’t have any footage of your own, check out Adobe Stock to download high-quality stock video and get some practice in.
Tips to get the most out of your transitions.
Don’t go overboard.
As fun as they are, too many transitions can be distracting and cause your video to look amateurish. It’s best to stick with a few well-placed transitions than to crowd your video with too many effects.
Keep your transitions consistent.
Too many different transitions can make your video seem unevenly paced and erratic. Pick a few types of transitions to rotate between and you’ll establish a consistent flow your audience will get used to.
Use them where appropriate.
Think about how your transition serves your story. A transition that marks a new chapter or phase of the film, such as an intro or outro, will be more expected than a transition between two clips in the same scene. Your transitions should be a storytelling device, not a way to simply fill space or add flashy effects.
Do more with Adobe Premiere Pro.
Make visually stunning videos virtually anywhere — for film, TV, and web.
You might also be interested in…
Establishing shots are crucial because they tell us where, and often when, the action is happening.
A guide to principal photography.
Learn the ins and outs of a day on set, plus expert tips for a successful day of filming.
Learn how to create a shot list that guides the crew through all of the day’s camera setups.
Experimenting with video effects.
Dive into popular post-production effects, and explore the moods and styles each can achieve.
Get Adobe Premiere Pro
Create flawless productions with the industry-leading video editing software.
7 days free, then Rp344.322/mo Termasuk PPN.


