Introduction
[Glyn Dewis]: Having the ability to enlarge our images within Lightroom and still maintain the detail and quality opens up so many creative possibilities, such as tightly cropping in on an image to create a new composition.
Hi, I'm Glyn Dewis, and I'm a photographer, educator, and author; and in this tutorial, I'm going to show you how you can use Generative Upscale with Topaz Gigapixel inside of Lightroom to increase the size of your images by up to 4x the original and improve the quality, sharpness, and clarity.
Common use-cases for Generative Upscale
Generative Upscale is great for such uses as enhancing and enlarging low-resolution image scans, files from an older, low-resolution camera, or - as in this case - images that have been tightly cropped.
The time to use Generative Upscale is once you've finished editing your image.
Create a new composition with a tighter crop
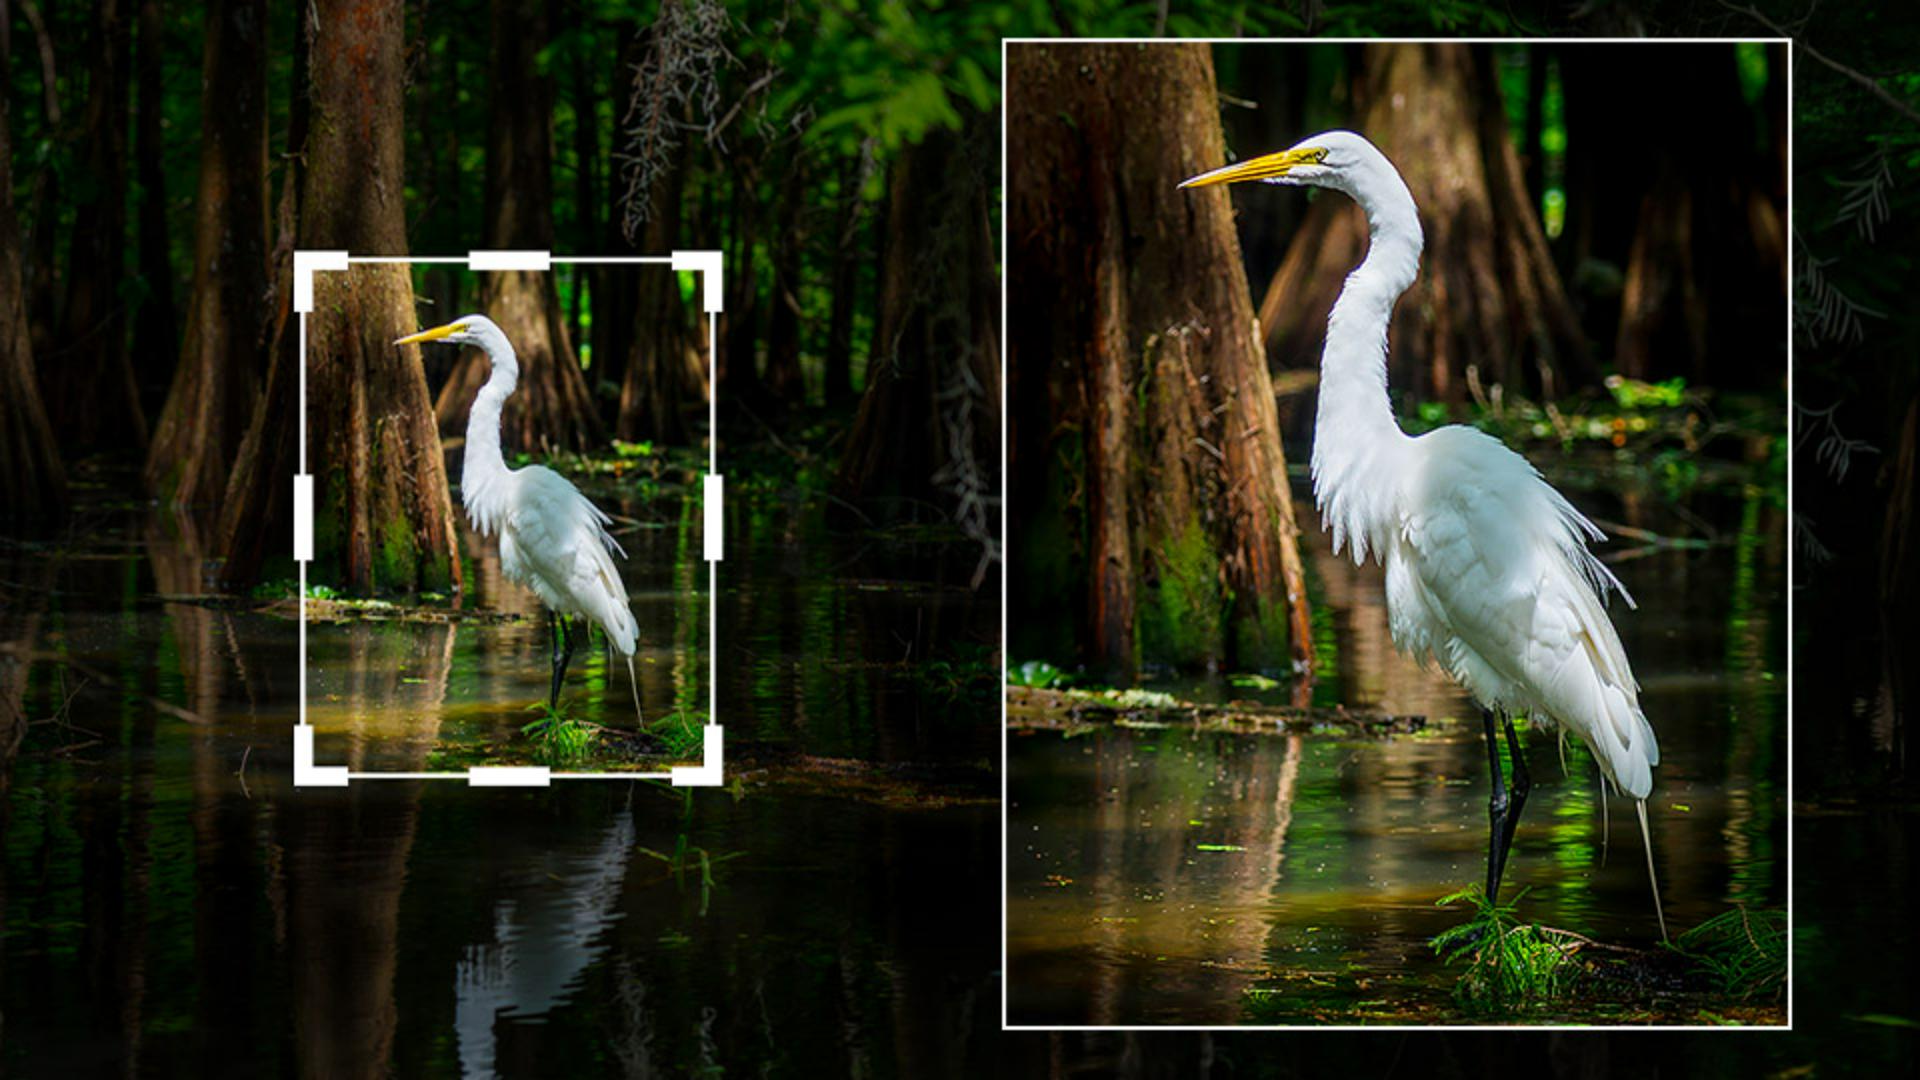
Here is an edited photograph of an egret that I have already cropped.
You can see here when I go to the Crop Tool, the actual size of the original image and how much I've cropped in to create a new composition, much tighter on the bird, and leaving out a lot of the surrounding area.
If I set the Crop Tool to what it was originally by choosing As Shot, and then press on the I icon in the bottom right of the screen or the I key on my keyboard to show the image information, we can see the full sized image is 7952 px x 5304 px.
I'll go to the Edit menu and then Undo Crop Rectangle to return to the tighter crop on the bird, and then again press I to see the image information.
And at this much tighter crop, we can see that the image dimensions are 2074 px x 2592 px, so the image now is considerably smaller.
Upscale your image by 2x or 4x
Now I'll use Generative Upscale to increase the size of the image and improve the quality, sharpness, and clarity.
There are currently two ways I can access Generative Upscale.
I can find it as an option in the Photo menu, or by right-clicking on the image to display the Contextual menu.
When we choose Generative Upscale, we can upscale the image by 2x or 4x its current size.
Upscaling the photo will consume either 10 or 20 generative credits, depending on the final file size of the upscaled image.
We can also see our current monthly Credit balance.
I'm going to choose to upscale by 4x, which will increase the image dimensions, making the longest side now 10,368 px, with the maximum being 65,000 px on the longest side, which would be huge.
We know, Super Resolution has been in Lightroom for some time and can only upscale images by 2x.
Generative Upscale works on Raw as well as other file formats and upscales now either 2x or 4x.
Plus, it works on images in both cloud or local storage, and as all of the processing is done in the cloud, we need to be connected to the internet.
When to use Generative Upscale
Once Generative Upscale has worked its magic, it will create a new DNG file that has all of the Lightroom edits applied.
You can still go back to your original file and make changes, of course; but because the edits are permanently applied to the upscaled version, the time to use Generative Upscale is at the very end of your processing workflow.
I'll leave the Create stack option unchecked, so we can see both versions of the file side by side, and I'll click on Upscale.
As the file is processed in the cloud, we can see the progress bar in the top left.
And a few moments later, it's done.
Evaluate details and understand upscale limitations
I'll now go to the Grid view by pressing G on my keyboard, and here we can see the original image, and next to it the upscaled version.
You can see that the file name clearly states that Topaz Gigapixel has been applied, and that it was upscaled by 4x.
I'll double-click on the original image to fit to screen, and then click on the Filmstrip icon at the bottom of the screen on the right, and then I'll click on 100%.
This is the full-sized original.
And now if I click on the upscaled version, this is at full size, and we can see the fantastic detail and sharpness in the feathers and in the bird's eye.
This has worked out great, but it's worth bearing in mind - the results we get when using Generative Upscale might not always be quite so impressive if we perform an extreme crop on an image that isn't quite as sharp and detailed to begin with.
Here's another example where I've used Generative Upscale.
This is the original photograph that I've cropped and zoomed in to 100%, and here is the upscaled DNG at 100%, which looks so good with its detail, sharpness, and clarity.
So now you know how to use Generative Upscale using Topaz Gigapixel inside of Lightroom to increase the dimensions of your image by up to 4x of the original with great detail, sharpness, and clarity.
This is something that is great to do if maybe printing your image where the quality is really important, but not so, if you only intend to ever share the image on social media.
Have fun using this on your own images and opening up even more creative possibilities, especially for images where you've applied a significant crop to show only a smaller part of the original photo.
I'm Glyn Dewis, thanks for watching.