In the second video tutorial you'll learn how to link your layers together, in order to animate a character easily.
We have imported quite a lot of layers in this new Animate file.
Luckily, I've named my layers, so I know what content is placed on those layers.
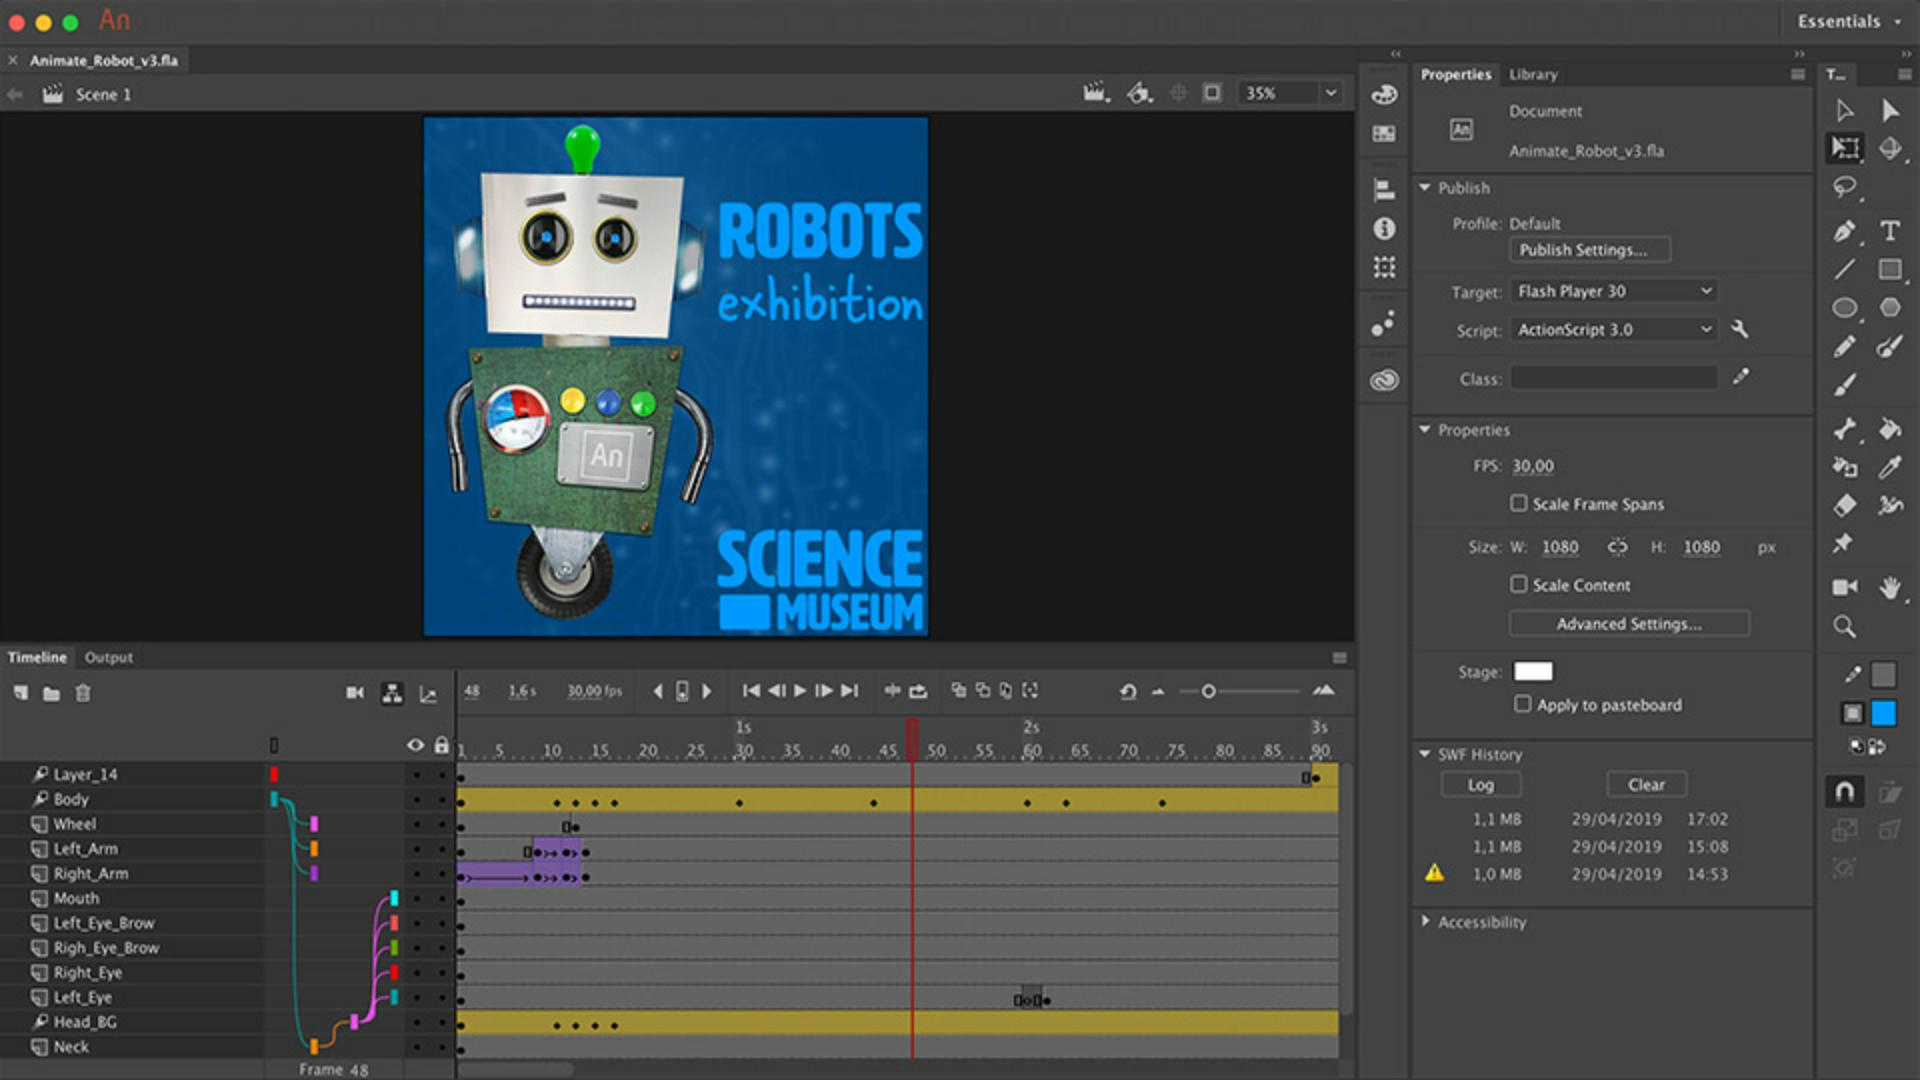
By default space is a bit limited within a Timeline panel, we will pull the top end of the panel a bit upwards to balance the space between the Timeline and the Stage a bit better.
Let's enable the Show Parenting view within the Timeline panel.
Linking layers allows you to rig the character.
Just figure out what the most important part is of the character and that layer will be the parent of all layers.
Of course, children listen to their parents so the idea of linking the layers is that you create a hierarchy of layers - children - listening to their parents.
In this case, the body of the robot is the most important part, it's also the easiest part to select and drag around.
An arm is a child of the body, let's select the arm, drag it towards the body layer, and let go.
Do the same for the other arm.
To test if this works, please drag around the body, and see if the arms will follow.
Undo to put it back to the original position.
Now link the Wheel and the Neck to the body, the Head to the Neck, and the Mouth, Eyes and Eyebrows to the Head.
Give it one final check to make sure that all layers are attached correctly.
With all these tasks done, you're ready to animate the character.
And that's what we'll talk about in the next video tutorial.


