Try these tutorials with Photoshop
Edit photos to create new images and graphics.
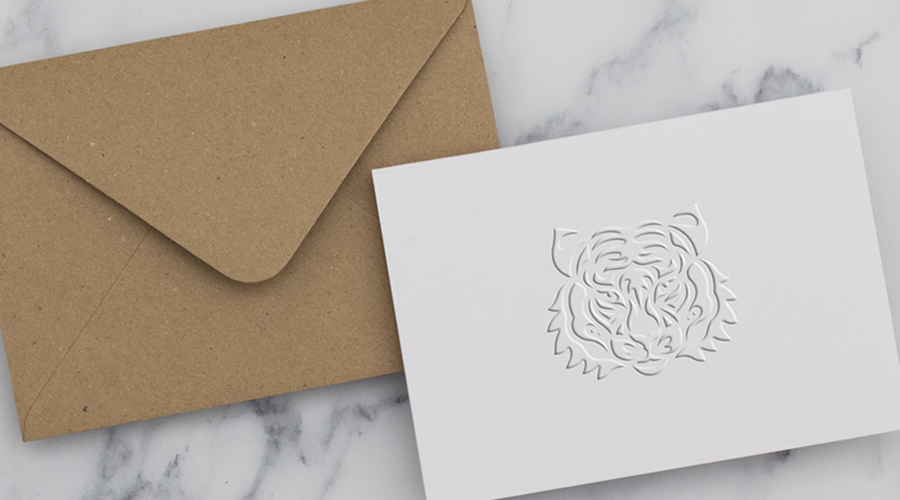
Designing with an embossed effect is a great way to highlight your creativity. In this short tutorial, see how award-winning artist and illustrator Lidia Lukianova raises her vector drawing using layer styles in Adobe Photoshop.
Lidia Lukianova is an artist and designer with a passion for illustration. Her primary approach is to use an iPad to create illustrations, lettering, and animation.
Note: Project files included with this tutorial are for practice purposes only.
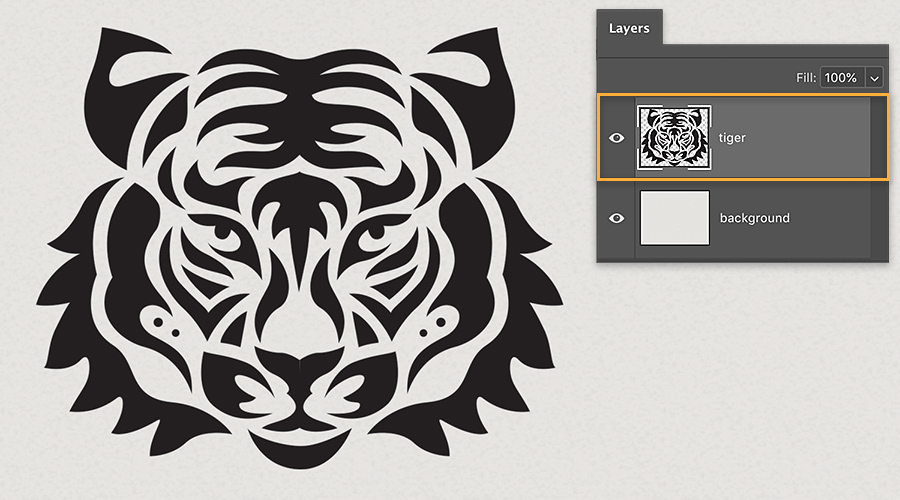
Lukianova added a drawing of a tiger head as a new layer to a Photoshop document.
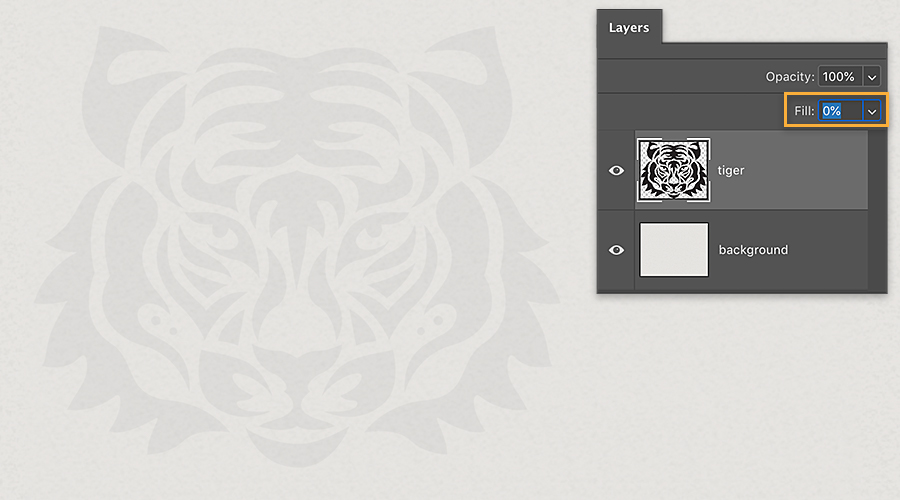
In order to apply a layer style to her drawing, Lukianova set the Fill to 0 for the tiger layer.
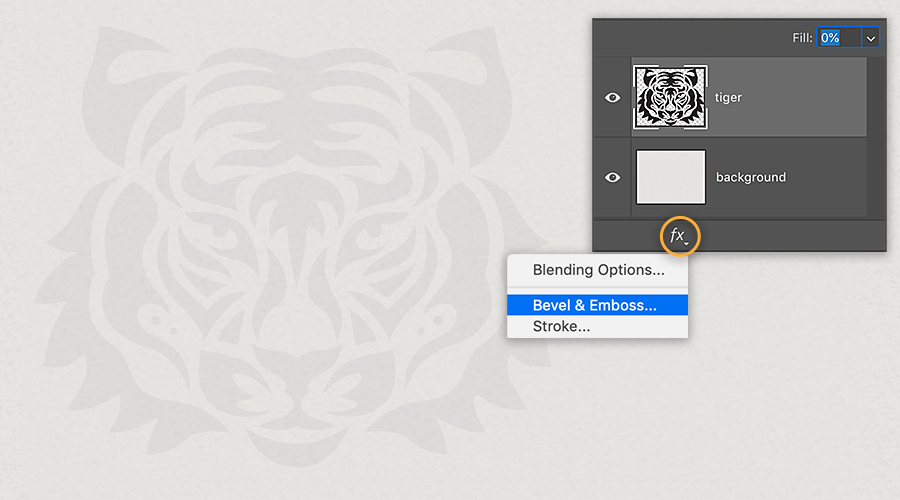
The emboss effect is a layer style, so Lukianova clicked the ‘fx’ icon in the Layers panel and chose Bevel & Emboss. You can also double-click a layer to open the Layer Style dialog box.
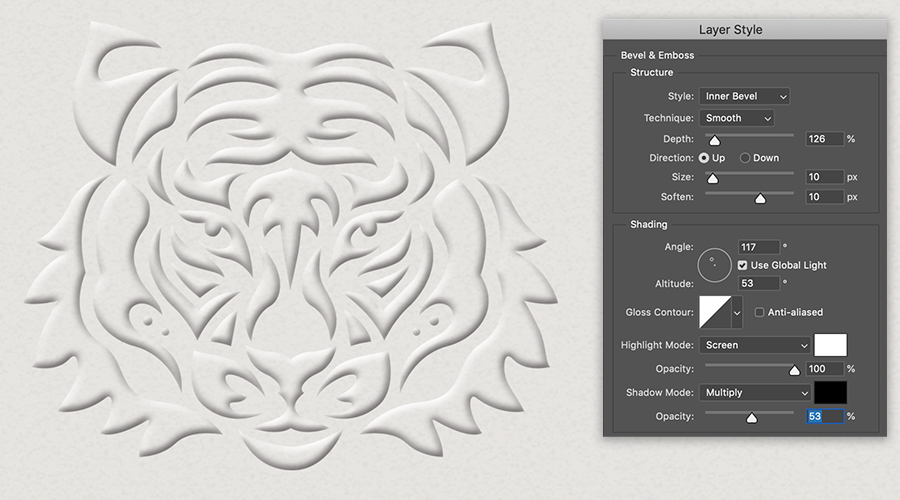
Lukianova experimented with the Bevel & Emboss settings until she was happy with the results. See the screenshot below for the adjustments she made.
Add some three-dimensional flair to your designs.