Introduction
[Seán Duggan]: Have you ever taken a photo of a scene where everything looked good, but the sky was just not that exciting?
We have all been there, but as you'll see in this video, replacing a sky in Photoshop is very easy to do and the results look great.
Hey everybody, Seán Duggan here from the Adobe Learn team.
Adding a new sky to an image is one of the most common compositing tasks.
Fortunately, the Sky Replacement feature in Photoshop takes care of all of the compositing for you.
Let's see how it works.
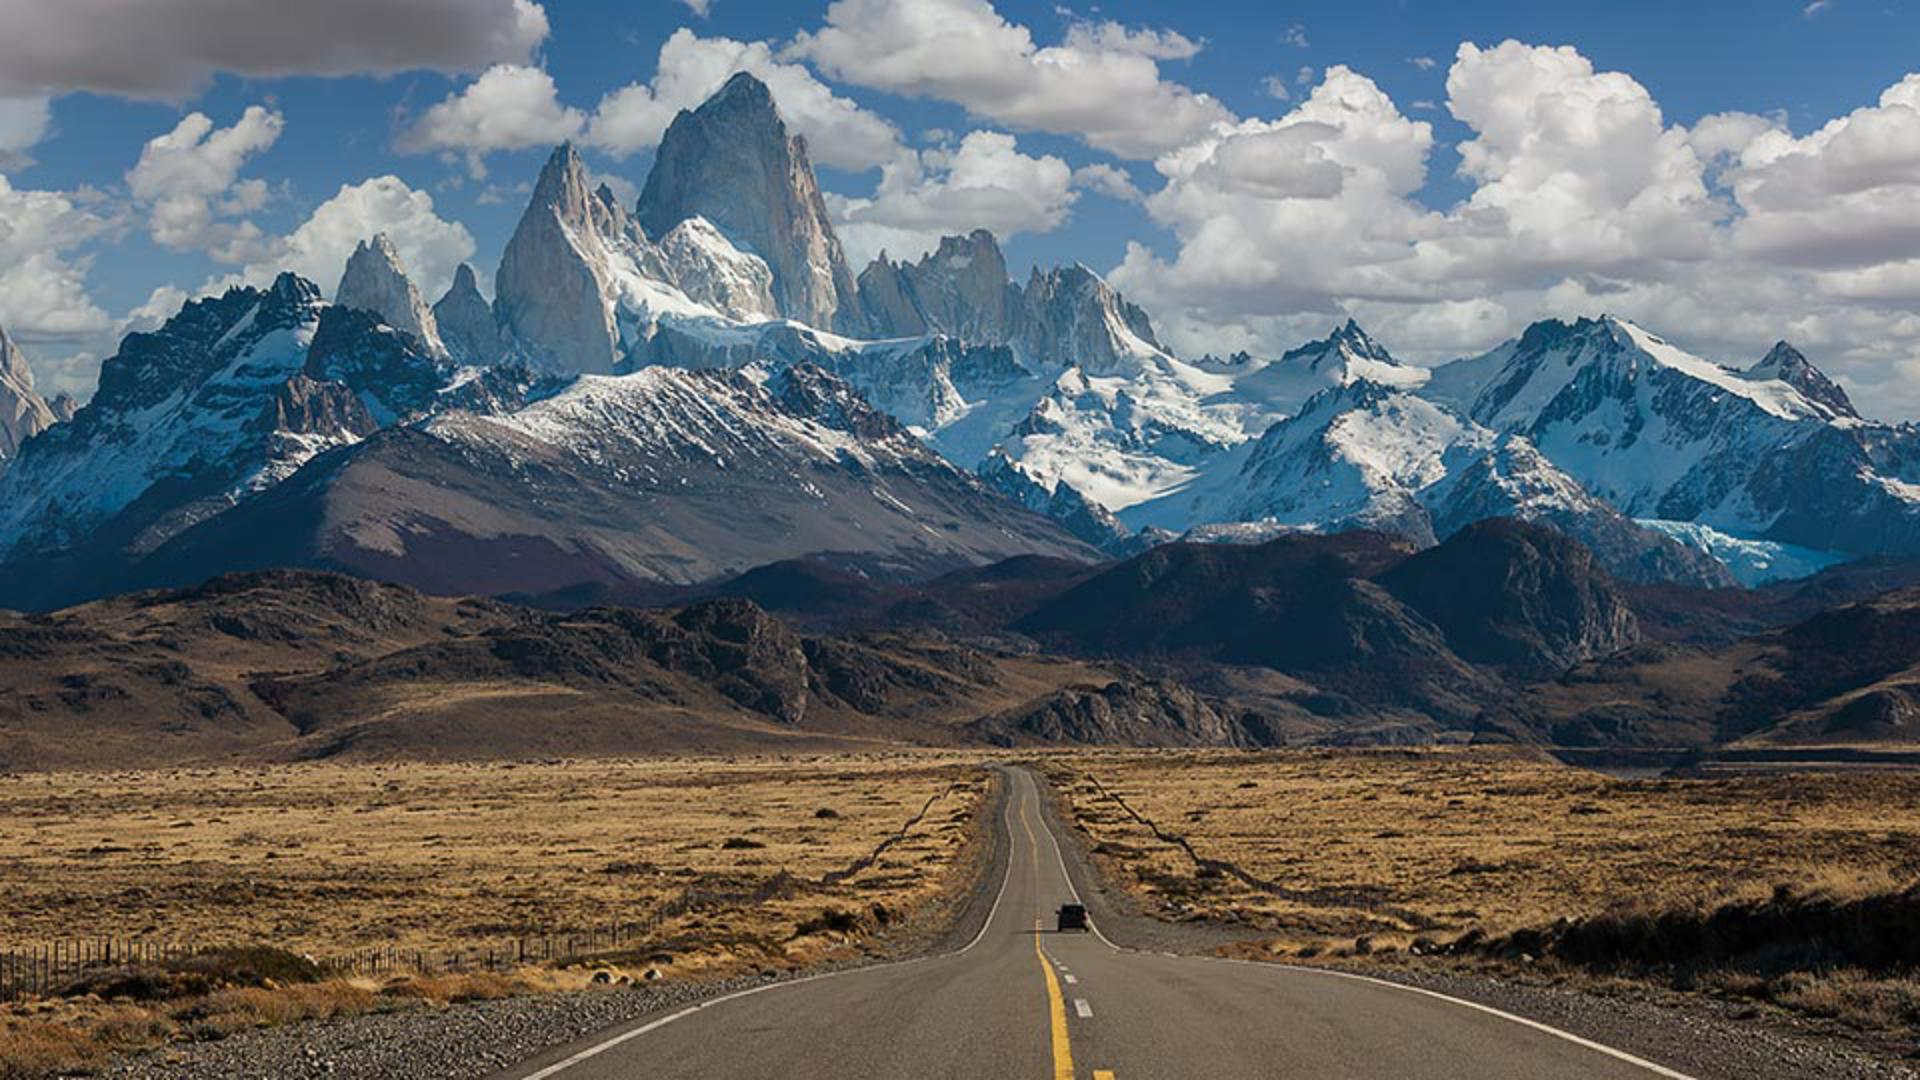
I'm working with this landscape photo of Mount Fitz Roy in Patagonia.
Everything about it looks great, but I really wish it had a more dramatic sky.
Let's do something about that.
Opening the sky replacement feature
From the Edit menu, I'll choose Sky Replacement...
In the Sky Replacement dialog, a new sky will be automatically added to your image just to get you started.
I'll open the Sky menu and here you can see the three groups of sky images that come with Photoshop.
Let's take a few of these for a test drive.
Some of the blue sky images work very well because they are similar to the sky in the landscape photo.
Choosing skies based on lighting and realism
When I use this feature, I always try to identify the type of light in the scene and where the light is coming from.
This helps me choose a sky that works well with the original image, and one that creates a realistic and believable result.
For example, I could come down into the Spectacular group and I could choose a dramatic sky with dark storm clouds, and Photoshop would do a great job combining it with my image, but it might not be a plausible sky replacement based on the light in the original scene.
This is a great sky, but we can see from the light rays that the sun is shining through the clouds behind the mountains and in the original photo the highlights and the shadows on the rocky peaks, as well as the shadow from the car on the road tell me that the sunlight is coming from the upper-right side of the scene.
Let's choose a Sunset scene so that we can discuss some of the Sky Replacement settings.
The top two sliders control how the mask for the new sky
Adjusting sky replacement settings
is blending with the original image.
You can move these back and forth to get a sense of what they do.
In addition to moving the slider, you can also position the cursor anywhere over the name of the adjustment and drag left to right to move the slider that way.
Most of the time, Photoshop does such a good job with this that I rarely need to adjust these.
You can adjust the Brightness of the sky and also the color Temperature. making it warmer or cooler.
You can even Scale it larger or Flip it if that makes for a better composition.
The Move Tool, which is active by default, lets you move the sky around and experiment with a different placement.
The Foreground Lighting and Edge Lighting sliders affect how the lighting of the new sky is blending with the original image.
The changes that you see from these adjustments will be noticeable along the sky edge between the two photos.
Finally, one of the most interesting controls is the Color Adjustment, which harmonizes the color in the foreground based on the color of the new sky.
A value of 0 does nothing, and you can see the color balance of the original photo.
But if I move the slider to the right, the foreground starts to take on some of that rosy color in the sky.
With a more neutral colored sky, you won't see as much of a change, but it's very helpful with sunset skies.
As beautiful as this looks, it's still not the right sky for this photo based on the light in the scene.
Adding and using custom sky images
So let's see how you can add your own sky images, which is really what makes this feature so useful.
I never pass up an opportunity to photograph great skies when I see them, and this is where that practice comes in handy.
I'll open the Sky selection menu and I'll click in the gray area down here at the bottom, just to get out of the Spectacular group that I already had active, and I'll click the Folder icon to create a new group.
I'll call this new group My Skies.
Next, I'll click the + icon next to the Folder, I'll go out and find the sky I want to use, and bring that in.
In keeping with the flavor of the original photo, I'm going with a blue sky that has interesting clouds.
I'll scale it a little bit larger and let's drag on it to experiment around with some different placements.
Overall, I think that this sky is looking pretty good with this scene, and it also passes the plausibility test.
Outputting results and reviewing generated layers
In the Output section, I'll choose New Layers, and then I'll click OK.
And in the Layers panel check out the layer's adjustment layers and the detailed layer masks that Photoshop has created and neatly placed in a Sky Replacement Group.
And the great thing about these adjustment layers is that they can all be further modified if you feel they need some fine-tuning.
The Sky Replacement feature makes a common task much more accessible because Photoshop handles all of the compositing and color adjustments for you.
Now that you know how it works, give this a try on your own photos where you need to jazz up a dull and boring sky.


