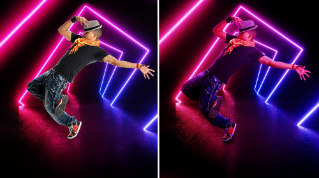
- Open a photo
- Open the Blur Gallery
- Define a focal point
- Adjust the blur area
- Adjust the blur transition
- Adjust the blur amount
Focus on your subject, blur the rest
Learn how to blur specific portions of your photo to draw attention to a focal point.
Ver tutorial en Photoshop

What you'll learn
How to apply the Iris Blur effect in the Photoshop Blur Gallery, so that you can blur a specific part of your photo and create a focal point.
In Photoshop, go to File > Open... and select a photo from your computer, or, if you're following along with the sample go to “selective-focus-blur.jpg”. Click Open.

Go to Filter > Blur Gallery and select Iris Blur from the Blur Gallery options.
Use Iris Blur to define a focal point in the image while bluring the rest of the photo.

When Iris Blur opens, you'll see a large blur preview ring and several dots in the image.
In the middle of the ring is a “pin.” The pin is like a target: At the center of the target, the image is sharp and clear; further away from the target, the image increases in blurriness.
Click the center of the pin and drag it to the figure. Release your mouse to place the pin.

The outer ring of the blur preview defines the point at which the blur effect reaches 100%. Everything outside of the ring has a maximum blur effect applied.
Along the outer ring of the blur preview are four small dots. Hover your mouse over one of the small dots until your cursor changes to a curved double-ended arrow. For the sample photo, click and drag to elongate the blur preview ellipse, and rotate it slightly counter-clockwise.
To resize the blur area while constraining the shape, click and drag the line (rather than one of the dots) on the blur preview ring.

Inside the blur preview ring, see the four larger white dots, which define the blur transition area. Between these larger white dots and the blur preview (outer ring), the blur effect goes from 0% blur to 100% blur.
Click and drag the white dots to adjust the size of the blur transition area. Move the dots closer to the focal point to make the blur transition smoother, or, move the dots away from the focal point to make the blur transition sharper.
For the sample photo, move the large white dots slightly closer to the figure to make the blur transiton smoother.

You can adjust the blur dial, which is around the pin at the center of the blur preview area, to control the amount of blur applied.
Click and drag the blur dial clockwise to increase the blur, or, drag the blur dial counterclockwise to reduce the blur. For the sample, apply a blur of 8.
You can also adust the blur by using the Blur slider in the Blur Tools panel to the right of your workspace.

Done!
When you're finished, press Enter or click OK at the top of the Blur Gallery window.
Applying the Iris Blur effect is a creative way to make the subject of your photo stand out, and give a unique look to the image. Try using this effect to frame a face in a portrait, or to highlight a specific area of a landscape.

25 de agosto de 2022


