Introduction
In this tutorial, you'll learn how to work with adjustment layers in a composite, in Photoshop on your iPad.
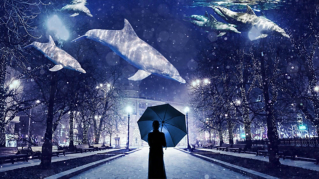
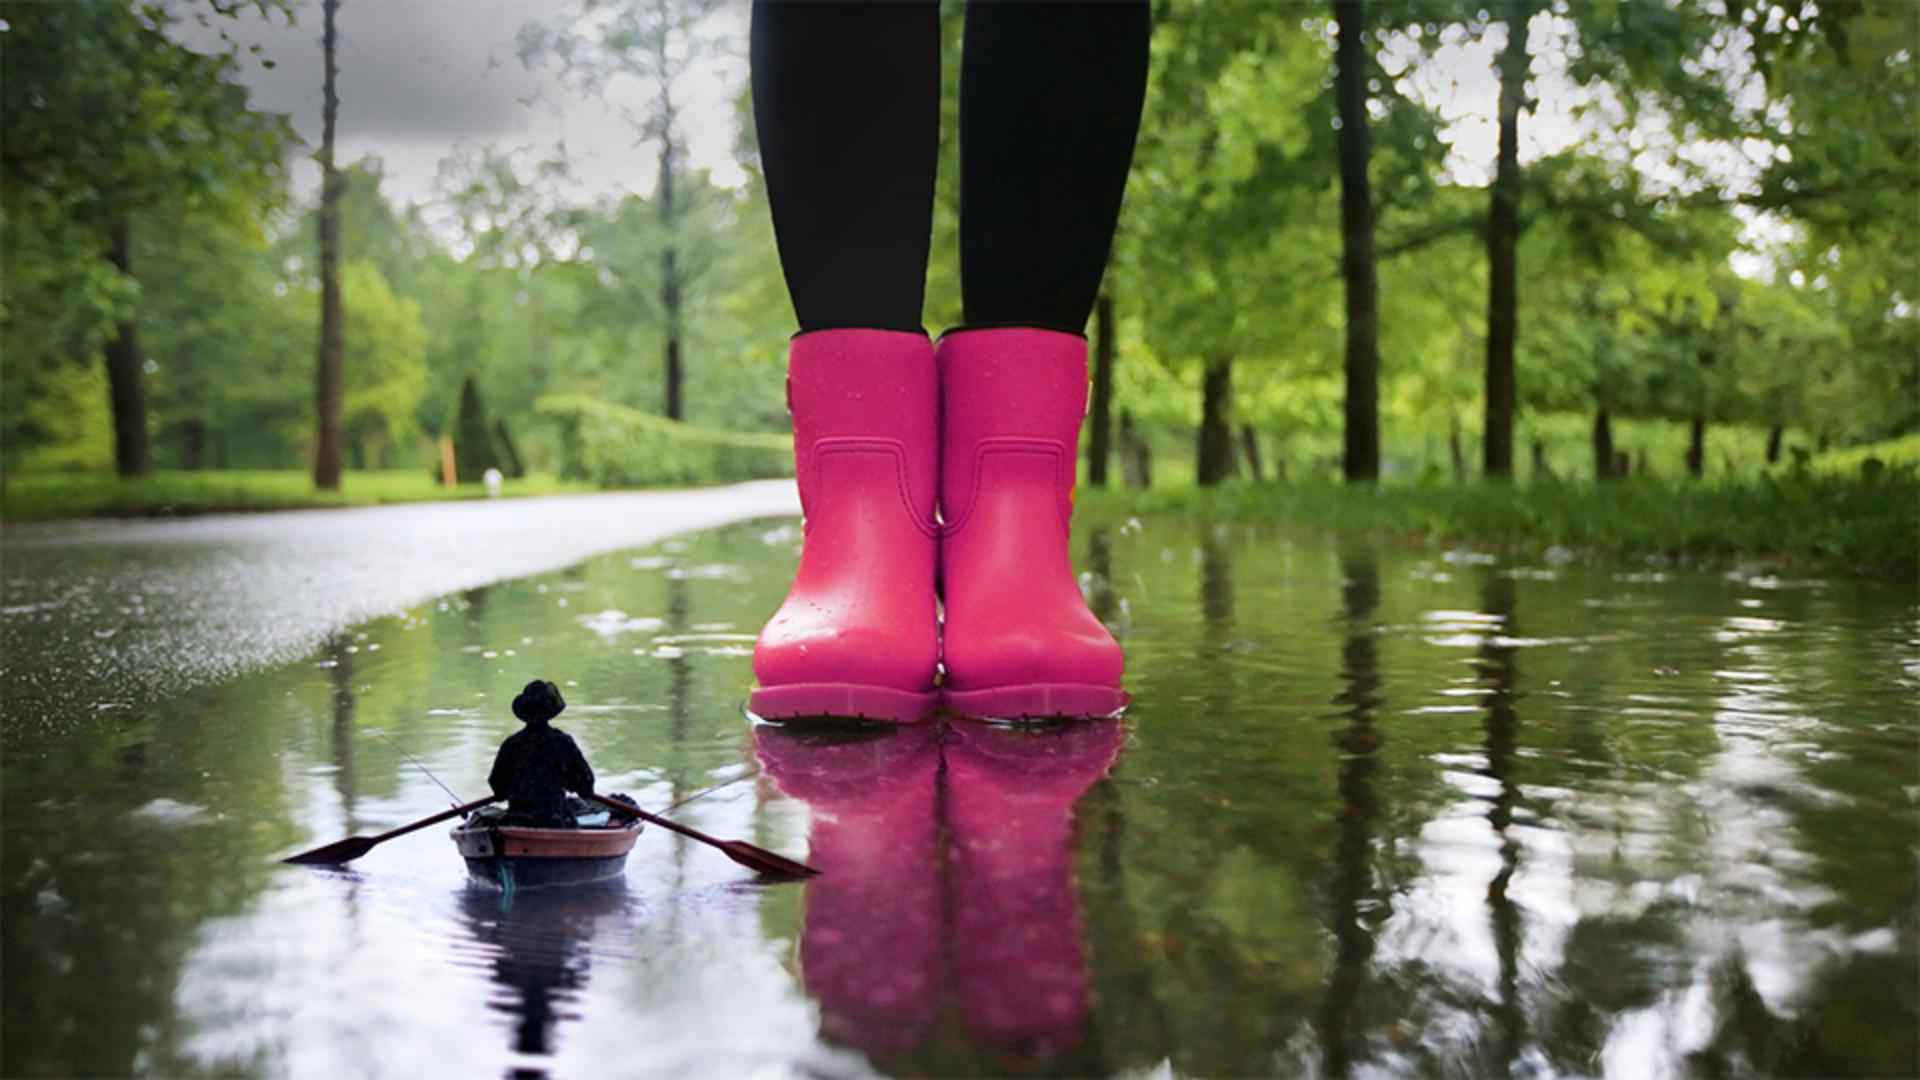
In this example, I'm going to start with this layered file, and I'm going to turn it into this composite, with just a couple of adjustment layers.
Creating adjustment layers with selections and masks
Let's start by seeing how to create an adjustment layer with a mask, in Photoshop on the iPad.
I want to change the color of the rain boots, in the bottom layer by applying a hue/saturation adjustment layer.
I'm going to turn off the top layer, by tapping the Eye icon in the Taskbar on the right.
Then I'm going to select the layer that contains the boots, so that the adjustment layer I'm about to make, will come into the layer stack right above it.
And then I'm going to make a selection of the rain boots, so that the adjustment layer I'm going to make, will affect only the rain boots and not the entire boots layer.
I'll press and hold the Lasso Tool in the Toolbar, to view all the Selection Tools and I'll tap on the Quick Select Tool, the second tool, and then move into the image and drag over one boot, and then drag over the other boot to add that one to the selection.
If there's a little bit extra selected as well, I'll go to the Options bar for the Quick Select Tool, and I'll tap the second icon, and then I'll just brush over the area that I want to remove, from this selection.
Great!
Now, let's add an adjustment layer.
To do that, I'll go over to the Taskbar on the right, and I'll press and hold the + icon.
In the fly out menu, I'll tap Adjustment Layer.
That brings up a menu of the kinds of Adjustments, that are currently available in Photoshop on the iPad.
So, I'm going to tap the Hue/Saturation adjustment layer.
And if you take a look at the Compact Layers panel that I'm using, you can see that there's now a new layer, that's displaying a black and white mask.
Notice also that the Layer Properties panel opened, with controls for the selected adjustment layer.
I'm going to use the Hue control, dragging it to the left, to change the color of the boots.
To help you understand why only the boots changed color, I'll double click the Layer Mask on the Hue/Saturation adjustment layer to show it in the document.
On the Layer Mask, the area that I'd selected is white and it's revealing the Hue adjustment.
The area that I didn't select is black and it's hiding the Hue adjustment.
Expanding adjustments by painting on layer masks
I also want this Hue/Saturation Adjustment to affect the reflection of the boots in the puddle.
To do that, I'm going to use another method, brushing on the layer mask with white, to show more of the adjustment.
In the Toolbar, I'll tap the Brush Tool.
In the Brush Tool Options, I'm going to switch the foreground color to white, by swiping down on that black color chip.
And I'm going to use a big and soft brush, to brush over the reflection of the boots in the Layer Mask.
And the Hue change now appears on the reflection of the boots too.
Now, let's take a look at how and why to clip an adjustment layer
Clipping adjustment layers for precise blending
to a content layer.
I'll select the rowboat layer, in the Compact Layers View panel.
And then I'll go over to the Taskbar on the right and I'll tap the Eye icon to bring that layer back into view.
If you're following along, you'll get the best results with the technique I'm about to show you, if you're working with images like mine, a top layer that has a light background, the water around the rowboat and a bottom layer, with a darker image.
I'd like to blend the surrounding water into the boot's image.
To do that, I'll try applying a Blend Mode.
I'll go over to the Layer Properties panel and I'll tap the Blend Mode menu, and from there I'll choose the Multiply Blend Mode, and then tap off the menu.
Now the Multiply Blend Mode usually hides white pixels from view, when they're on top of darker pixels.
But some of the surroundings of this rowboat aren't pure white, so they're still showing a bit.
I think I can take care of this problem by using a levels adjustment layer to push those pixels to pure white, so that they'll blend in, when the Multiply Blend Mode is applied to them.
But here's the important part: I don't want to apply a levels adjustment to all the layers, the boots and the rowboat.
I just want to apply this levels adjustment layer to the rowboat layer.
So, I'll go over to the Layer Properties panel and tap Add clipped adjustment, and then I'll tap Levels as the type of adjustment layer.
And that both creates a new adjustment layer, as well as clips that adjustment layer to the layer right below it, the rowboat layer.
The small bent arrow on the new adjustment layer in the Layers panel indicates, that that adjustment layer is now clipped.
So, when I go over to the Layer Properties panel and I make a change there, my change will affect only the rowboat layer.
I'm going to change this levels adjustment by dragging the white slider to the left, and as I do so, you can see that the water surrounding the rowboat, is now blending in nicely with the layer below.
So that's a look at adjustment layers, adjustment layer masks and clipped adjustment layers in Photoshop on your iPad.