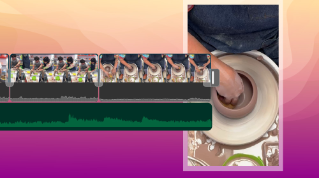
Premiere Pro has a nifty feature that can save you a lot of time. especially if you're working with multiple takes of the same scene.
What you can do now is you can take multiple clips, put them in a sequence, and then load that sequence up into the Source Monitor and edit it from there.
So here's how this process works.
Sort of the old school way of doing things would be to take these 3 takes at the scene.
You're going to view them one at a time in the Source Monitor.
I'll click on this top button there and Shift click on the last one, I can right click and say Open in Source Monitor, or I can simply drag them up there like that.
Now we have these 3 takes: Take 3, Take 2, and Take 1.
It's kind of tedious, because the editor has to go through them one at a time and decide which one's going to work best.
And also it would be nice if you could see them in their final cinematic view.
You might want to add a look to them, but you can't do that here inside the Source Monitor.
Ah, but there's a new way of doing things, and that's using a sequence instead.
So let's make a new sequence from these 3 clips.
I'll just drag them down to this New Item icon there.
There's the new sequence--the 3 clips here.
I'll just show you the full group there.
Let's add an Adjustment layer to that so you can add a look to it.
So I'm going to down here and click on this New Item icon and go to Adjustment Layer, add that above these 3 clips-- kind of thin here.
Let me just spread things out a bit so I can open that up all the way like so, and we'll get it on all 3 of them like that.
Let's add a look to this, so you can see how you can add a look to all 3 at once.
Go over to Effects, go down to Lumetri Looks, Cinematic-- kind of take a preview over here.
I like this cinematic one here, so I'll drag that over to the Adjustment layer, and you can see how it makes it a little bit darker, a little bit warmer.
Now let's go back here a little bit.
The typical routine at this point would be to take the sequence and nest it into the final one.
So we're back to the Project panel.
Here's the sequence we just made called Take 1.
I think I'll change the name here to something like "All Takes" so we don't get confused about this later.
I'll take the "All Takes" sequence here and nest it inside this panel.
Now I'm going to show you the old school way of doing it by turning off this switch here.
I'll show you what I mean in a second.
Take this guy, drag it over there, and this would be the way you typically see it when you nest the sequence.
If it's one video track and one audio track, you're not seeing the Adjustment layer separately or the separate clips here, either, but there's a new feature inside Premiere Pro right over there called the Insert and Overwrite Sequences of nests or individual clips.
As a nest is the old way of doing things.
Individual clips is the newer way of doing things, and individual clips is the default way, so I'll click on this and switch to Default view.
I'll get rid of this and do it again.
Now I'll drag "All Takes" over there one more time and notice what happens--a-ha!
There's the Adjustment layer, and there are the 3 clips, just like that.
So you can basically copy and paste--is what's going on here, and it's much more convenient--you can see things this way.
You can see exactly where the edits are, and you can work on these guys individually.
But another really great thing is that you can edit them from the Source Monitor.
Let me show you how that works.
So I'll take the "All Takes" and open the Source Monitor by just dragging it up there like that, and you can see the Adjustment layer that's been applied to it.
You can see the look that's been applied to all 3 of those clips as you go through there.
So now the editor can go through and look at all 3 of them, one after the other.
This process of putting all these takes in what's a one sequence is what folks in the film world call the KEM roll.
KEM stands for the name of the flatbed editor that people typically use to create these KEM rolls.
KEM is Keller-Elektro-Mechanik, so I guess we're making a virtual KEM roll here, and you can see how easy it is now to go through and pick out the one you want.
We'll take this take right there, in point like so.
Over here to the out point-- right there to the out point.
Click that.
And now I'm going to bring it down to this final edit sequence here.
I'm going to get rid of these guys--highlight them, delete them, and drag this one down like so, and look at that.
It comes down with the Adjustment layer.
It actually names the clip there, Take 2.
And notice that we got right at the beginning--you can see the little triangle there, indicating you got right at the beginning of that clip.
If I had extended the in and the out point, we'll say right there or over to here, for example, and dragged it down, it would show the original clips there--right there at the other points.
So this makes it really easy to go through and put all of your takes in one sequence.
If you have them in the Source Monitor, even with effects applied-- or multiple tracks or multiple clips applied, and then pick out the take that you want and then drag it on down to a sequence.
So this process of editing from a sequence loaded to the Source Monitor can really save you a lot of time and improve the quality of your work.


