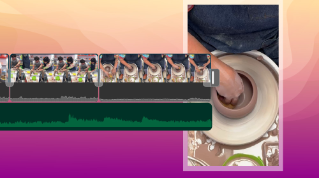
For this tutorial, I'm using the Editing workspace.
You can reset the workspace by double clicking on the Editing name in the Workspaces panel and by clicking Yes to confirm.
In the Project panel icon view in Adobe Premiere Pro CC, you can arrange clips in the order you'd like them to appear in a sequence and add them to the Timeline panel to kickstart your sequence development.
Let's take a look at how this works.
This sequence has a music track, but no visuals and I've locked the music track to avoid moving or making changes to it.
I'm going to double click on this Video bin to open it up and I'm making sure I'm in Icon View.
Let's maximize the bin by double clicking on the panel name and I'm going to increase the size of these thumbnails just a little.
The greater part of video editing is watching video clips and making creative decisions about them.
And in fact, you can do this right in the Project panel.
I can select a clip in the Project panel and use the mini Timeline Control to view the contents or I can use the J, K and L keys to playback, and I can even use the Spacebar which is what I'm going to do right now.
I can use the I and O keys to add In and Out marks during playback, and when I do that, if I just press the Spacebar again to stop, you can see at the bottom right corner, the selected duration updates.
If I hover the mouse pointer over a clip or thumbnail, I get a preview of the contents too.
There's no audio this way, but I get a very fast overview of the footage.
The left edge of the thumbnail represents the beginning of the clip and the right edge represents the end.
And once again, I can press I and O to add my In and Out marks.
Let's add marks to the other clips here as well just so we've got them selected.
I'm going to leave this last clip with no marks so I can show you another detail in the workflow later on.
Let's add a mark here as well.
So, an In mark and an Out mark.
I'm going to drag these clips into the order I'd like them to appear in my sequence.
I've just got five clips here, but you can imagine with 50, this would really look like a complete edit.
Now, I'm going to deselect because the selection order defines the order in which these clips are going to be added to the Timeline.
So, if I press Control A here in Windows - this would be Command A on Mac OS - I'm making sure the clips are selected left to right top to bottom as they appear here in the bin.
I'll double click to restore the size of the panel and just drag these clips straight into my sequence.
I'll zoom out a little so we can see - there they all are.
Just note the duration as well.
These clips are gone a little bit longer than my music.
This is a really fast way to go from the Project panel to a rough cut, but there's a more nuanced approach too.
I'm going to select all of these clips and press Backspace or Delete to remove them and with the clips still selected in the Project panel, I'm going to click Automate To Sequence.
This allows me to specify the way my clips will be added to the sequence.
I can choose to have the clips added in the order they were selected or in the Sort Order, that's particularly useful if you're in list view.
I can have them appear Sequentially or At Unnumbered Markers if I'd added markers to my sequence, I could use them to line up my clips.
I can Overwrite or Insert, of course that would push all other clips out of the way in the sequence and I can specify a Clip Overlap.
I'm going to set this to 60 Frames.
If I'm using still images, I can specify an in and out duration using the Source Monitor or I can specify a duration for all of the clips, and this is the bit I'm interested in: Do I want to apply a default audio or video transition automatically?
I can also specify to ignore all of the audio or all of the video from the clips.
I'll click OK, and there are my clips.
The same sections were selected, but you can see they've come up shorter.
And that's because when you use the Automate To Sequence option, the overlap to create those transitions is taken from the selected range of the clip.
It's not using the leftover media or handles to create that overlap.
It just means you know exactly what's going into the sequence.


