In Illustrator, we can edit fills and strokes by applying color, gradients and even patterns.
A pattern fill in Illustrator is created from artwork that's repeated.
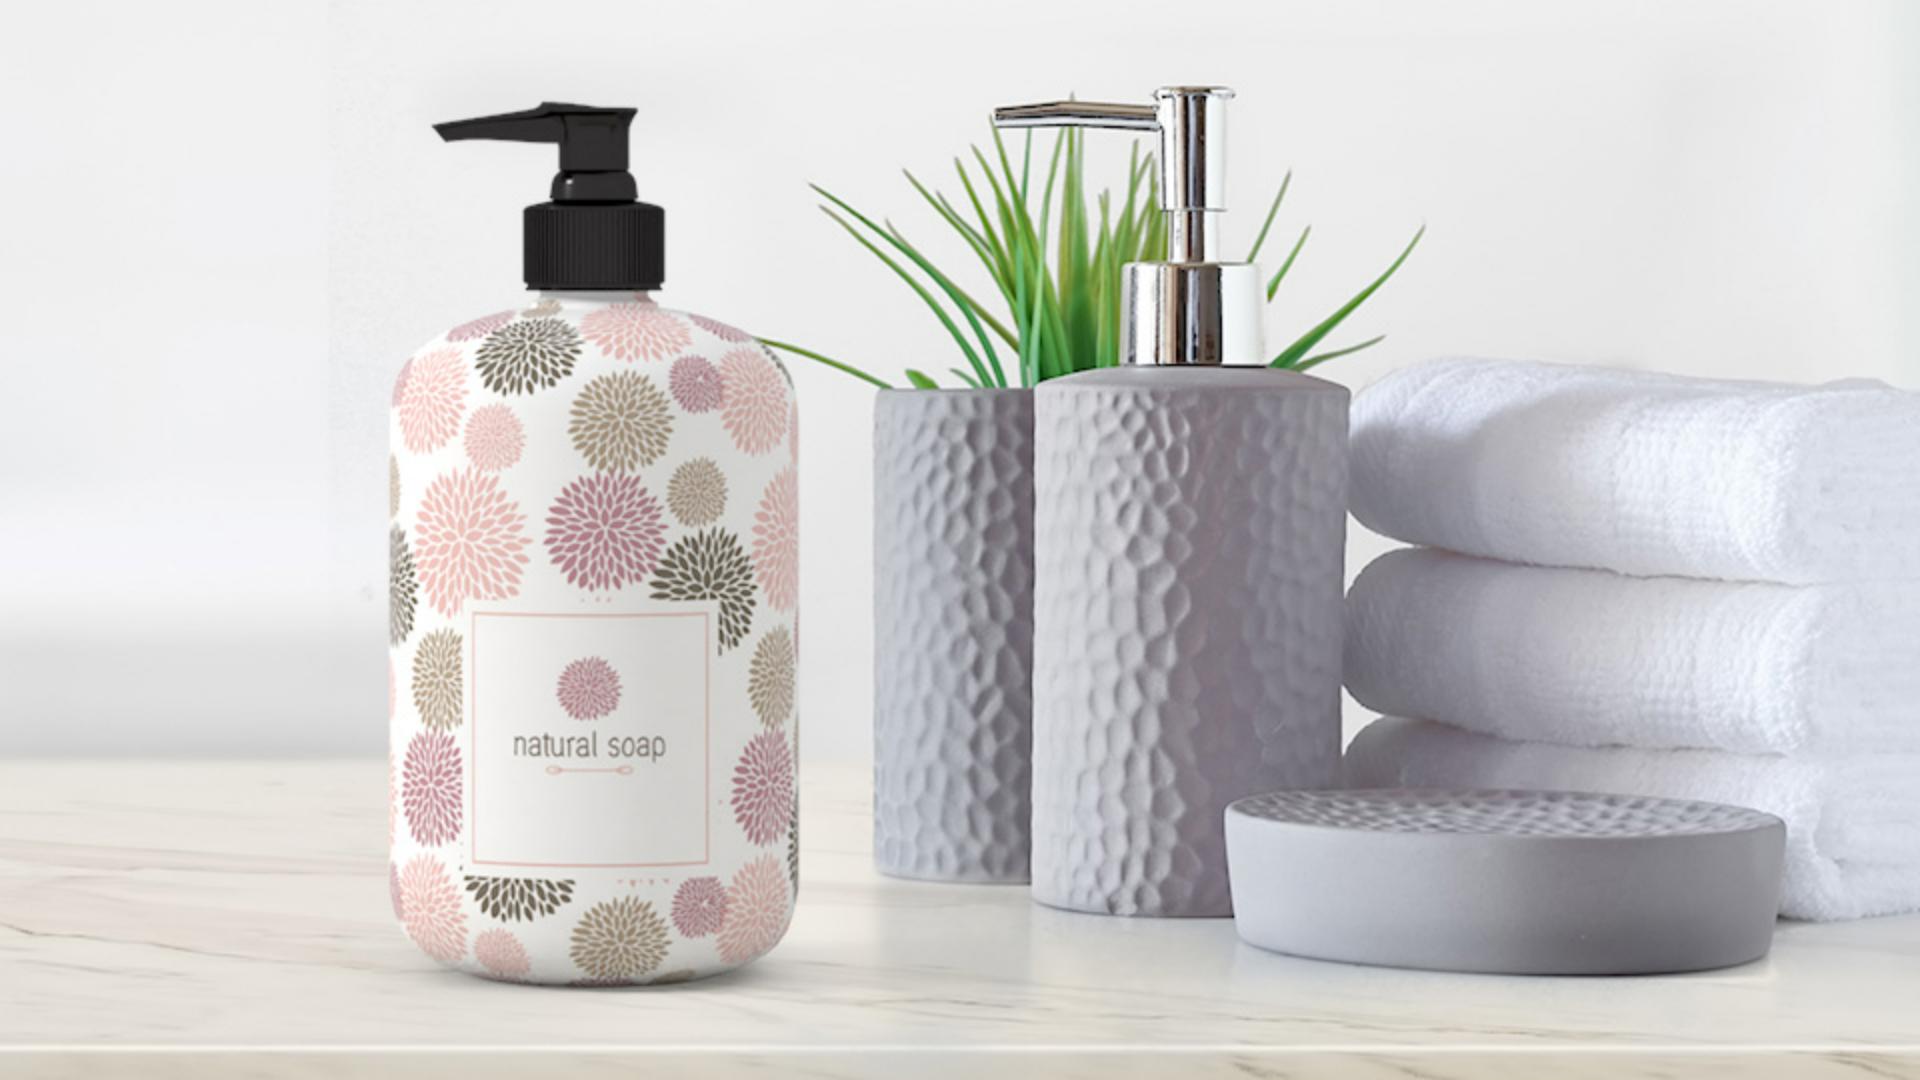
You can see an example here.
In this tutorial, you'll take this artwork and you'll create a pattern for this gray shape similar to the example.
So, to start, you'll select it.
With the Selection Tool selected, drag across the artwork.
Now to create a pattern from it, choose Object, Pattern, Make.
When you start a pattern with the Make menu command, and there are a few ways to make a pattern, you can either have artwork selected or not.
Illustrator enters pattern editing mode and you'll most likely see a message appear.
Patterns in Illustrator are saved as swatches in the Swatches panel.
That way you can easily apply them later and even double click the swatch to edit the pattern.
You can click OK.
In pattern editing mode you can see a gray bar along the top here which is how you start editing a pattern among other options.
You can see that the original artwork is now repeated in the Document window to give you an idea of how it will look.
Let's zoom into the artwork a little bit to make it easier to see.
So, click to select the shape here, and to zoom in, press Command + on macOS or Control + on Windows a few times.
Now you should see a box around the original artwork.
This is called the pattern tile.
It defines the edges of the pattern tile or what gets repeated and anything in this box is repeated in the pattern.
You should also see the Pattern Options panel over here and there are a lot of things you can do to a pattern to change its appearance.
To start, you'll name the pattern.
So, change the name to flowers by clicking the word Name and typing in flowers.
This is the name of the pattern swatch that appears in the Swatches panel.
Now, right now the artwork in the pattern tile is repeating in a grid straight across up and down.
But you can change that.
So, click the Tile Type menu to see some options.
Try choosing Brick by Row and you can now see that the repeat is staggered.
You can see that here.
In the panel, the Brick Offset determines by how much tile width the centers of tiles are out of vertical alignment.
Choose 3/4 from this menu to see how it affects the pattern.
Now the Width and Height here actually determine the size of the pattern tile - this box.
If you make the width or height bigger there will be space around the repeated artwork.
And if you make the width or height smaller the artwork will overlap.
Now come out to the artwork.
You can still add, delete or edit any of the artwork in the pattern.
Try dragging this shape up a bit and notice that as long as a part of it is within the box it remains part of the pattern, but it overlaps the other content.
Also notice that the pattern tile - that box - doesn't change in size.
If you want the pattern tile to change as you move and edit pattern artwork, select Size Tile to Art here.
The pattern tile now surrounds all the artwork.
Drag the flower back down and you'll see it change size again.
Let's try editing some of this artwork.
So, click to select this flower and we'll change the fill color.
So, click the Fill color in the Properties panel and choose a different color.
Now back in the panel you can see H Spacing and V Spacing which control the space around the pattern tile.
To change the value here, click the words H Spacing and change the value by typing in -.1 and press Return or Enter.
The artwork now overlaps horizontally since the spacing is a negative value.
Try the same for the vertical spacing, but let's change the value to -.2 and press Return or Enter.
You'll see a bigger overlap.
You can actually adjust the horizontal and vertical overlap here.
So, in other words, click the Bottom in Front option in this one and you'll see that the artwork below overlaps the artwork above.
There we go.
With the pattern finished you can now click Done in the bar along the top and also close the Swatches panel.
Now let's apply the pattern you created to this shape.
So, click the gray rectangle and in the Properties panel click the Fill color.
With the swatches showing, click to apply your pattern.
Now, if you need to make more changes to this pattern, you can always double click the swatch here to enter pattern editing mode again, like that.
Now I'll click Cancel since I don't need to make any more changes.
Patterns can be used to liven up your designs, add texture, and so much more.
Why don't you try to experiment with this design by creating a brand-new pattern from artwork you create?