Introduction
Want to share your Animate creations over social media channels, but not sure how?
We will see how to export a character animation as video that can be easily shared across Twitter, Facebook, and more.
So, this is the document that we uploaded to Twitter as an MP4 file.
You will note that the puppy is in the center of the screen.
There is just too much white space around it.
Resizing and centering an animation for social media
And if we wanted to, we could easily resize everything, so that the puppy would be able to be front and center.
To do this, we could choose Advanced Settings... in the Properties panel and anchor everything to the center and then adjusting our Stage size to something like 800 by 700.
If we hit OK, then now we have an animation where the puppy is definitely front and center.
However, there are other ways to do this.
We can also create a new document
Creating a new document using social media presets
and insert this content into it.
So, if I Shift click to select both of our layers, and then right click and choose to Copy Layers, I can then create a new document through File, New... and in the New Document window I can choose one of the Social presets.
If I wanted to share something on Facebook, or Twitter or YouTube, I can choose from these presets.
Perhaps I wanted to choose and In-stream Photo on Twitter.
I can choose that preset and hit Create.
Let's go ahead and go to 100% to see how that is going to look.
From here I am going to go into my Library,
Creating a movie clip symbol and placing content
and down at the bottom of the Library I can create a New Symbol..., by clicking this little icon right here.
We'll call this symbol Puppy and hit OK.
As you can see, we are now within the Puppy symbol.
And I can right click on Layer_1 and choose to Paste Layers that I copied from the ScaredPuppy.fla.
If I now scrub, and zoom out, I can see my scared puppy.
Let's go back out to Scene 1 and re-center the stage, and then go ahead and drag our new Puppy movie clip symbol from the Library onto the stage.
You can see it appears rather large here, but we can easily use the Free Transform Tool and holding down the Shift key rescale this, so that it's really front and center.
Adjusting the timeline length for video playback
The original Timeline takes about 350 frames.
So, what we'll do is go out to about 350 frames, roughly 14 seconds, and if we select and right click, we can Insert Frames in order to give ourselves enough room for this to playback.
We can no go ahead and export this as an MP4 or an animated GIF.
Exporting video and sharing on social media
I will choose to Export, Export Video...
And I'll just call it puppy.mov and hit Export.
Within Adobe Media Encoder we can now search through our presets.
So, underneath Web Video, and Social Media here is Twitter, that sounds just fine, so we will drag that onto puppy.mov, and then go ahead and hit the Start Queue (Return) button.
This will render the video for us.
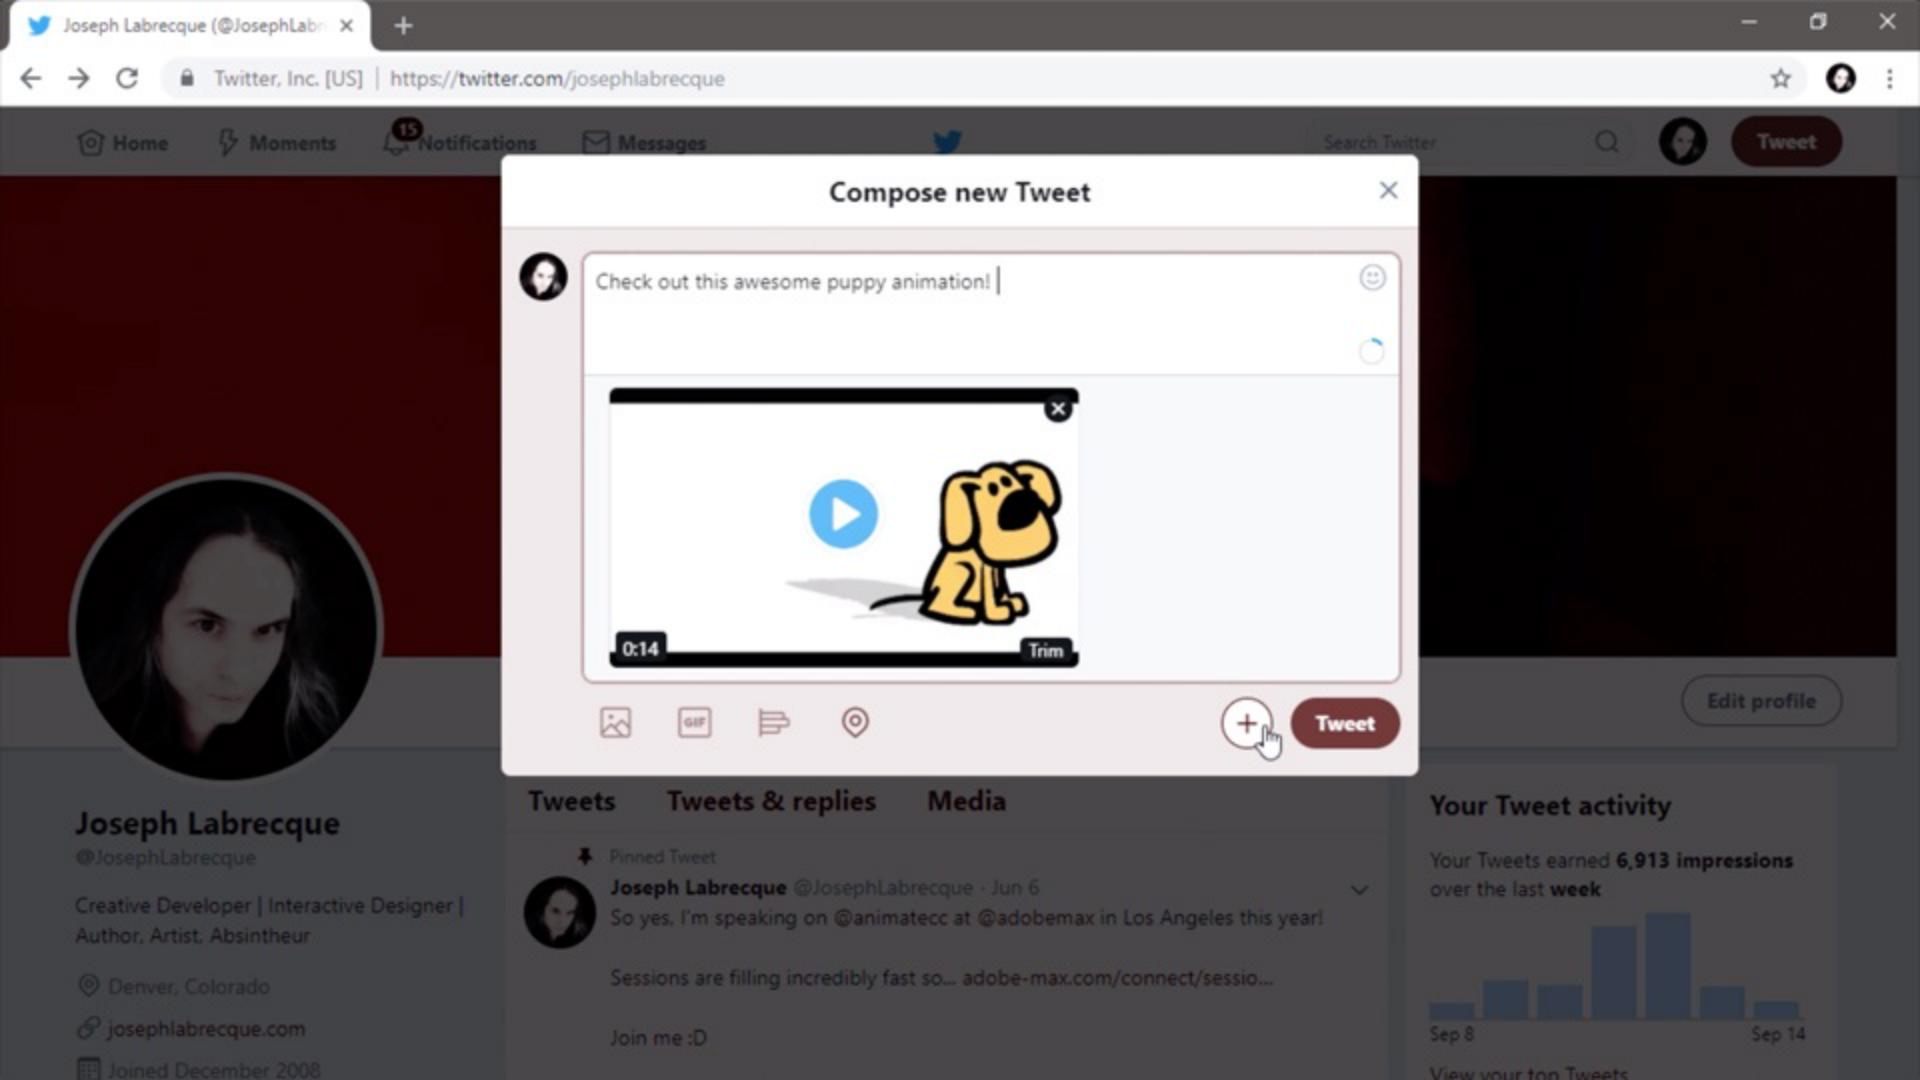
And now back to Twitter, we can ahead and create a new Tweet and attach a video - puppy.mp4.
Open.
And then we can tweet it.
Alright, so our tweet was posted.
And that looks a lot better.
The puppy is now front and center.


