Introduction
Hello and welcome back to my Getting Started Series in Adobe Animate.
If you've been following along, so far, we've managed our workspace, we have learned how to use the drawing tools, created symbols, learned how to create classic tweens, and learned all about movie clips.
In this video, I'd like to show us how to upgrade our artwork
Understanding the power of gradients in Adobe Animate
using the amazing powerful gradients in Adobe Animate.
I've used gradient tools for numerous projects: From creating artwork, designing interfaces.
Here's another interface design I created using the gradients in Animate.
Here's the interface - I'll show you a couple of the animations here.
And here I have an animation of the motor.
This whole thing was created here in Animate, drawn from scratch, and it looks 3D, but it's just the gradients that are making it look 3D like that.
Also this animation here of the pump, again, all the gradients I've used to make this look a little more 3D.
You can see the Animate.
So again, this are all gradients.
I've also used gradients here in Animate to convert a bitmap to a vector.
So this top image is the bitmap, and to make it smaller and scalable, I've resized it and redrew it inside of Adobe Animate using the gradients to make it look just like the original.
I've done that with a lot of different graphics here.
You'll see this lunch tray of food, all using the powerful gradients in Adobe Animate 2020.
So let's jump in.
Setting preferences and workspace for gradient work
So before we begin, I just want to change a couple of the preferences in the new Adobe Animate 2020 application.
So let's go into the Edit, Preferences menu.
For Mac that's Animate, Preferences Edit-Preferences, or File, Edit Preferences on a PC.
And I just want to change the UI appearance from Comfortable to Compact.
You'll see that it tightens up my Timeline, and also tightens up the tools a little bit.
Next, we'll go back again.
And under Preferences, we'll make this set to expert preferences.
Again, which tightens up the ship here.
And lastly, I will navigate back to my workspace that we created in our first video of the series.
And now we're ready to begin.
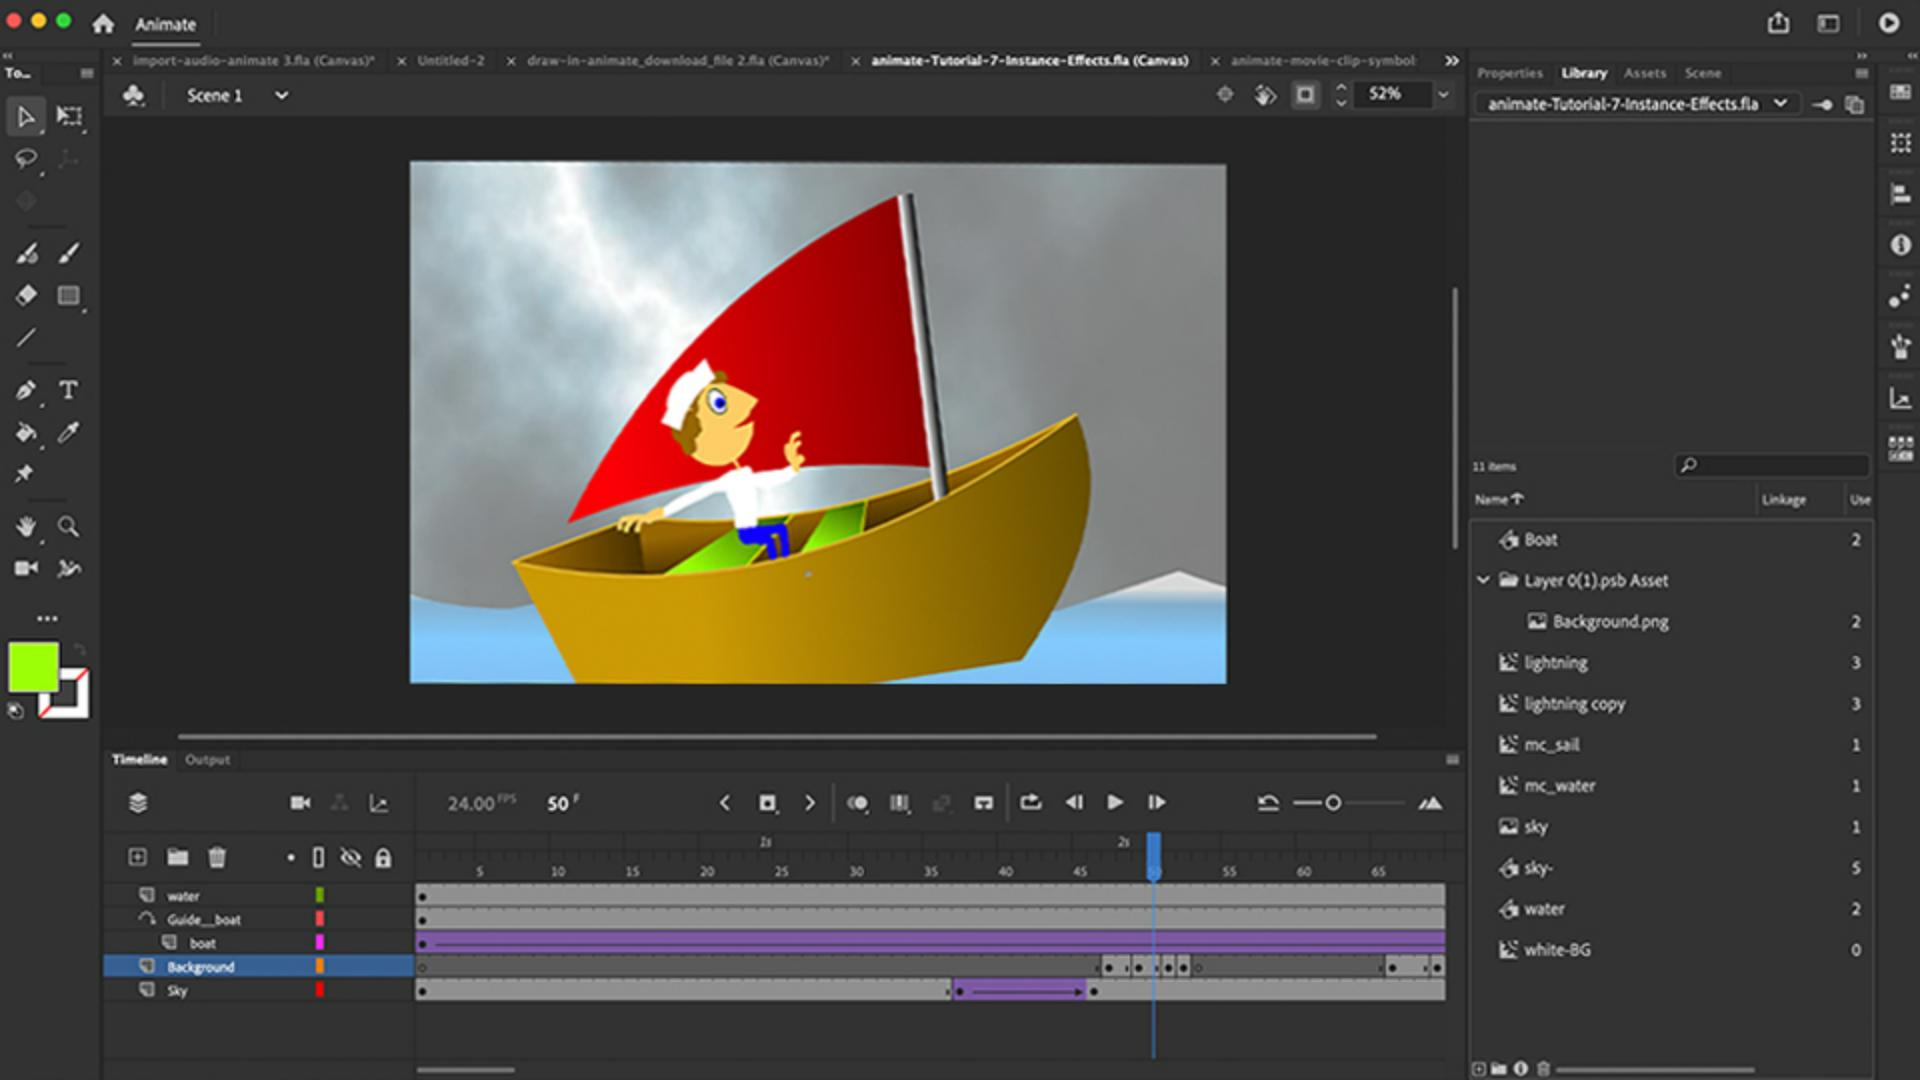
So here's our boat, you can see there's no gradients involved here, I'm just going to jump into the Library.
And we're going to double click or knock, knock, knock on our boat to jump into the editing area.
And I want to recolorize this using gradients.
Creating and editing linear gradients
So I'm going to go up to here and grab my Color panel.
And you'll see here it says Solid color.
So I'm going to click here and select Linear gradient.
And now you'll see a gradient pops up at the bottom with two color stops.
One at the left here, which is black, and the other color stop on the right, which is white.
And you see when I click on them, the top of the color stop, the little triangle goes black, and it shows the color here that's selected, I click on this little white selector, and again, it shows me the hexadecimal code for that color.
And you can see that the little top triangle is black, we have a two-stop gradient.
If I want to add more stops or more colors in between, I can simply just click on the way, and then double click any of these colors to change the color.
And then I have my new gradient here.
Just as easy if I want to get rid of them, I can just click and drag, and it's kind of thrown away off the bottom of the panel.
And all we need is two right now.
And I want to make a gradient using the colors that I've already selected.
And if I double click here, I only have the web pout with 216 colors.
It's going to be really tough for me to select the same brown that I have here, on my boat, and then a darker one.
So what I do is just drag outside of this panel and select the color we already have, this brown.
I'll do that again on the second stop.
And now I don't have a gradient, I have a solid color.
But what I could do to make it a gradient is click on the second stop, or the first doesn't really matter.
And if I change my Hue, Saturation and Brightness to Brightness, I can then drag this Slider to darken the color that I'm using, which in this case is brown.
And now I have a nice gradient going from brown to dark brown.
I can collapse this panel, I'll grab my Paint Bucket Tool, and I'll just click to add the gradient to my boat.
I could also click and drag to help the gradient, kind of direct it to angle it by direction, the way I drag it, or to make it, you'll see, drag longer or wider across the boat.
Applying the gradient transform tool for depth
But I can also use the Gradient Transform Tool, which is sandwiched right here underneath the Free Transform Tool or press the letter F.
And the Gradient Transform Tool is what makes this super powerful.
So here if I click inside my gradient, you'll see I have this center point.
This shows me where the gradient will lie, the center point of that gradient.
Now on the outside here, I can stretch the gradient, making it longer or shorter to fit within my boat here.
At the top here, I can rotate the gradient and I'll drag the center point.
Maybe I'll stretch this out a little bit.
Looks pretty good, it's light and it gets darker as the boat goes towards the front.
So let's do that again, I'll go under my swatches here.
Again, I'll grab and double click this stop, but I'll instead grab the inside color of the boat.
I'll do that again with the second stop, darken it using the brightness.
There we go.
I'll collapse the panel.
And again, using my Paint Bucket Tool, I will fill in these areas inside the boat.
I'll go back here and grab my Gradient Transform Tool again, and I'll click and that one actually doesn't look so bad, and I can just click on the gradient and maybe this all rotates so it gets darker going inside of the boat, make it a little smaller so that the highlight is in the top and then it gets darker as it goes inside the boat, giving it some depth.
Prehear again.
Again, I'll rotate this one.
And one more time, scale this in, rotate it, maybe move the center point around, tighten it up so I could see the darkness, at the bottom there, something like that.
Let's move on to the seats.
I'll grab this color swatch, double click, select the color, I'm already using it, makes it much easier for me to redraw this.
So now I have that green-to-green gradation.
And I'll click on this second stop and on the Brightness, I will slide this down to darken up my green, which basically is just adding either black or white, right, that's what the brightness is doing, and grab my Paint Bucket, add the gradient and then go get my Gradient Transform Tool to perfect it a little bit.
So I'll rotate this, and I'll scale it down a little bit.
Looks like it's kind of getting darker as it goes back in time.
Again, I rotate that, scale this in a little bit.
So something like that.
Refining artwork details and final touches
The last thing I'd like to do is maybe get rid of the stroke now.
Now that we have gradients, we don't really need the stroke at the bottom here on the boat.
So I'll press and delete that.
The stroke to the left, I'll delete that.
The stroke to the right of the boat, I'll click and delete that.
Maybe I'll delete the line behind the seat, we wouldn't see that.
And maybe this line here, we wouldn't see, and get rid of this one here.
And then all I have left now is the top edge outline of the boat, which I'm going to click, and double click actually, to select all of the outlines here.
The two pieces to the seat and the outline of the boat.
In my Properties panel, maybe I could make this little line, maybe I'll make that like three or four pixels thick.
And then maybe we'll add like a light color to the top of that boat there.
So something like that.
And it kind of gives it like this little kind of edge, like the boat has this highlighted edge giving it some thickness and some depth.
I'll test it again.
And I can see we have this semi looking 3D boat using gradients in Adobe Animate.
Try upgrading the sail and the water using the same exact technique.
Maybe with the water you could use multiple stops to go from dark blue to lighter blue, to lighter blue, to a little bit of white, and maybe even alpha transparency on that white.
See you next time.