Introduction
In this tutorial, you'll explore some techniques and tools for creating more precise artwork using Grids, Smart Guides, Alignments and a lot more.
To start with a document open, you can set up a grid to work from.
Setting up grids and snapping for precision
By tapping Precision on the right, you can turn on the grid.
And then you can set some options for it.
You can see the by default is a series of evenly spaced horizontal and vertical lines.
It's useful for creating pixel perfect artwork.
Let's set some options.
You can make the grid dots or lines.
You can also tap to change the Color so maybe it's not as visible.
Then tap away to hide the Color options.
You can also set Grid Spacing and the number of Subdivisions.
You may see another Unit here like Points, it depends on how you set up your document.
Just know that 72 Points equals one Inch.
I'll set it to 1 in spacing between the main grid lines, and 8 for Subdivisions, which is pretty typical to start.
Make sure to turn on Snap to grid so that the artwork actually snaps to it up here.
You can also make Guides from actual artwork in the Task bar on the right, this Guides option is to show and hide those.
Tap to close the options and I'll use two fingers to zoom in closely to the grid.
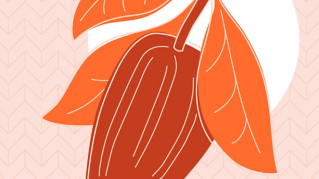
You'll create this icon.
Building icon shapes using the grid
We can do it in a number of ways.
We'll start with shapes.
Tap to select the Rectangle Tool and drag to create a rectangle that snaps to one of the squares here in the grid.
Now we need to round the corners.
So, you could drag this widget, but it's not exacting, and you can't replicate it either.
In the Properties panel on the right, you can set the Corner Radius here to an exact value.
Tap to close the panel.
Now we can remove this part of the shape since we only need this path.
Double tap the shape to enter Isolation Mode so you can delete the anchors you don't need.
Drag across these anchors to select them.
Now if you tap Smart Delete in Common Actions, the path actually stays close.
That's not what you want.
You just want this path.
So, tap Delete in Common Actions and those anchors are removed.
So that you can snap other objects precisely, select and drag each of these anchors to snap to the closest grid line intersection.
To draw the top here, press and hold or double tap on the Rectangle Tool and select the Ellipse Tool.
Come out and drag.
Normally you'd press the Primary Touch shortcut to make a perfect circle.
But in this case the grid is helping with that.
It's snapping.
Drag it into place.
And to remove the bottom half of the circle, you'll repeat the Anchor Delete.
So double tap, select the anchor and Delete, not Smart Delete.
Now you copy this half and flip it over here.
With the Selection Tool selected, select this path.
To duplicate it, tap Duplicate in Common Actions.
And you can now use the Align Options to flip it across.
So, tap Align on the right and then Flip Horizontal.
To move it over, I tend to drag with the Nudge Arrows here in Common Actions when the paths are small or there's a lot of them.
So, try dragging with the Nudge Arrows to the right.
And you'll see it's snapping.
Combining and aligning paths precisely
Now you can join all of these paths into one path.
You need to select the path with the Direct Selection Tool, not the Selection Tool.
So, select the Direct Selection Tool and drag across all parts of all these paths.
To join them, tap Paths and in the menu, tap Join Paths.
Tap away to deselect.
Now to add the straight line.
Select the Pencil Tool.
Come over here and tap and release.
To make a straight line with the Pencil Tool, press the Primary Touch shortcut and tap over here.
Now to ensure that they are snapped to the grid, you can enter Outline Mode and zoom in.
To enter Outline Mode,
Refining artwork with outline mode and finishing shapes
tap up here and turn it on.
You can now see the paths without Appearance Properties.
Two Finger Zoom In.
And to move the anchors, select the Direct Selection Tool.
And you can drag each of these anchors to snap to the grid.
You can't see the grid, you just have to know that it is actually snapping to the grid line intersections.
Go back to Preview Mode up here and Zoom Out so you can add a rectangle down here.
Select the Rectangle Tool and draw a rectangle making sure it's snapping to the grid.
Now to remove the top here, double tap to enter Isolation Mode so you can see the anchors.
Now in this case, you're going to cut the path at these anchor points and delete just that part of the path.
So, select these anchors by dragging across then cut them by tapping to open the Path Options and tap Cut path.
It was cut at each of those anchors now.
Now you can tap that path and delete it in Common Actions.
Don't worry about the fill here.
If you see a fill covering, we'll get rid of that soon.
Now to add the rounded corner part up here, you just going to draw another rectangle and round the bottom corners.
So, with the Rectangle Tool selected, go ahead and draw one.
To round just the bottom corners, you need to select those anchors.
So double tap and drag across in Isolation Mode.
You can now drag either of the Corner Radius Widgets or you can go to Properties and enter a value.
I'll drag.
When finished, you need to tap Done.
If you want to change the fill and stroke, you can drag across all of these with the Selection Tool and do that over there in the Toolbar.
I love that you can be as creative and free form as you want in Illustrator on the iPad, but there are also a lot of ways to be more precise.
To keep practicing: Why don't you try creating a few more of the icons like you see here?