Introduction
This tutorial shows you how to instantly apply adjustments to multiple layers at once in Photoshop.
Hi, I'm Colin Smith from PhotoshopCAFE.
In this tutorial, you'll learn how to create an adjustment group.
We can affect multiple layers at the same time and when you change the settings, it will affect all the layers, so you don't have to change them individually.
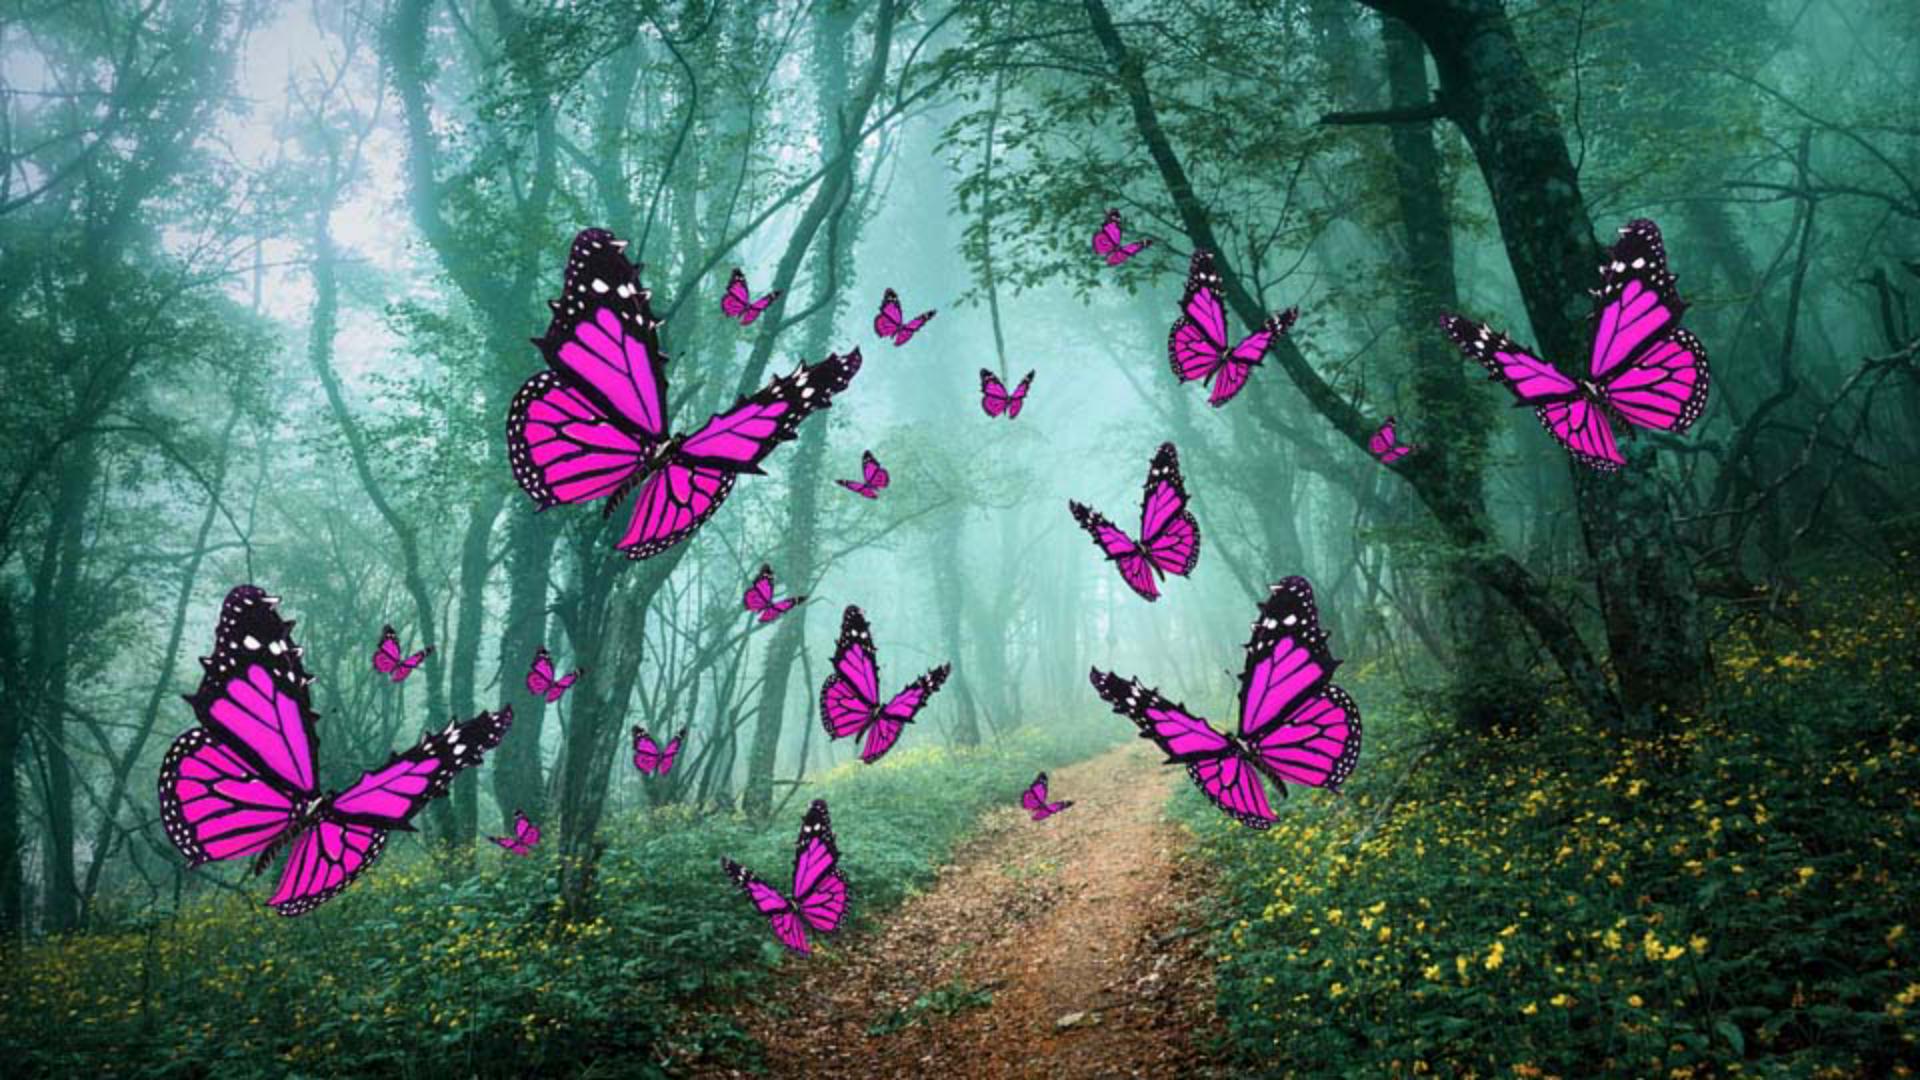
In this image we have a number of different butterflies on separate layers.
Selecting and grouping multiple layers
Let's select the layers we want to adjust together.
We can click on a layer, hold the Control or Command key and click on other layers to add to the selection.
But if you have multiple consecutive layers, we can select them all together.
Select the bottom layer, hold the Shift key and click on the top layer.
Now all the layers in between are also included in the selection.
Let's put these into a layer group.
In the Layers panel, click on the Group icon, click the arrow to expand the group so we can see all the layers within.
Applying an adjustment layer to a group
Let's add a Hue/Saturation adjustment layer to change the color of the butterflies.
With the group selected, go to the Adjustments and then choose Hue/Saturation...
Notice that a Hue/Saturation adjustment layer is automatically added inside the group at the top of the layers stack.
Let's change the color of the butterflies.
In the Properties panel, push the Hue slider to the left until we get a nice pink color.
And you'll notice in addition to the butterflies changing color any layers beneath the group, in this case, the background layer also change color.
Constraining adjustments using pass through and blend modes
Let's limit the adjustment to just the layers within the group.
To do that, choose the group name, then at the top of the Layers panel you'll see Pass Through.
This is a layer blending mode, and it affects the way layers interact with each other.
Pass Through is a special blending mode that treats the layers in a group as if they were just in a regular layer stack.
So all the adjustments pass through the group and effect layers underneath the group as well.
If we want to constrain the adjustments to just the group, we need to change the layer blend mode.
Let's click on it and choose Normal.
Notice the adjustment that changed the butterflies to pink is now only within this group, and it is not affecting the layers underneath it.
To show how this works, let me drag one of these butterflies out of the group.
And notice it goes back to its original color even if I put it underneath.
Drag it back into the group and once again it's affected by that adjustment.
This is a great way to instantly adjust multiple layers with the same adjustment settings.
If you rearrange the stacking in the Layers panel, all these layers will still be affected by the adjustment as long as they remain in the group.