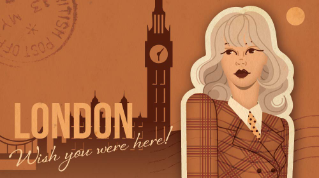
Have you been wanting to up your social posting game with custom social stickers?
With Adobe Illustrator and some playful creativity, you'll be able to add personality and emphasis to your social posts.
Hi, my name is Carra Sykes and I'm an Illustrator, Designer, and Creative Director.
In this video, I'll show you a few tips and tricks in Adobe Illustrator so you can quickly create your own social stickers.
You can use these whenever you want to add a little extra character to your social posts.
In Adobe Illustrator, I'm going to select the Ellipse Tool and click on the artboard to create a circle.
This will be our sticker base.
We'll continue building the sticker, making a smaller copy of the circle by selecting it and going to Object, Path, Offset Path...
Here I'll use a negative Offset number to make it a smaller circle.
I color it a different color to make it stand out from the sticker base.
Repeat these steps, playing with Stroke and Fill to build out your sticker structure.
You can Offset with a positive number to make the shape bigger, while using a negative number will make the shape smaller.
Here, I'm continuing to create the shapes that will frame the text in the sticker.
I like to use lines, Stroke, to build structure, plus it's a great way to add extra detail.
And then to add variety, I like to use Fill.
Once you get the layout to where you like it, it's time to add text.
I want to add in curved text, so I'll need to create a path in the center using Offset Path.
To create the path from an existing circle, select that circle, go to Object, Path, Offset Path... and create a path where you'd like the text.
With your new path selected, go to the Text Tool and hold it down.
You will then select the Type on a Path Tool.
Now I'll click on to the path and filler text will appear.
I'll center the text and then pick a font from Adobe Fonts.
I went with Venice Blvd.
With the text box selected, double click on the Type on a Path Tool, a Tool menu will appear.
Here you can dial in your settings.
This is a tip that I learned that has been super helpful in my work.
I like to use Center when aligning my text to the path.
Play around with how the text appears until you've got it where you want it.
Sometimes I'll repeat the text by copying it, placing it in front, and then rotating it to fill the space.
Once you've added text to all of your stickers, feel free to add your own illustrations or illustrations you've licensed from Adobe Stock.
I added in the smiley illustration I made, plus these little stars to make it more me.
Once I finish making the sticker, I select it and drag it into my library for easy access in different Adobe apps.
This way, I can quickly add the sticker from my library and continue to use them over and over with ease.
Here are a few more social stickers I made using the same process.
Now that you know how to create your own social stickers in Adobe Illustrator, you'll be able to further customize your social posts or even create stickers for clients.
Again, my name is Carra Sykes and I can't wait to see what you create and share.


