Introduction
Have you ever wanted to apply an edit to just part of a photo?
Lightroom's masking feature makes it easy to do this with tools that can automatically create detailed masks for the subject, the sky, or the background in an image.
Hi, I'm Seán Duggan with the Adobe Learn team.
In this video, you'll learn how to get started with the masking capabilities in Lightroom, so that you can apply selective edits to specific areas in your images.
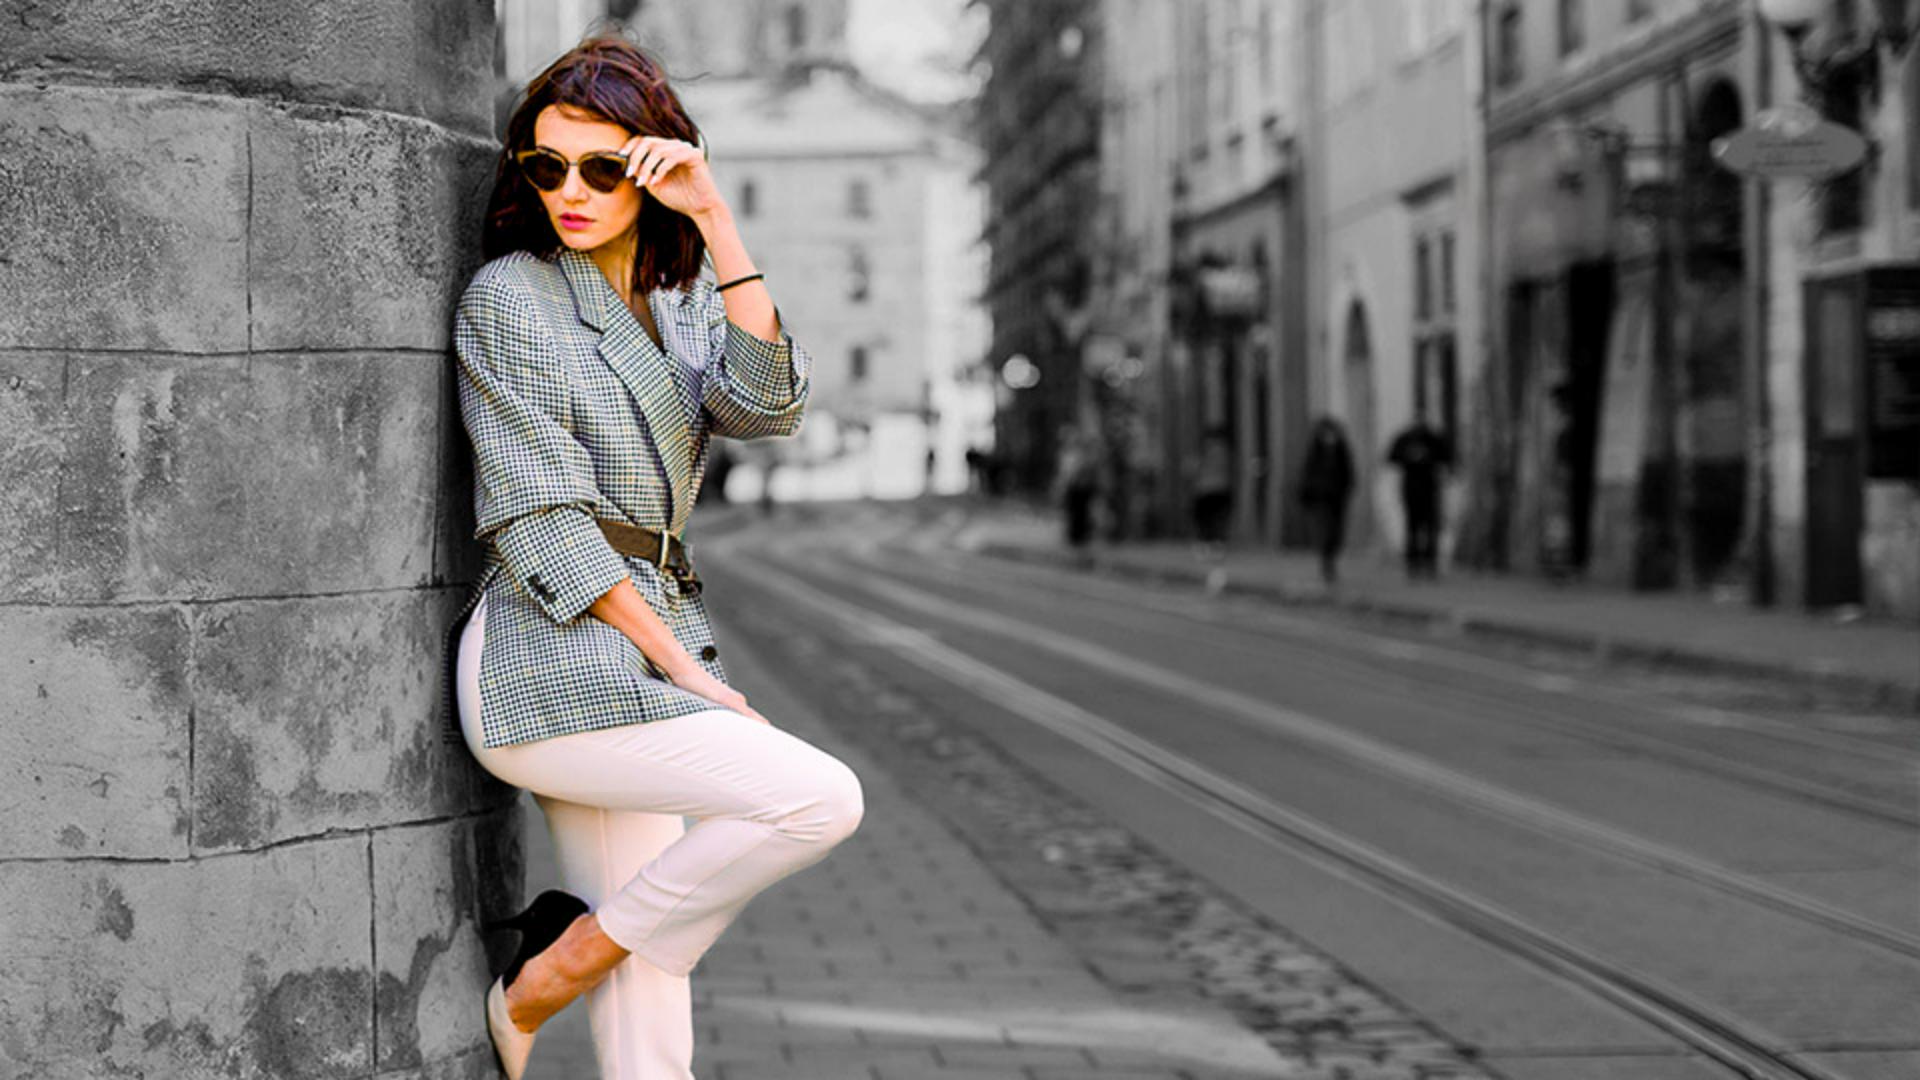
For this fashion photo, I want to apply different adjustments to the model and to the background.
Creating masks with subject, sky, and background
I'll click the Masking icon in the Toolbar on the right.
This opens a panel with several ways to create a new mask.
The three options at the top for Subject, Sky, and Background use AI to identify those areas in a photo.
I'll click Subject.
In just a few seconds Lightroom analyzes the scene and creates a mask for the subject.
The areas that will be affected by the adjustments that you apply are shown with a red overlay.
Applying selective adjustments to masked areas
In the Edit panel for the Subject mask, you can see the different types of adjustments you can apply to the masked area.
These include many of the same edits that you can apply to the entire image, such as Light, Color, Effects, and Detail.
In the Light section, I'll move the Exposure slider to the right to lighten the model.
I'll also adjust the Shadows a bit, so that we can see more detail in her hair.
In the Masks panel, you can work with any of the masks that you've added.
On the thumbnail of our mask, white indicates the area that is affected by the adjustment, and black indicates the areas that are not affected.
You can click the Eye icon for a mask to turn it off and see the photo without the adjustment.
Click the Eye again to turn the mask back on.
In the image, you can see a pin for the mask, which identifies the type of mask in that area.
This is the icon for a Subject mask.
If you hover the cursor over a mask pin, it will temporarily display the overlay color.
Now I want to add a second mask.
Combining multiple masks for creative effects
To do that, I'll click the blue + symbol at the top of the Masks panel.
And here you can see that I have access to all of the various masking tools.
I'll choose Background and Lightroom will analyze the scene and create a mask for the background area.
And here you can see the pin for the new Background mask.
Now I can adjust the Exposure slider to darken everything except for the woman.
By darkening the surrounding area, the model now stands out a bit more from the rest of the photo.
And since I have this very useful mask, let's apply another change by going down to the Color panel and moving the Saturation slider all the way to the left to make the background black and white.
To turn off the visibility of all the mask adjustments, hold the Eye icon at the top of the Masks panel.
Now let's explore using masks with a different type of image.
For this landscape photo, I'll start by applying an Auto adjustment.
Using sky masks to enhance landscapes
That does a great job for the entire photo but now I'd like to modify the brightness of just the sky.
I'll click the Masking icon on the right, and I'll choose Sky to create a mask for that area.
I'll adjust the Exposure slider a little bit to the left to slightly darken the sky, and I'll also brighten the Highlights, so that the light parts of the clouds are not darkened too much.
Sometimes a mask may need a little fine-tuning.
For this image, I like the way the sky looks now that it's a bit darker, but I think that the hills are a bit too light, especially the ones in the distance on the right side of the scene.
Rather than make a new mask just for the hills, I can add to the existing Sky mask.
Refining masks with add and subtract tools
Let's see how that works.
Under the Sky component for Mask 1 are buttons for Add and Subtract.
I'll click Add and now I can choose which masking tool to use to add to the mask.
For the simple edit that I want to make, I'll choose Brush.
At the top of the Adjustments panel for Mask 1.
I can change the Size and the Feather settings for the brush.
Feather controls how hard or soft the edge of the brush is.
I don't want to add the darkening adjustment at full strength, so I'll lower the Density setting to about 50.
Now I'll click on the hills to place the brush pin, and then I'll brush over the top part of the hills to add a slight darkening effect.
In the Masks panel you can see that Mask 1 now has two components: Sky 1 and Brush 1.
If I hover the cursor over those thumbnails, you can see the red overlay for each mask component.
To close the Masks panel, just click the Masking icon again or you can also click the Edit icon to return to the regular edit controls.
There's a lot more to working with masks in Lightroom, and in this tutorial, we've just covered the basics to get you up and running with this powerful feature.
Now that you know how to apply selective adjustments to the sky, subject and the background, as well as how to apply simple modifications to a mask, give these techniques a try on some of your own photos.
Once again, I'm Seán Duggan from the Adobe Learn team.
Thanks for watching.