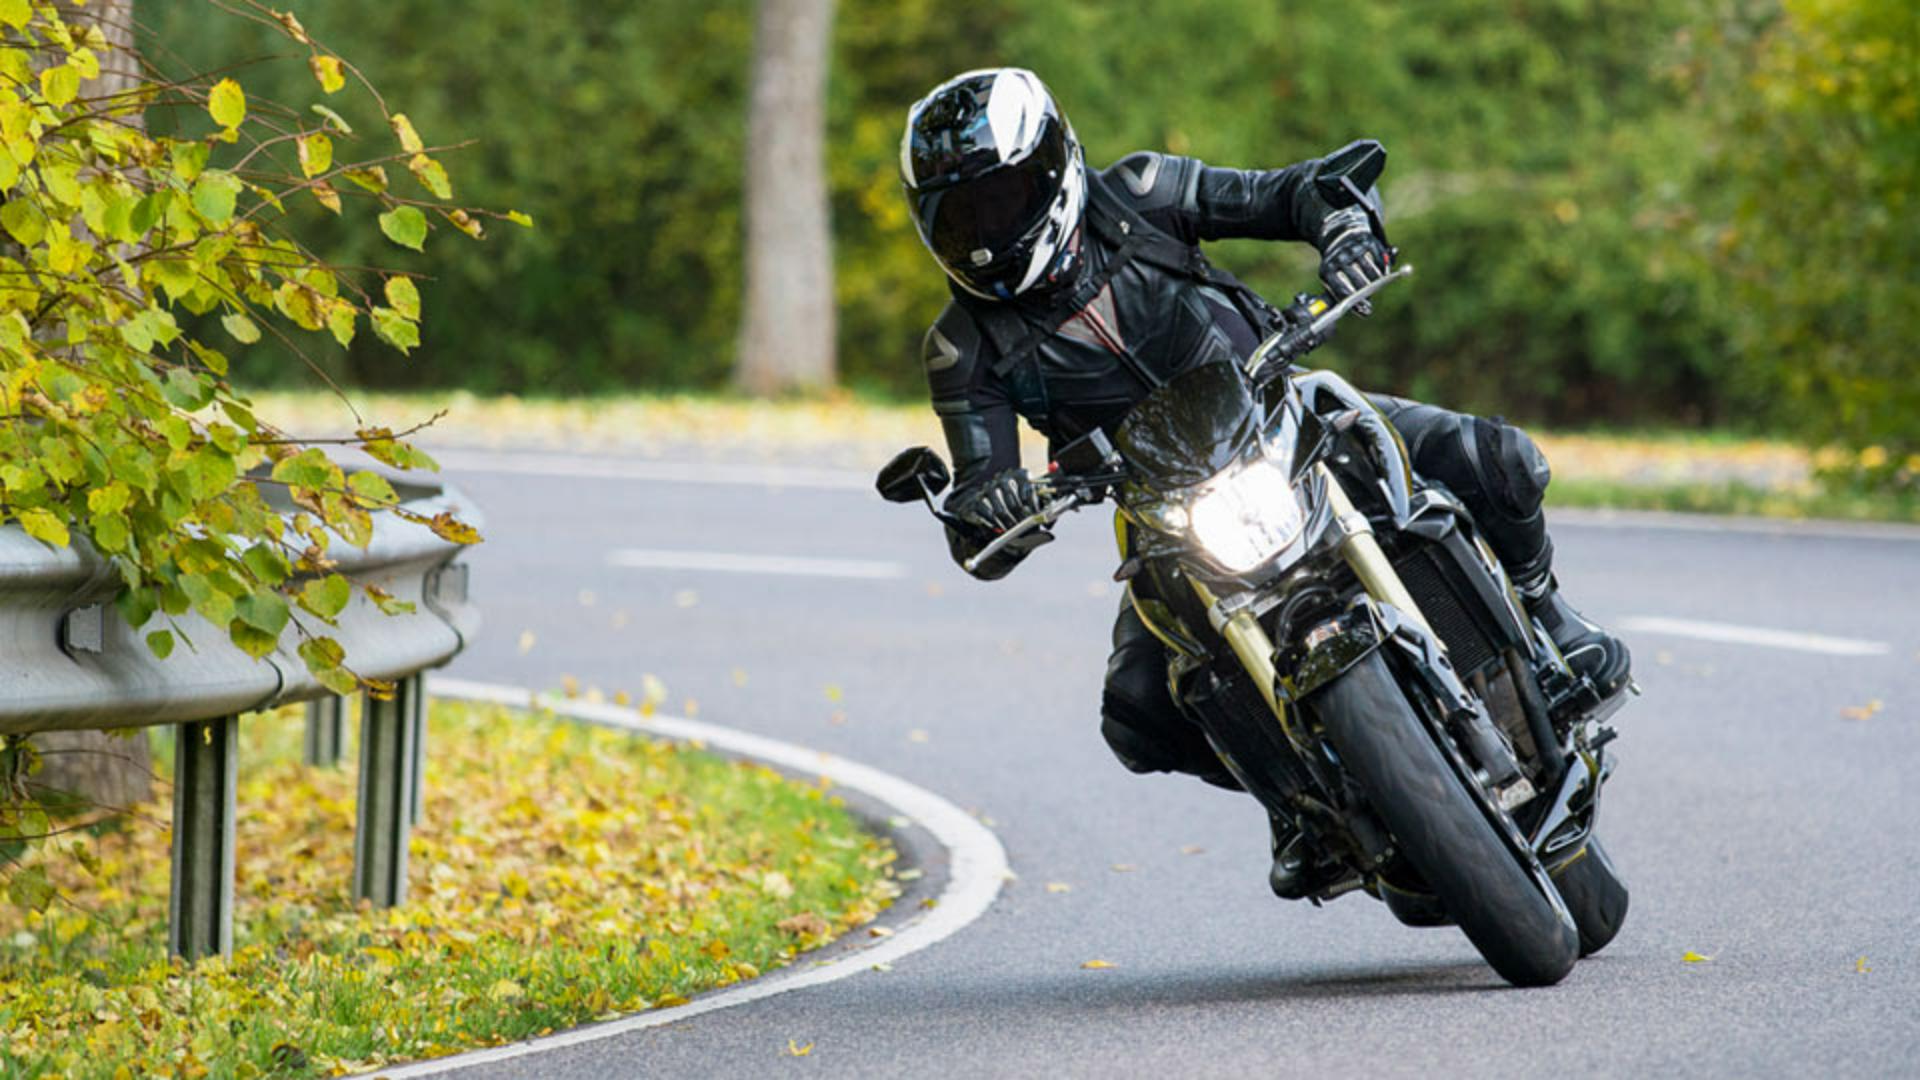
This is a great image.
Unfortunately, that traffic sign in the post on the road are distracting and take away from the composition.
My name is Jesús Ramirez.
And in the next few minutes, I'll show you how to remove unwanted content from your photos with just a few clicks.
For this image, we will use the Clone Stamp Tool, which allows you to copy content from one area and apply it to another.
Photoshop has several powerful tools to remove content from your photos, but they all work differently and have unique strengths.
In this image, we need a tool that offers total control because the edges between the motorcyclist and the distracting elements are very sharp, and we need to maintain that sharpness for good results.
Other tools like the Content-Aware Fill or the Spot Healing Brush are great for removing objects, but their strength relies on blending content to their new surroundings to create a natural look.
To remove the street sign above the motorcyclist's head, select the Clone Stamp Tool from the Toolbar or press the S key on the keyboard.
I'm a big fan of keyboard shortcuts.
I recommend using them if you feel comfortable.
Again, the Clone Stamp Tool allows you to copy pixels from one area and apply them to another.
Think about it as copying and pasting, but you're pasting the content by painting.
Before you make any adjustments, click on the New Layer icon in the Layers panel to create a new layer.
This new layer will contain all your changes and they will not alter the original photo.
This non-destructive workflow allows you to edit an experiment without committing to the adjustments.
You can always return to the original image if you don't like the changes you've made.
To ensure the Clone Stamp Tool works at the content on multiple layers, go to the Options bar, and set the Sample dropdown to All Layers.
Next, you need to sample the area to copy content from.
You always want to sample from areas similar to the ones around the object you would like to remove.
In this case, the greenery in the top right matches the areas around the street sign perfectly.
To sample an area, hold the Alt key on Windows.
That's the Option key on the Mac.
Your cursor should now switch over to a Target icon.
Then, click on the area to sample and release all the keys.
The cursor will now reveal an image preview of the content you will paint with.
If you can't see the preview, try making the brush larger by going into the Brush settings in the Options bar, and dragging the Size slider to the right.
However, I prefer to decrease or increase the brush size by tapping on the left or right bracket keys.
Those are the keys to the right of the letter P in North American keyboards.
Make you brush size large enough to see, but small enough to fit within the areas you want to remove.
Also, remember that you can always resize the brush tip as you paint.
Another important setting in this process is the Brush Hardness.
A hard brush has defined crisp edges.
While a soft brush has more gradual blended edges.
You can adjust the brush hardness from the Brush Settings in the Options bar.
The Hardness slider will go from 0%, a soft edge, to 100%, a sharp edge.
Again, I prefer to use keyboard shortcuts.
Hold Shift and tap on the left and right bracket keys to decrease or increase the Brush Hardness.
Notice the brush preview overlay.
It changes as you adjust the Brush Hardness with the keyboard shortcut.
For this image, use a softer brush to remove the top part of the sign.
Now, hover over the top of the sign and paint it away by clicking and dragging over it.
The + icon on the right indicates the sampled areas, the Soft Brush Edge will blend and smooth colors to create a more natural-looking effect.
But this Brush Hardness will not work for the edges around this helmet.
Those edges need to be sharper and more defined.
You can use the Brush Settings if you prefer.
Increase the Brush Hardness to about 90%.
And also reduce the Brush Size.
Then paint along the edge of the helmet to continue removing the sign.
This looks fantastic.
Click on this layer's Eye icon from the Layers panel to compare the original photo against your edited version.
Now that you know how the Clone Stamp Tool works, try removing other distracting elements from this image.
This is what my final result looks like after removing other distracting elements.


