Combining Photoshop's generative AI with traditional tools unlocks endless creative possibilities.
I'm Jesús Ramirez.
In this video, you'll discover how to blend a generative image feature with time tested practical techniques to design a captivating album cover.
This is our starting document.
It contains a text layer with the album name, Heartstrings.
Let's start by creating a background.
Click on this icon below the Toolbar to open the Generate image window.
Think of this tool as a creative partner, enhancing your ability to ideate and design without replacing your unique vision.
Offering one-of-a-kind elements tailored to your needs.
The first step is to enter a prompt.
I'll go with Grunge paper texture.
Under Content type, choose Photo to generate a photorealistic image.
Now click Generate to create three images based on the prompt.
You can use the arrow icons in the Taskbar to cycle through the results.
They're all great, but I like this one the best.
The generated layer is above all others, but we need to place it on the bottom of the layer stack to act as our background.
To do so, you can drag the layer down from the Layers panel.
If your background is a bit too dark, you can brighten it by going into Image, Adjustments and choosing Brightness/Contrast...
Drag the Brightness slider to the right to brighten the image.
Press OK when you're done.
The adjustment is applied as a smart filter, meaning you can edit it at any time by double-clicking on this label.
Watch the final video in this series to bring all your generative AI techniques together.
Now, let's create the main subject for this album cover.
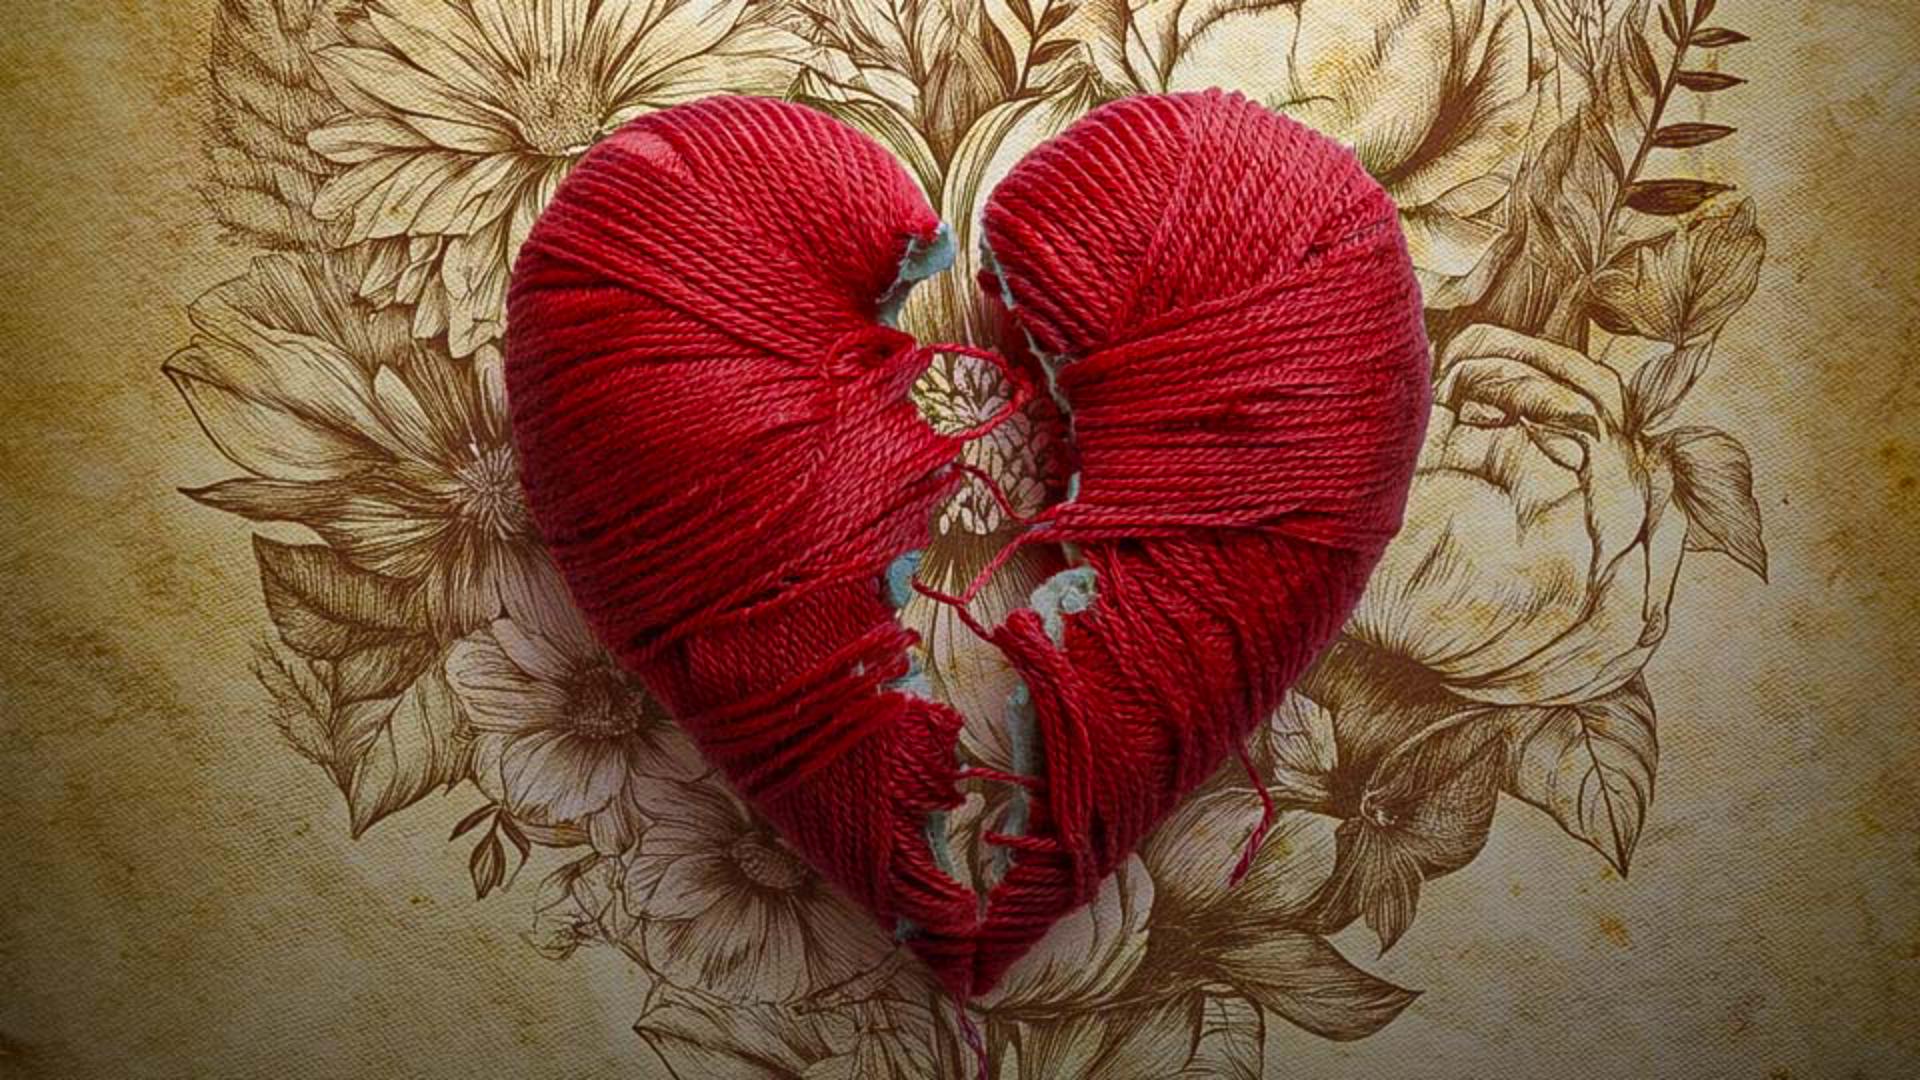
Click on the Generate image button and use the prompt, Broken heart made out of yarn with intricate details on a solid white background.
Now click on the Photo button.
Under Effects, go into Materials, scroll down and choose Yarn.
This will assure us that the generated images will look like they were made out of yarn.
Then click Generate.
Again, you can use the arrow icons in the Taskbar to cycle through the results.
They all look fantastic, but I'll go with this one.
This is the best part about using Generate image in Photoshop.
It generates an image over the entire canvas without any influence from the content below.
Next, from the Taskbar, go into the three-dot icon and choose Remove background.
This command will duplicate and hide the original generative layer.
The duplicate layer will be pixel-based, containing a layer mask that hides the background.
And this is why we generated a white background so that it would be easy to mask.
Now let me show you an easy-to-follow technique to keep the original shadows of the heart layer.
First, duplicate the layer by pressing Control J in Windows, That's Command J on the Mac.
Then from the bottom layer, right-click on the layer mask and choose Delete Layer Mask and change the blending mode to Multiply.
This will make white areas invisible, leaving only the shadows behind.
To control the intensity of the shadows, go into Image Adjustments and choose Levels...
Then use this slider to make the darker areas darker, which will make the shadows darker.
And with the slider on the right, you can make the brighter areas brighter, which will hide more of the background.
This is all possible because we applied the Multiply blending mode to this layer.
Press OK when you're done.
To keep things organized, I'm going to click on the topmost heart layer, scroll down and click on the hidden generative layer while holding Shift to select all the layers.
Then press Control G on Windows, that's Command G on the Mac to place all selected layers into a group.
Now press Control T on Windows, that's Command T on the Mac to transform.
Drag the corner transformation handle inwards while holding Alt in Windows or Option on the Mac to scale from the center.
Press Enter on Windows or Return on the Mac to commit the changes.
Next, click on the Grunge paper layer to generate another design element above it.
Then click the Generate image button.
Type the prompt, Shape of a heart with flowers inside.
Set the Content type to Art to generate an illustration.
From here, you can apply a Style Reference image to ensure that your generation is similar in style to your chosen image.
You can upload your own or choose one from the sample images.
In this case, you can scroll down and click on this line drawing illustration of a tiger and flowers.
Click Generate and Photoshop will give you three incredible illustrations.
I'll disable the Heart layer to better see the results.
You can cycle through the variations by clicking on them from the Properties panel.
I like this one the best.
To apply this illustration to the background, change the blending mode to Multiply.
This will make all white areas invisible, and you will only see the dark areas.
Let me now show you a technique to colorize the line drawing.
Go into Image, Adjustments and choose Hue/Saturation...
From here, click the Colorize checkbox.
The goal is to make the line drawing the same yellow orange color as the grunge in the background image.
Start by dragging the Hue slider to the red areas, increase the Saturation a bit, and increase the brightness with the Lightness slider.
Press OK when you're done, then enable the heart group to see the current design.
Next, double-click on the text.
From the Taskbar, change the Font to Adobe Handwriting.
Then click and drag on the font size label to increase the text size.
Now that you know how to combine Photoshop's Generative image feature with traditional tools, I encourage you to apply these techniques in your own projects.
Watch the final video in this series to bring all your generative AI techniques together.
Again, I'm Jesús Ramirez, thank you for watching.


