Introduction
Hello, this is Russell Preston Brown from Adobe.
And this tutorial is all about converting color images to dramatic black and white images.
In this project, I'm going to demonstrate some of my tips and techniques here in Adobe Lightroom.
And these techniques will date back to the beginning of time when I learned how to dodge and burn in the darkroom.
So, I'm going to do some dodging and burning with the Radial Gradient Tool, the Linear Gradient Tool and the Brush Tool here in Lightroom.
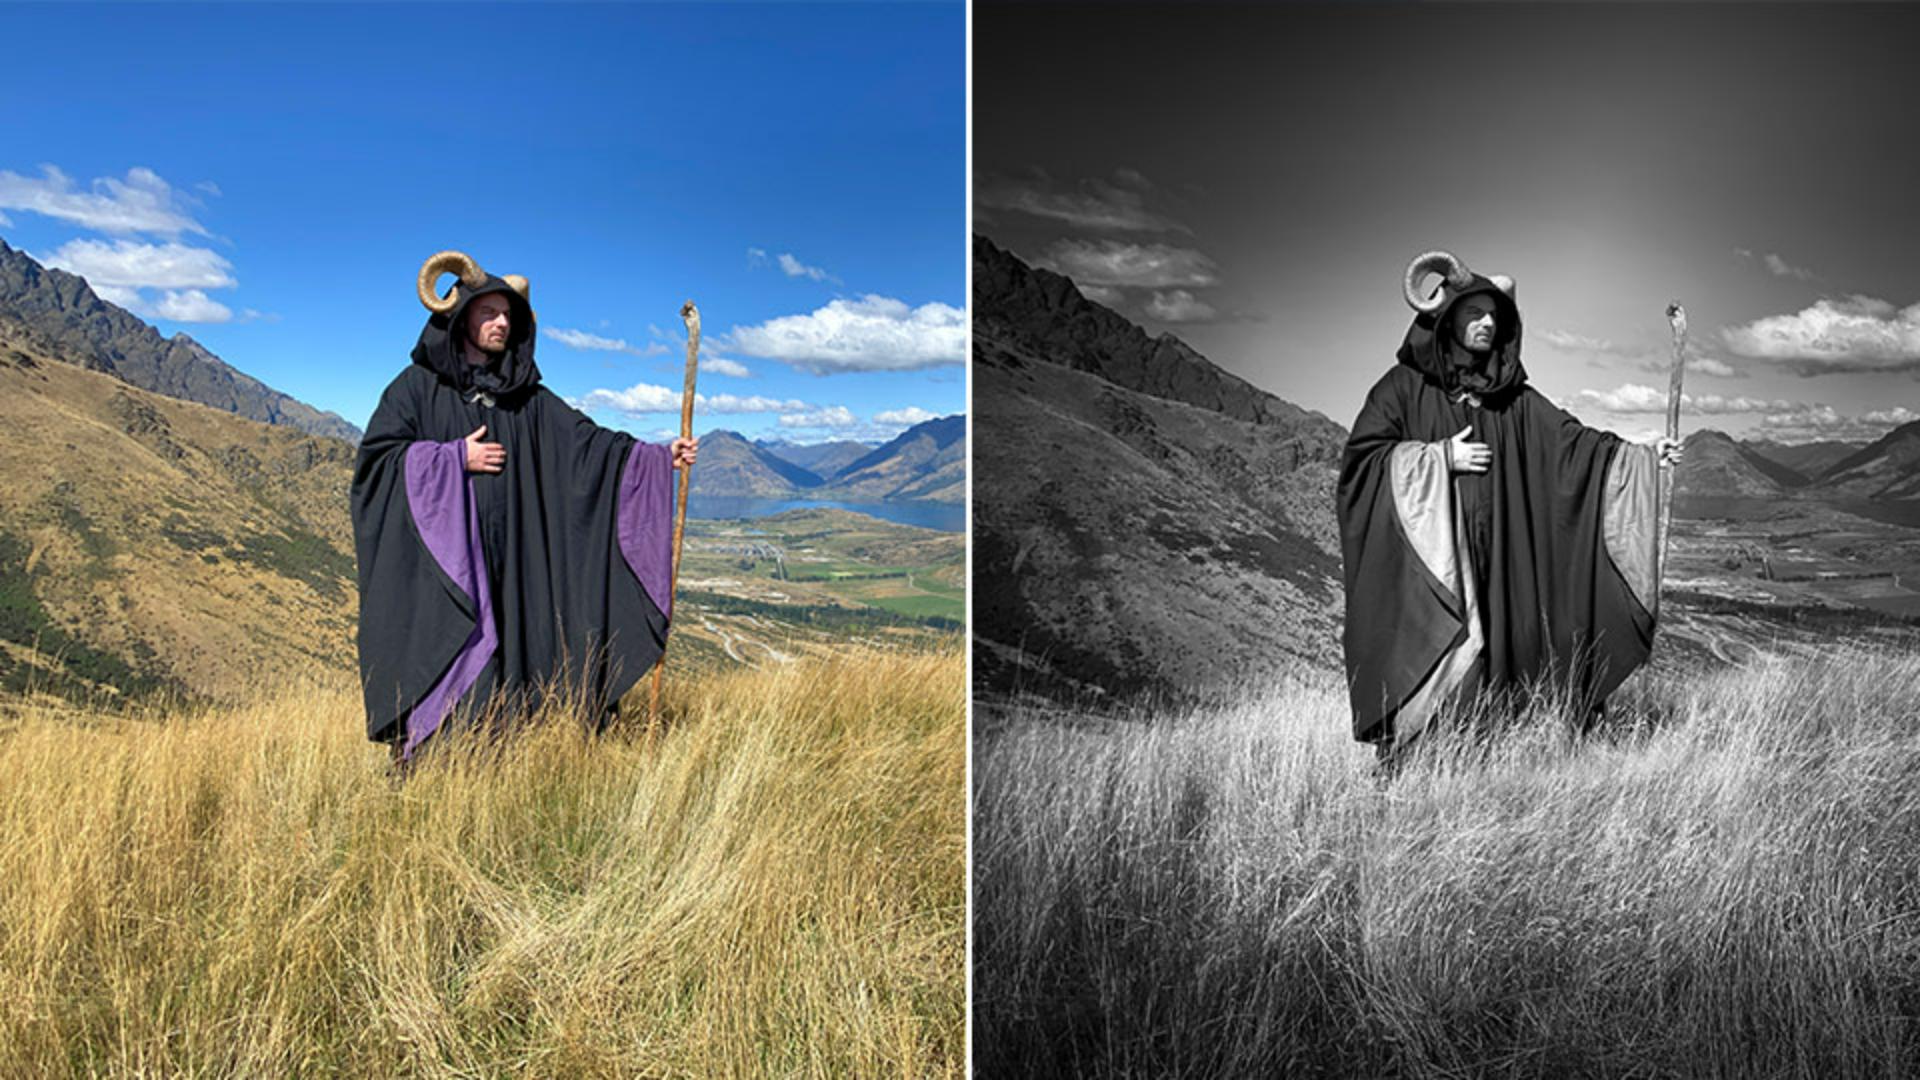
I'm going to start with this image that I captured in New Zealand, as well as this second image that I used for my panorama episode in New Zealand.
Once again, I'm going to convert this image to a dramatic black and white image as you see here.
Let's get started with this first image.
Choosing a black and white profile for a dramatic base
Whenever I convert a color image to black and white, I always start right over here under my Profile settings.
I'm going to tap here and reveal my selections here.
I'm going to go right down here to Browse All Profiles...
Then in this window, I'm going to select B&W here.
Now these are all the built-in profiles, I can select from.
See, as I move my mouse over each of the profiles, it then previews that profile.
This way, you can go through all the existing profiles and find the profile that is closest to the look that you want for your project.
I want a really nice dramatic look.
So, I went through these and I ended up liking B&W 06 the best.
See how dark the sky is.
Then down here, I can adjust the Amount by sliding this to the right, I can really make the sky dark, but it's too dark.
To the left, I've lost all my effect, but if I move it back here to this spot, I get just the look I want to start this project.
Get the base tones you want for your black and white image.
Then up here I'm going to select Back and go to my other adjustments.
Of course, I can adjust the Light settings, Color, Effects, Detail, Optics and Geometry.
But in this case, I'm going to go right to Color.
Right here.
Refining tones with the black and white mixer and effects
Opening up Color, I sometimes make targeted adjustments here with the B&W Mixer.
For example, there's a really nice purple in the outfit that the wizard is wearing.
If I select the Purple and slide it over to the right, I can then enhance and make the purples all lighter.
However, if you push this technique too far, it can add artifacting in the sky as you see here.
It does not look good.
So, in this case, I'm going to set this back to 0 and I'm going to use another technique.
But before I show that let's go next to Effects, because I do want to adjust the Dehaze, Clarity and some Exposure to make my image a bit darker.
Then down here, I'm going to add a Vignette, right here.
I want to darken in on the edges.
As you can see, I'm making my image darker and darker.
However, my next step is to go in and lighten areas up.
If I go right over here, this is where the story really begins.
Dodging and burning with radial gradients
Because I'm going to select the Radial Gradient Tool for targeted adjustments.
Selecting that I can then draw this ellipse into my image.
Notice I've made it a really large ellipse that goes off the edge.
I want this effect to come down from the sky and appear as if it is lighting up my subject.
I can also select Invert here, because I want to affect the areas outside this ellipse, not inside the ellipse.
I want to make those areas darker on the outside, so it makes it appear to be lighter on the inside of the ellipse.
Check this out.
Here are the results.
I now have this what appears to be a light coming down from the sky and hitting my subject.
Wow.
Let's continue this process and do selective brushing of light.
Here I'm selecting the Brush Tool.
Sculpting light with the brush tool
Then I can go in as you see here and apply different areas of adjustment with the Brush Tool.
I go in as if I were in the darkroom and do dodging and burning.
I can make areas lighter or make areas darker.
Notice as I select each of these areas that I've painted in, you can see the adjustments over here to the right.
I can bring up the Highlights and drop the Shadows.
And by doing so, I can adjust the purples in this image without affecting the sky as I did with the targeted colors earlier.
I'm going to go through and select and paint in these areas for adjustment.
Now, here's one other tool you can use in this process.
Its Linear Gradient Tool here.
Finishing with linear gradients and applying the look to other images
Target that, then tap and drag a gradient here in your image.
In this case, I've placed a gradient here at the base.
Tapping on the gradient, you can see my adjustments, I'm dropping the Highlights down and the Exposure.
I can then adjust the size of this gradient to get the look just right.
And here is my final result.
It looks fantastic.
Now here are the results on the second image I created.
I used some of the exact same techniques.
As you can see here, I've gone in with the Brush Tool and applied some adjustments here.
I go through again with the Radial Gradient Tool to lighten areas up.
And here on the ground, I wanted it to be lighter.
And over here near the barn.
I can target those areas and bring them up just as if I were in the darkroom.
So, the final image looks like this.
And of course, the original looked like this.
It's quite a dramatic change.
So, there you have it. some great tips and techniques for adjusting color images into black and white images with a really dramatic effect.
And I showed you how to use the dodging and burning techniques with these targeted tools - the Radial Gradient Tool, the Linear Gradient Tool and the Brush Tool.
Give these techniques a try.