¿Alguna vez te has preguntado cómo podrías agilizar tu trabajo en Lightroom?
Los ajustes preestablecidos pueden ser la respuesta.
Soy Kenneth Hines Jr., embajador de ZEISS.
En este tutorial, te enseñaré a crear ajustes preestablecidos personalizados para aplicar rápidamente tu aspecto o estilo favorito y acelerar el procesamiento.
¿Qué son los ajustes preestablecidos?
Se trata de ajustes de edición guardados que se han aplicado a una imagen.
Puedes utilizar los ajustes preinstalados por Adobe o crear ajustes personalizados.
Guardan de todo, como ajustes de pincel, de gradación de color y de curva de tono, entre otros muchos.
Una de sus grandes ventajas es que reducen el tiempo invertido en la edición de imágenes.
Si tienes una serie de imágenes de un evento o escenario concreto y los cambios entre los fotogramas son mínimos, editar una de las imágenes con los ajustes que quieras guardar como ajuste preestablecfido y aplicarlo al resto de imágenes te ahorrará mucho tiempo.
También puedes clasificar los ajustes preestablecidos que tengan funciones específicas para crear un aspecto concreto.
Puedes tener ajustes solo para enmascarar al cielo, o ajustes de tonos y de color, que veremos más adelante en este tutorial.
Busca el icono del círculo superpuesto en la parte superior derecha del panel derecho.
Aquí están las pestañas Recomendados, Prémium, para los ajustes preestablecidos preinstalados, y Propios, para los ajustes personalizados que hayas creado tras realizar ajustes en una imagen y guardarlos, como veremos ahora.
Hay muchos ajustes excelentes en las secciones Recomendados y Prémium, pero en este tutorial quiero centrarme en enseñarte a crearlos.
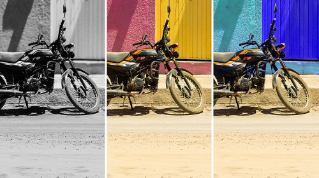
En esta imagen del Monumento a Lincoln, en D.C., ya he aplicado mis ajustes.
Esta es la imagen antes de realizar ningún cambio.
Me encanta este aspecto, así que voy a guardarlo como ajuste preestablecido.
En Ajustes preestablecidos, buscamos el icono + en el panel, lo seleccionamos y, a continuación, tenemos que ponerle un nombre.
Ahora, podemos elegir el grupo en el que queremos guardarlo y las selecciones que queremos guardar.
Luego, elegimos Guardar.
Ya tenemos el nuevo ajuste preestablecido.
Apliquemos el ajuste a otra imagen.
A esta del Monumento a Washington, también en D.C.; creo que quedaría muy bien con el ajuste preestablecido.
Lo buscamos en el panel Ajustes preestablecidos.
Y lo aplicamos.
Queda genial en esta imagen.
Estos ajustes se pueden guardar con cualquier combinación de ajustes.
Habrá situaciones en las que el aspecto buscado no encaje con todos los ajustes.
Por ello, tiene sentido guardar solo algunos ajustes.
Puede que necesites un ajuste para una función específica, como un ajuste preestablecido adaptativo.
Veámoslo en esta imagen de la playa, que tiene un ajuste de máscara del cielo.
Solo quiero guardar esa máscara, así que repito los pasos para guardar el ajuste y lo guardo en el grupo Ajustes preestablecidos adaptativos.
Esta vez, seleccionaré el menú desplegable Seleccionar y elegiré Ninguno.
Sin ninguna selección, puedo localizar Máscara.
Con la máscara del cielo seleccionada, hago clic en Guardar.
Así, tengo un ajuste preestablecido solo para la máscara del cielo.
Veamos otros ejemplos de imágenes para ver si quedan bien con los ajustes que he creado.
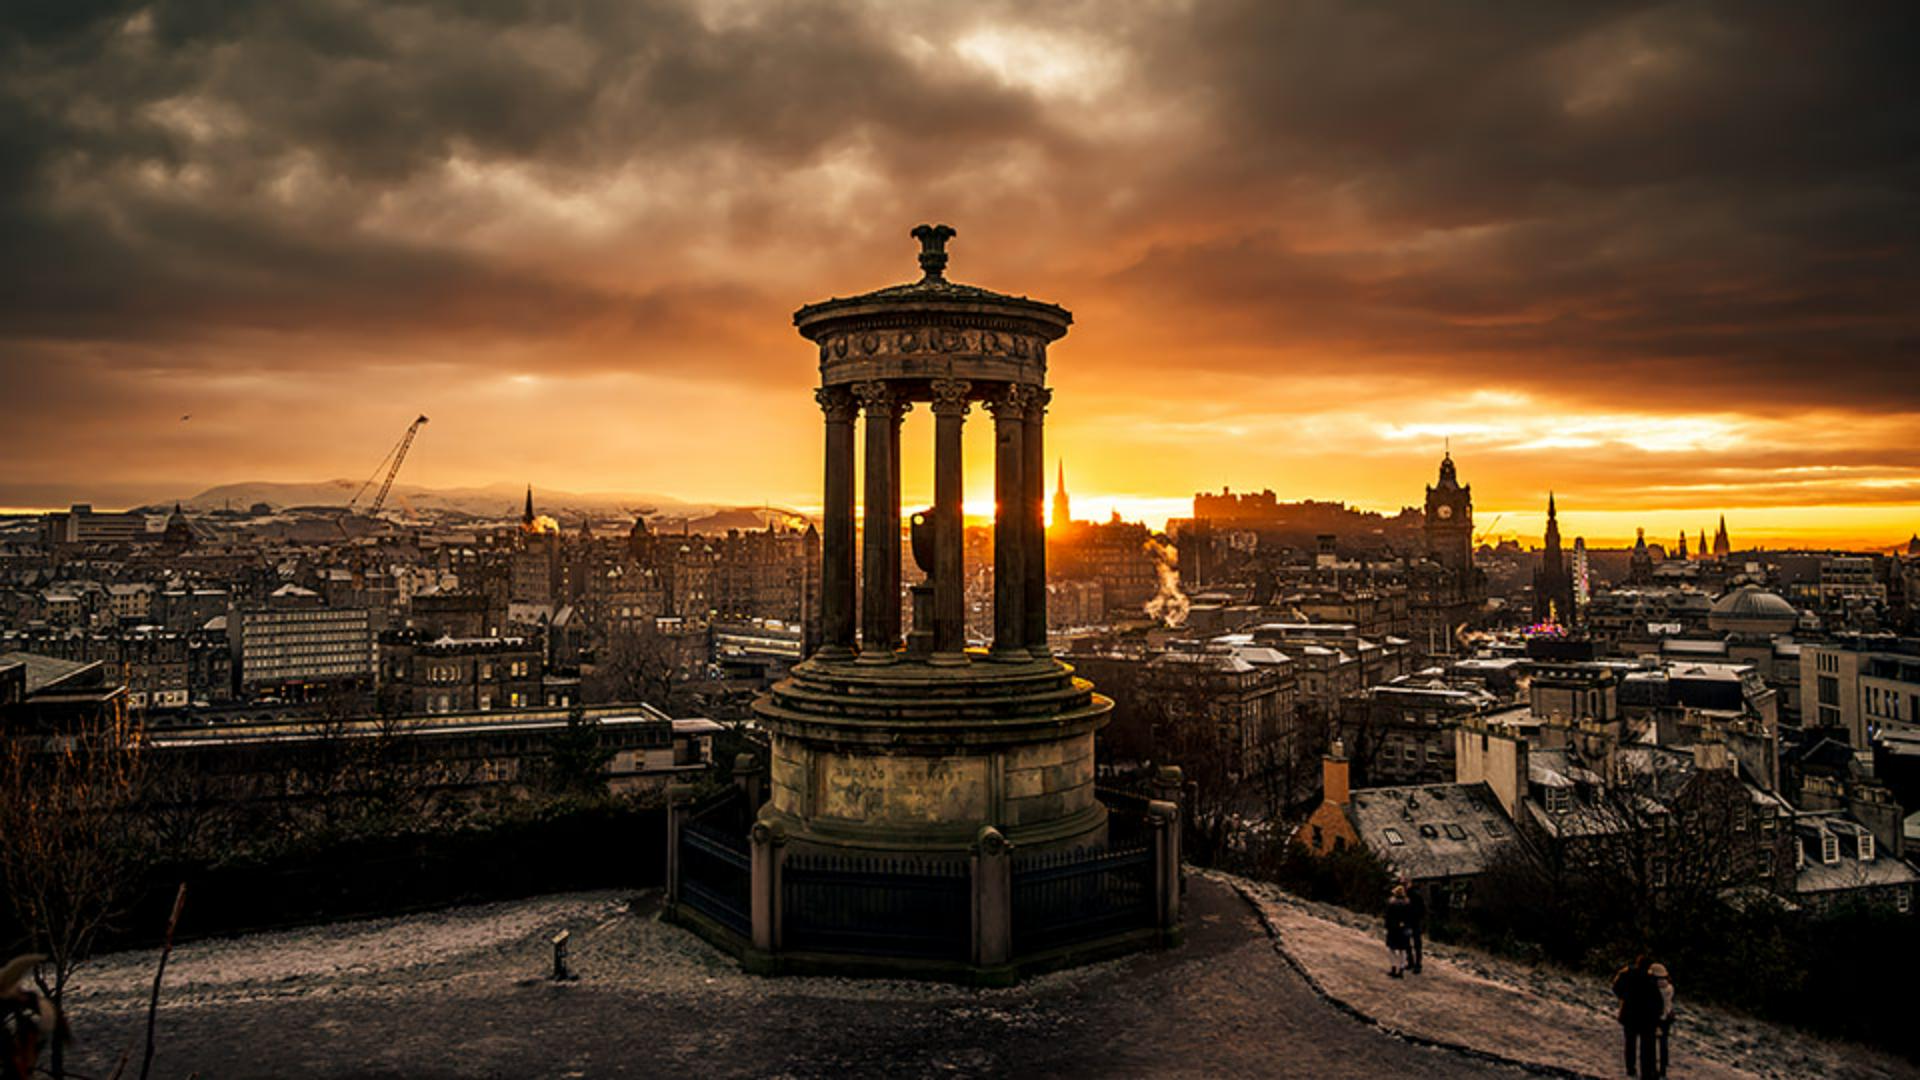
A esta imagen de Escocia, elegiré uno de mis ajustes para horizontes y puestas de sol.
Al pasar sobre una selección, aparece una vista previa de cómo quedará antes de seleccionarlo.
Creo que este ajuste es el que mejor queda, así que lo seleccionaré para esta imagen.
Pasemos ahora a esta imagen de Nueva York.
Solo quiero ajustar el cielo; me gusta el aspecto delicado de los edificios y el agua, pero quiero que el cielo tenga más detalles.
Vamos a ajustes preestablecidos de Cielo adaptativo y buscamos cuál va mejor para la imagen.
Creo que este es el que mejor queda, voy a seleccionarlo ¡y listo!
Si un ajuste no encaja con la imagen en la que estás trabajando, Soy Kenneth Hines Jr.
Espero poder seguir explorando Lightroom contigo muy pronto.