Introduction
Hello everyone and welcome to part 2 of the Getting Started series on Adobe Premiere Rush CC.
Basic editing tools in the Timeline
In this video you will get a tour of the Rush CC interface.
When you open up Rush CC you will see all of your current projects available in the Project browser.
So, whether they were created on your mobile device or on your desktop all of the projects will be synced to the cloud, so you can pick up where you left off from any device.
You also have the option at any time to turn off the syncing from this Project browser.
To start a project simply click on the blue Create a New Project button.
And from here you are taken to the media browser where you can select the media you are going to use in your project.
This can be video, images, or audio.
And it's important to note that media is selected and added in the order that you select them, so you can preview how your project will be laid out in the timeline at the bottom of the screen.
Working with audio clips and track controls
So, in essence when you're selecting this media it can help you build your story from the get go.
Of course, you can always reorder these clips in the next stage in the editing timeline.
Lastly give your project a name here and then we're ready to begin editing.
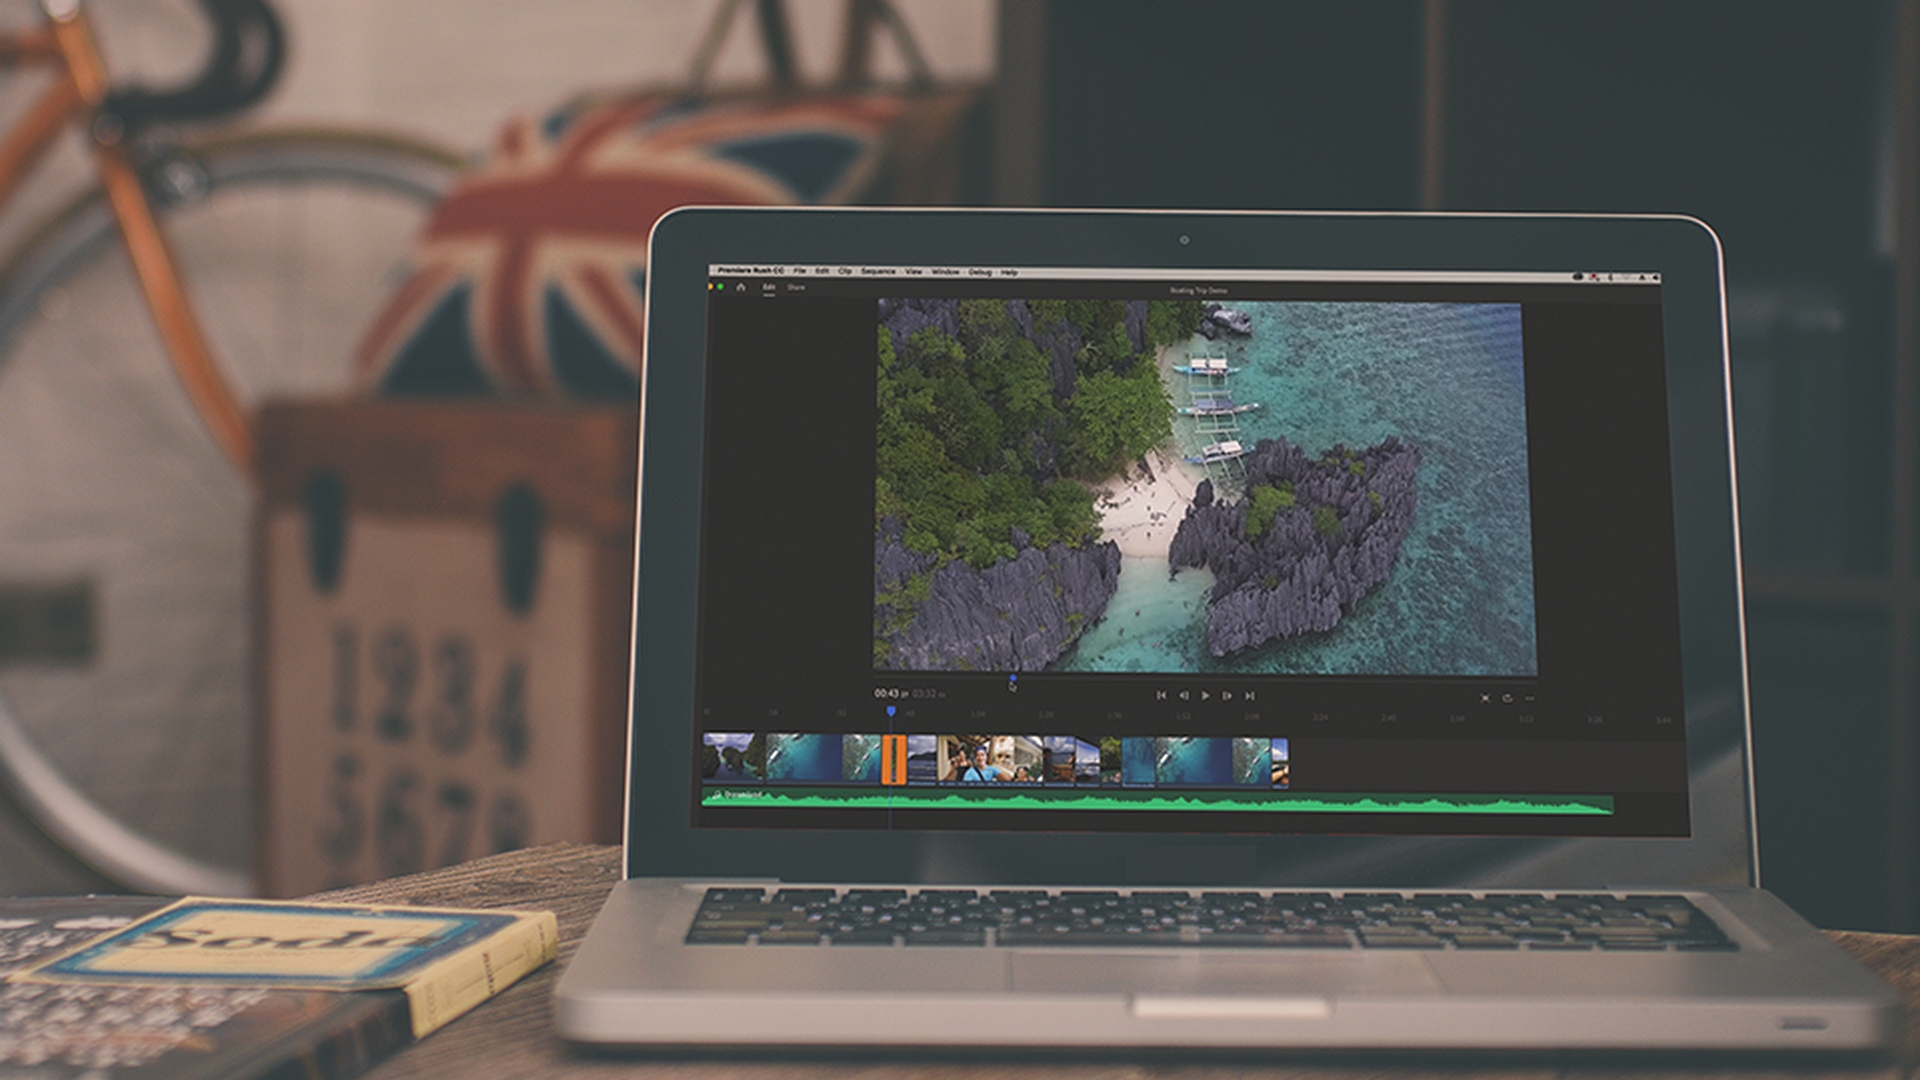
Now this is your editing workspace.
On the left there is a blue plus button and here you can add more elements such as Titles, more Media, like videos or music, or here you can even record a Voiceover.
And below this you will find a box icon.
This will open up your Project panel.
In here you will see all the media you selected for your project.
And you can hover over this media to scrub through and preview it. and when you select the clip you can also add it to your Timeline by hitting that blue Add button.
And once you're done with this Project panel you want to close it, just click back on the box icon and it shrinks away.
And also, up here is the Home button.
And if you click on this it'll take you back to the Project browser.
And this is where you can select another project that you're working on or we can go back to the current one that we're editing just by clicking on it.
All right, so now let's go over the Preview monitor and the controls.
Adding titles, transitions, and color presets
So here we can actually move this blue dot and you will see a preview of your video at the timecode. you will see that as you move this blue dot it will also move the play head in the Timeline and it will indicate the exact timecode where it's at.
And next to this timecode you will see another number.
And this is the entire duration of your video.
You can also use these playback controls to move within your video.
And also, just a reminder, if you hover over any button it will bring up a friendly tip that describes what the button can do.
And also shows the keyboard shortcut if there is one.
Next to the playback controls you can hit this Full screen icon
Refining audio with advanced controls
to make your playback monitor full screen.
And then tap it again to minimize it.
And next to Full screen is the Loop Playback button.
Click on this if you want your video to play again after it's finished and continuously loop.
Now next to this button is the most important.
You can change the aspect ratio.
After you click it you can change the video's orientation.
Right now, it's Landscape because Rush CC sets the aspect ratio based on your source media.
But you can always change it to a different one.
So, for example if you click on Square it will automatically change your orientation to a square aspect ratio.
And then you can choose Portrait if you want to create a vertical video - let's say for IGTV.
So, this is one of Rush CC's most unique features that I'm super excited about.
Transforming and cropping clips
So, I'm going to change it back to Landscape as this will be for you too.
So now that you have a tour of the workspace and your project is set up it's time to move on to editing in the next section.