What is normal mapping?
In 3D computer graphics, not every detail of a 3D model needs to be modeled or sculpted in the object’s geometry, thanks to normal mapping. This technique is used to create illusory surface details to enhance the realism of digital objects without increasing geometric complexity.

Understanding the normal mapping process.
In 3D modeling, surfaces are represented by polygons. Lighting calculations are performed based on the geometry of these polygons in the same way an artist would use shading techniques to mimic three dimensions. This approach works very well; however, it can get computationally intensive, limiting the overall level of detail possible. Normal mapping provides a great, lightweight solution by modifying the way light interacts with a surface without altering the underlying geometry.
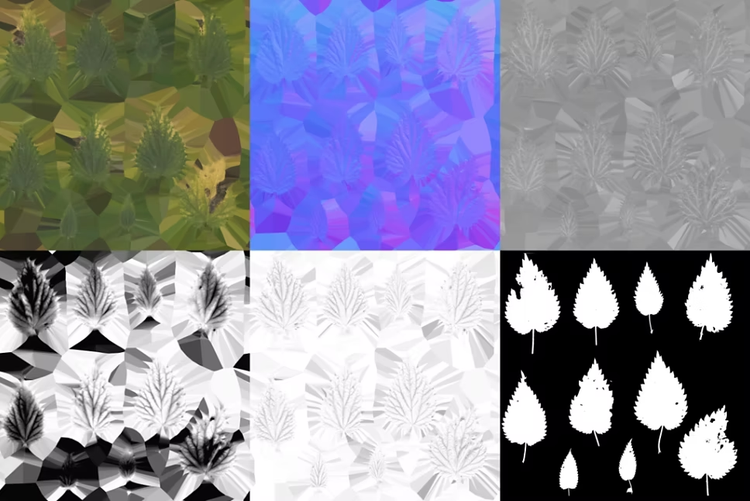
Normal maps store information about a surface in the form of a texture image. By encoding surface normal in a texture, normal maps can simulate the appearance of surface detail, such as bumps, scratches, wrinkles, and more, without adding complexity to the geometry below.
Normal maps are calculated during rendering using the modified surface normal from the normal map. Because these calculations are less computationally intensive, high levels of detail can be accomplished, even in real-time, making normal maps a popular technique used by video game developers.
Where we see normal mapping today.
Overall, normal mapping is a versatile technique, and should be used by any 3D artist and designer to speed up and improve their workflow.
You will see normal mapping employed not only in scenarios when hardware constraints are extremely important like video games, which require scenes to be rendered in real-time for the gamer, but also in computer-animated movies, architectural visualization, and product design.
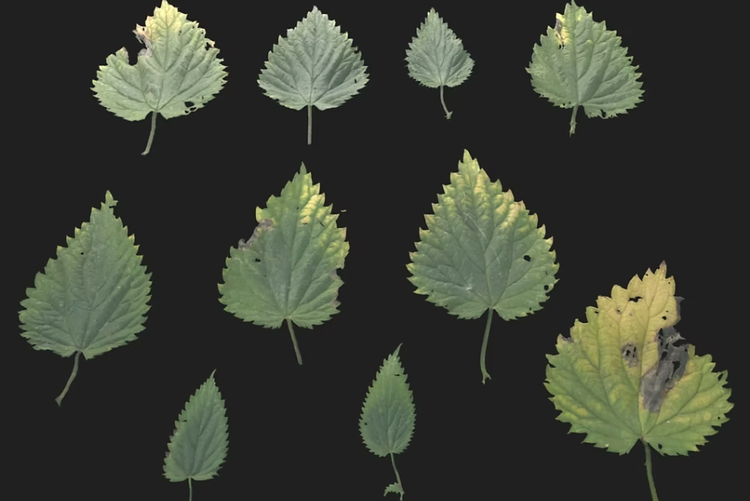
Normal mapping doesn’t affect the colorization of an object, so you will see it used most often in instances where an object’s surface isn’t perfectly flat or smooth. To be fair, this means nearly every 3D model could use a normal map to approve its realism, from worn leather, bumpy wood grains, human skin, fabric, and more.
There are several essential tools and software that are commonly used for normal mapping. Here are a few of them:
1. 3D modeling software: Tools like Blender, Maya, ZBrush, and {{substance-3d-modeler}} are used to create the models that will be used for normal mapping. There are many great software solutions which all bring their own approaches to modeling and sculpting.
2. Texture painting software: Software like {{substance-3d-painter}} or even Adobe Photoshop can be used to create and edit texture maps, including normal maps.
3. Normal map generators: Normal map generation software helps create normal maps from high-resolution geometry or texture information. Tools like xNormal, CrazyBump, or Substance 3D Designer can generate normal maps based on various inputs.
4. Game Engines: Game engines like Unreal Engine and Unity have built-in support for normal mapping. These engines provide necessary tools and rendering capabilities to take advantage of normal maps. They are equally great for creating renders as they are creating gaming experiences.
5. Shader programming languages: Understanding shader programming languages like HLSL (High-Level Shading Language) or GLSL (OpenGL Shading Language) can be useful for creating custom shaders that take advantage of normal mapping. These languages allow developers to define how lighting interacts with normal and other texture maps to achieve amazing visual effects.
This list may not be all inclusive, but it offers creators a great place to start in forming a foundational understanding of normal mapping and how to implement them in real-time rendering environments.
Images by Playground Games.
How normal maps differ from bump maps.
Normal maps store explicit surface normal information using RGB images where each color channel represents the X, Y, and Z components of the surface normal vector at each texel. Normal maps capture a lot more information about the orientation of a surface. Normal maps don’t affect the geometry of the model itself, but still modify how the light interacts around it.
Compared to bump maps, normal maps provide the most accurate results, capturing surface details beyond height variations only.
Pros and cons of normal mapping.
1. Realistic surface details: Normal mapping allows the addition of intricate surface details without increasing geometric complexity.
2. Efficiency: Normal mapping is a computationally efficient technique, especially when compared to increasing polygon counts of models to achieve surface detail.
3. Memory requirement reduction: Normal maps store information in a texture format, which typically uses less memory compared to storing geometry information.
4. Reusability: Normal maps can easily be applied to different models, allows artists and developers to reuse them across multiple assets. This saves time, effort, and final size of a product.
5. Interactive lighting effects: Normal mapping enhances the interaction of light with a model, allow for dynamic 3D lighting effects, such as specular highlights, shading variations, and more accurate reflections.
1. Limited geometry alteration: Normal maps only affect the appearance of surface details and cannot modify the geometry. The illusion they create can often be useful, though sometimes other techniques may be necessary when actual modification of geometry is required.
2. Creation and editing: Creating high-quality normal maps can be difficult and requires specialized knowledge and software. Editing normal maps can be difficult due to the intricate nature of the data.
3. Texture space limitations: Normal maps require additional texture space since they are typically stored as RGB images. This can impact the overall memory usage and may require careful optimization in some instances.
4. Tangent space limitations: Normal maps are typically defined in tangent space, meaning they depend on a model’s orientation and UV coordinates. This can sometimes cause visual artifacts when applying the same normal map to models with different UV layouts or orientations.
Despite some limitations, normal maps are the most effective technique for enhancing the visual quality and realism of 3D models in real-time. Normal mapping offers a healthy balance between performance and visual fidelity, making it an invaluable tool in 3D texturing and rendering.
Know when to utilize normal mapping.
Learn more about normal mapping.
Frequently Asked Questions
WHAT IS A NORMAL MAP IN GAME DESIGN?
HOW MANY CHANNELS ARE ON A NORMAL MAP?
Normal are created using an RGB (red, green, and blue) image, where each color channel in the image represents the X, Y, and Z component of the surface normal at each texel of the map. This means a normal map has three channels, with each containing positive or negative values.
- The red channel (R) corresponds to the X component of the surface normal vector.
- The green channel (G) represents the Y component of the surface normal vector.
- The blue channel (B) represents the Z component of the surface normal vector.
All three channels are used together to provide explicit orientation data for each texel, which is used during rendering to enhance the lighting and shading effects on the 3D model.
WHY IS IT CALLED NORMAL MAP?
In computer graphics, “normal” refers to a vector that is perpendicular (or “normal”) to a surface at a specific point. Thus, we refer to normal maps as “normal maps” because they store information about a 3D model’s surface normals.
By applying a normal map during rendering, the surface normals of the 3D model are modified based on the information stored within the map, resulting in lighting and shading effects that create the illusion of intricate surface details.