Introduction
Assisted Culling in Lightroom uses AI to automatically detect issues with our images, such as being out of focus, eyes not being open, exposure issues, and more, meaning we no longer have to scroll through and manually check potentially hundreds if not thousands of images.
Hi, I'm Glyn Dewis, and in the next few minutes I'm going to show you how you can use the Assisted Culling feature in Lightroom and Lightroom Classic to automatically deal with problem images, and so potentially save you a ton of time.
Traditionally, culling images in Lightroom would have to be done manually and often image by image, and depending on how many images, could end up being quite a lengthy process.
But this has completely changed with Assisted Culling.
Right now, Assisted Culling is available as an early access feature, and the current feature set is optimized for portraits and headshots.
In Lightroom, Assisted Culling is located in the top left of the screen and is available to use in both the Cloud or Local tab, as you can see here, when I jump between the two.
When we expand the Assisted Culling section by clicking on the icon to the far right, we see that there are four distinct areas: Select, Reject, View, and Organize Results.
Sort images based on subject focus, eye focus, or eyes open
I'll go with the Select section first, and this is where we can automatically sort our images based on Subject Focus, Eye Focus, and Eyes Open.
I'll click on Subject Focus and you'll see that when I do, Lightroom automatically analyzes the images and sorts them as a Select or a Reject based on their sharpness.
Here we have a Scoring slider with Soft on the left and Sharp on the right, and this goes from 0 to 100, with 100 being the sharpest.
By default, the required sharpness score is set to 50, and we can see already that out of a folder of 45 images, we have 44 that score 50 or above.
And so appear as Selects and one Reject, meaning an image scores less than the required focus score of 50.
I'll click where it says Rejects in the View section, and you can see here that one image, which is clearly out of focus.
I'll increase the required sharpness score by dragging the marker to the right.
And you can see as I do, how more images are scored as Rejects.
If I drag to the left, we can see that the amount of images marked as Rejects decreases because we are lowering the required sharpness score.
If an image is marked as a Reject that you actually want as a Select, then you simply click on the Reject icon in the upper right of the thumbnail.
We can also do the same for images based on how sharp the eyes are, in the Eye Focus section.
There's also an option here to Reject photos without people's eyes, and this is an option, for example, because you may have a photograph of people wearing sunglasses where the eyes aren't visible, but you still want them to edit and not be rejected.
Lastly, in the Select section, we have Eyes Open.
I'll turn this on and you'll see straight away that there is no Scoring slider.
And that's simply because eyes are either open or closed.
We can see already that one image has been identified as a Reject, and we look at it, we can see that this is because the eyes do appear to be closed.
Reject misfires, exposure issues, or photos of documents and receipts
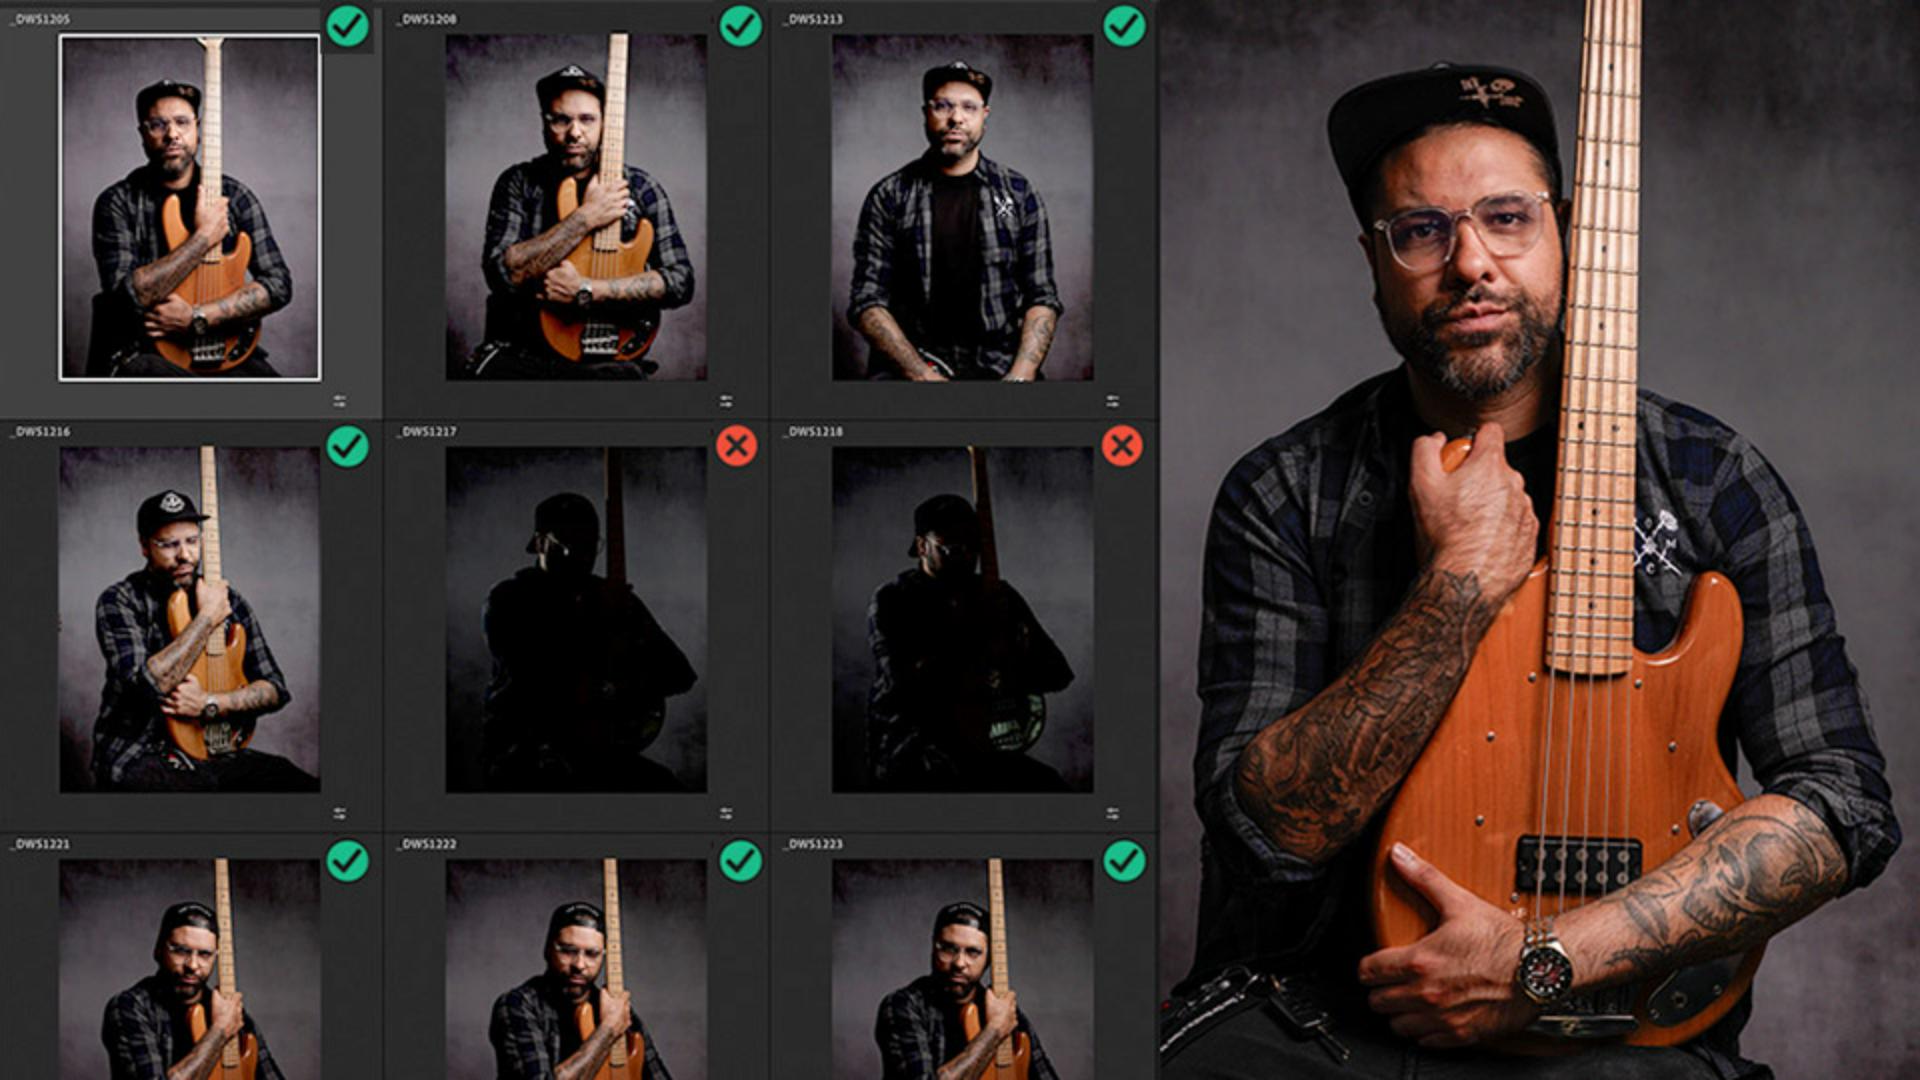
In the Reject section, we have options for Lightroom to automatically reject images if there are Documents and Receipts, if an image appears to be a Misfire, or if there are Exposure Issues, as we can see here.
Oh, and all the options available can be used alone or as a combination.
For example, you may want to only see images where the subject is in focus and the eyes are open.
Organize the Assisted Culling results
Lastly, in the Organize Results section, this is where we can mark up all images at once that are Selects or Rejects by signing a flag, a star rating, a color label, even adding them to an album, or, in the case of a Reject, removing them entirely.
Assisted Culling is available in both Lightroom and Lightroom Classic
Even though I've shown you how Assisted Culling works in Lightroom, it works the same in Lightroom Classic, where you can find it on the right-hand side of the Library module, as well as in the Import window, so you can take advantage of it when you're adding new photos.
But that is a quick look at the Assisted Culling feature in both Lightroom and Lightroom Classic, an incredibly useful feature for speeding up your workflow, helping you to get to the images that you want quickly and efficiently.
Now go give it a try on your own images and see for yourself how much time it could save you.
Enjoy!