|
Import a Macromedia Fireworks PNG file
Fireworks and FreeHand integrate well together. You can import vector data from Fireworks and further modify it in FreeHand. You can import bitmap content as well. Vector and bitmap content can be imported from a single file that contains both.
Depending on the settings you select, you can import layer and frame information. Objects with live effects that are shared between the two applications can be imported too, with their live effect information intact.
Here you'll import a Fireworks PNG that contains several paths and a bitmap image with a live effect applied.
| 1 |
Select File > Import. |
| 2 |
Browse to the FHMX_Tutorial/Assets folder and double-click fireworks.png. |
|
The Fireworks PNG Import Settings dialog box appears. |
| 3 |
Deselect the Import as a Single Flattened Bitmap option at the bottom of the dialog box if it is selected. (If this option is selected, all other options in the dialog box are inaccessible.) |
| 4 |
Select Open Frames as Pages from the File Conversion pop-up menu, and select Remember Layers if it isn't already selected. |
| 5 |
Select the Keep All Paths Editable option in the Objects section. This ensures that any vector information will be editable when it is imported into FreeHand. |
| 6 |
Click OK. |
|
The import pointer appears. |
| 7 |
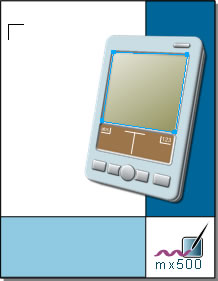
Position the import pointer at the location shown in the following illustration.
 |
| 8 |
Click to place the file. |
| 9 |
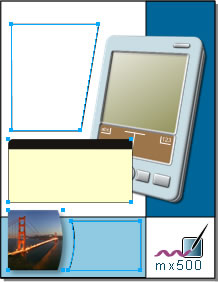
If necessary, use the arrow keys as you did previously to reposition the imported graphics so that they are positioned as shown below.
 |
| 10 |
Select Edit > Select > None, or click on the pasteboard to deselect the imported objects in the document. |
|
Clicking on the pasteboard (or in any empty area of the document) is a quick way to deselect all selected objects without inadvertently selecting other objects. |
| 11 |
Select the Golden Gate Bridge photo at the bottom of the page. |
|
In the Object panel Properties list, you'll see the Drop Shadow effect applied to the bitmap image. This effect was applied in Fireworks; it is one of the live effects that FreeHand and Fireworks share. |
| 12 |
Select the Drop Shadow effect in the Properties list, and look at the settings in the bottom portion of the panel. |
|
If you were to open the original PNG file in Fireworks, you would see these same values set for the drop shadow effect. |
 |
|
Work with an alpha channel
One of the graphics imported with the Fireworks PNG file, the photograph of the Golden Gate Bridge, contains an alpha channel. Alpha channels are used with graphics to create transparency or masking effects.
For most graphic file formats, alpha channels are retained when imported into FreeHand. Using the Object panel, you can display or hide an imported graphic's alpha channel.
| 1 |
With the Golden Gate Bridge photo still selected, click the RGB TIFF item in the Object panel Properties list. |
|
The bottom half of the Object panel displays bitmap attributes. |
| 2 |
Click the Display Alpha Channel (Windows) or Display Alpha (Macintosh) option to deselect it. |
|
On the page, the Golden Gate Bridge photo now has a white background on the right side where the photo was cropped in the shape of a curve. |
| 3 |
In the Object panel, click the Display Alpha Channel (Windows) or Display Alpha (Macintosh) option again to turn it back on. |
|
The Golden Gate Bridge photo again shows transparent areas along its right edge. The Display Alpha Channel option allows you to display the alpha channel (or transparent areas) of any imported bitmap that contains an alpha channel. |
|
|
Work with imported layers
When you imported the PNG, several new layers were created and highlighted in the Layers panel: Path 1, Bridge Photo, Box, and Path 2. These layers were defined by the Fireworks PNG. They were imported here with their names intact because you selected the Remember Layers option in the Fireworks PNG Import Settings dialog box.
By moving objects from one layer to another or rearranging layers in FreeHand, you change how objects overlay one another. Here you'll reorder the layers in the document by dragging one of the imported layers to another location in the Layers panel.
| 1 |
Click on the pasteboard to deselect all objects on the page. |
| 2 |
In the Layers panel, select the Box layer, and drag it beneath the PDA Background layer.
 |
|
Tip: If the Layers panel is docked and you can't see all the layers, try collapsing some of the other panels by clicking their panel group names, or resize the Layers panel by dragging its bottom edge downward. If the Layers panel is undocked, resize it by dragging its bottom edge (Windows) or bottom right edge (Macintosh). |
|
The rectangle with the rounded corners now appears behind the PDA graphic on the page. |
|
|
In the previous procedures, you imported a Fireworks PNG and discovered the powerful integration between FreeHand and Fireworks, as well as the features they share.
In the next section, you'll work with text.
Note: Remember to save your document often.
|


