| 1 |
In UltraDev, choose Site > Define Sites, select your site from the list, and click Edit. |
|
The Site Definition dialog box opens. |
| 2 |
Select Application Server from the Category list. |
|
The Application Server category appears.
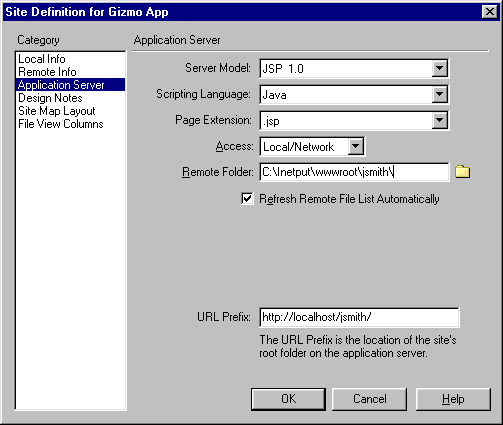 |
| 3 |
From the Access pop-up menu, choose how UltraDev should send dynamic pages to the application server for processing. |
|
You can choose FTP or Local/Network. Normally, the setting should be the same as the one you chose in the Remote Info category. |
| 4 |
In the Remote Folder box, specify where the dynamic pages should be sent for processing. |
|
Normally, the destination folder is the same as the one you defined in the Remote Info category. The folder should be on the system running the application server used by your deployed Web application. |
| 5 |
In the URL Prefix box, enter the URL that users type in their browsers to open your Web application, leaving out any file name. |
|
For example, suppose your Web application's URL is as follows: |
|
http://www.plutoserv.com/mycoolapp/start.jsp |
|
Enter the following URL prefix: |
|
http://www.plutoserv.com/mycoolapp/ |
|
For more information, see "About the URL prefix" in UltraDev help (Help > Using UltraDev), or on page 28 of Using Dreamweaver UltraDev 4. |
| 6 |
Click OK to close the Site Definition dialog box, then click Done to close the Define Sites dialog box. |
| 7 |
Verify the connection by clicking the Application Server icon on the Site window's toolbar (the second button from the left) and checking to see if the destination folder you specified in step 4 appears in the left pane. |
|
If you're accessing the server using FTP, click the connect icon to establish the connection. If you're accessing the server through a local area network, the connection is automatic and the icon is greyed out. |
 |
|


